• Home
  • Suggest A DIY
  • DIY Newsletter

Edible Crafts

Creative food craft ideas

  • About CraftGossip
  • Our Network
    • Bath & Body Crafts
    • Candle Making Ideas
    • Crochet Ideas
    • Cross Stitch
    • Edible Crafts
    • Felting Patterns
    • Glass Art
    • Home & Garden Ideas
    • Indie Crafts
    • Jewelry Making
    • Kids Crafts
    • Knitting Patterns
    • Lesson Plans
    • Needlework
    • Party Ideas
    • Polymer Clay
    • Quilting Ideas
    • Recycled Crafts
    • Scrapbooking
    • Sewing Patterns
    • Card Making
    • DIY Weddings
    • Not Craft Ideas
  • Giveaways
  • Roundups
  • Store
  • Search

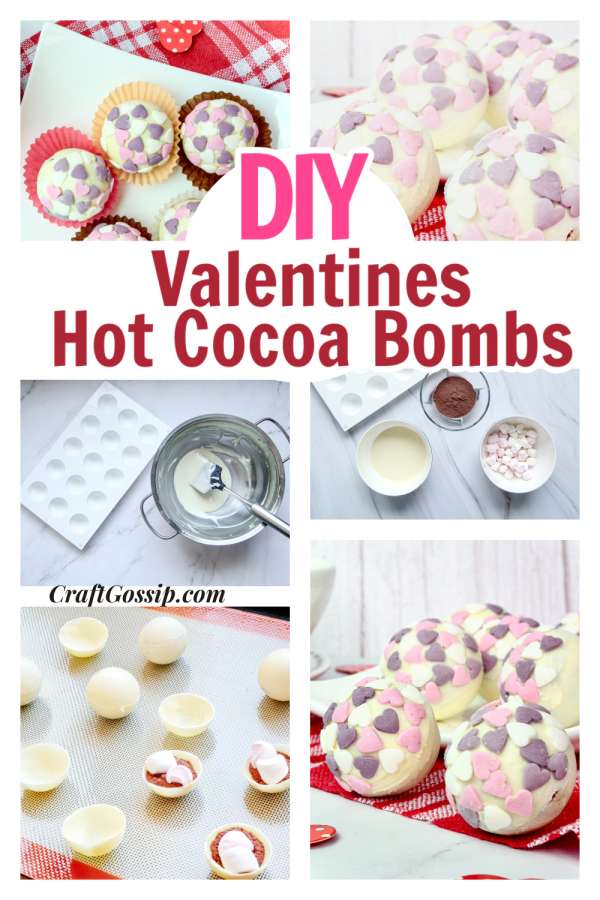
How To Make Valentine’s Day Hot Cocoa Bombs For Your Valentine

January 17, 2022 by Shellie Wilson

Hot chocolate bombs are still going strong, why? I think because these bombs have such an impressive look, they look harder to make than they are and of course, the person using them also gets to experience a fun transition from ball to hot chocolate as it melts into the cup.  We made our own hot chocolate bombs at Christmas time, they were lots of fun and we experimented using different shaped molds also.  The best thing about making things with chocolate is of course licking the bowl clean!

Wrap these bombs in a pretty bag or Kraft paper box for added impact. The perfect romantics DIY gift for Valentines day.

Serving: 7 hot cocoa bombs

Prep time: 15 minutes

Resting time: 5 minutes

Total time: 55 minutes

INGREDIENTS

  • 1 cup white chocolate

  • ½ cup marshmallows

  • ½ cup hot chocolate

  • heart shaped sprinkles
  • Chocolate Bomb Molds

DIRECTIONS

Melt the chocolate in a double boiler.
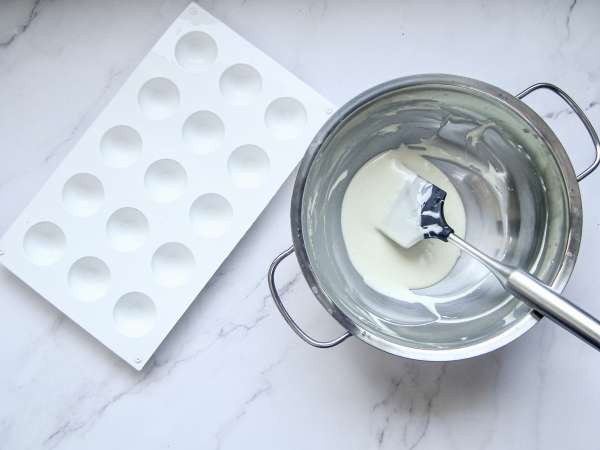
You need to temper the melted chocolate. If you have a degree, melt it up to 45 degrees first. Then cool it to 27-29 degrees, then heat again to 30-31 degrees. If you do not have a chocolate thermometer, don’t worry, basic rule is don’t over heat it. Should be hot but not burn your finger if you dipped it in (do so with caution)

Spread the tempered chocolate on round chocolate molds with the help of a spoon or brush.

Put it in the fridge for 5 minutes and let it cool down

Take the chocolates out of the molds.
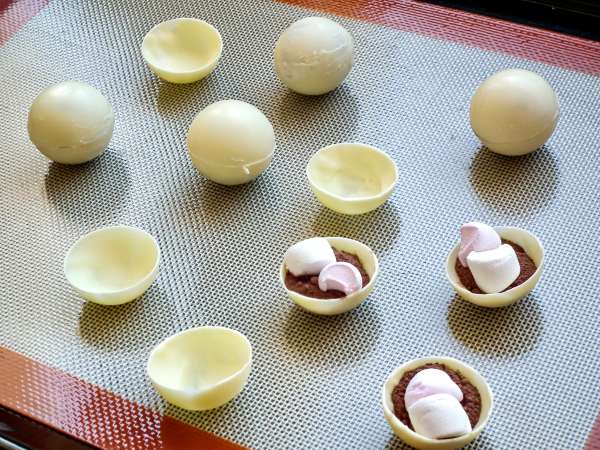
Melt the chocolate a little and put hot chocolate powder and marshmallows in it and stick them together and decorate as you wish

Your hot chocolate bombs are ready!

Bon-Appetit 🙂
«
»

Have you read?

Easy Homemade Mayonnaise Recipe – Know Exactly What’s in Your Food

I’ve become much more interested in knowing what is actually in the food I’m eating.

Not in an obsessive, everything-must-be-made-from-scratch sort of way. I still have convenience foods in my pantry and I’m certainly not standing around churning my own butter on a Tuesday afternoon.

But there are some everyday foods that are so ridiculously easy to make yourself that it’s worth knowing how.

Mayonnaise is one of them.

When you make homemade mayonnaise, there is no ingredient label to decipher because you put every ingredient in the jar yourself.

Egg.

Oil.

Mustard.

Lemon juice or vinegar.

Salt.

That’s basically it.

You choose the oil. You choose the egg. You decide how much salt goes in. You can make it tangier, milder, garlicky, spicy or completely plain.

And with a stick blender, the whole thing takes only a couple of minutes.

Why Make Your Own Mayonnaise?

For me, the biggest advantage isn’t actually the flavour—although fresh mayonnaise is delicious.

It’s ingredient control.

Commercial mayonnaise varies enormously between brands. Depending on what you buy, the ingredient list may include different oils, sugars or sweeteners, preservatives, stabilisers, thickeners and flavourings.

That doesn’t automatically make supermarket mayonnaise “bad.”

It simply means that when you make it yourself, you know exactly what you’re eating.

Homemade mayo lets you choose:

  • which oil you use
  • the type of egg
  • how much salt goes in
  • whether you add sugar
  • how acidic or tangy it tastes
  • whether you add herbs, garlic or spices

If you’re beginning to cook more foods from basic ingredients, mayonnaise is a brilliant little recipe to learn because the result feels far more impressive than the amount of work involved.

Five Simple Ingredients

You don’t need a cupboard full of specialist ingredients.

For approximately one cup of homemade mayonnaise you’ll need:

  • 1 large pasteurized egg
  • 1 tablespoon Dijon mustard
  • 1 tablespoon fresh lemon juice or white wine vinegar
  • 1/4 teaspoon fine salt
  • 1 cup neutral-flavoured oil

That’s your mayonnaise.

No complicated processing and no mystery ingredients.

And because you are making it, you can adapt every one of those ingredients to suit your household.

You Get to Choose the Oil

This is one of the biggest reasons I like making mayonnaise myself.

Oil makes up a large percentage of mayonnaise, yet when we grab a jar from the supermarket we don’t always stop to think about which oil has been used.

At home, the choice is yours.

For a mild mayonnaise, try:

  • sunflower oil
  • grapeseed oil
  • avocado oil
  • canola oil
  • another mild vegetable oil

You can also use some olive oil, although a strongly flavoured extra virgin olive oil can produce a mayonnaise that’s surprisingly bitter once blended.

I usually recommend starting with:

3/4 cup neutral oil + 1/4 cup mild olive oil

Then adjust the ratio next time according to your taste.

That’s really the point of making basic foods yourself.

You aren’t limited to somebody else’s recipe.

You Control the Salt and Sugar Too

If you’re watching how much added sugar or salt is in your food, homemade mayonnaise gives you complete control.

The basic recipe doesn’t need added sugar at all.

You can also begin with a small amount of salt, taste the finished mayonnaise and add more only if it needs it.

It’s a very simple example of something I’ve been appreciating more lately: rather than trying to decode a food label after something has been made, sometimes it’s easier to start with the ingredients yourself.

Homemade Doesn’t Have to Mean Complicated

There’s an unfortunate idea that making food from scratch means spending half your day in the kitchen.

Absolutely not.

I’m interested in homemade food when the effort makes sense.

If something takes three hours, sixteen bowls and leaves the kitchen looking like a cooking competition has taken place, I’m considerably less enthusiastic.

This mayonnaise passes my test.

With an immersion blender, it takes about five minutes.

Add everything to a narrow jar, put the blender at the bottom, blend until the emulsion begins to form and slowly lift the blender through the oil.

Suddenly you have thick homemade mayonnaise.

It’s one of those little kitchen tricks that’s genuinely worth learning.

A Small Change That Makes You Look at Food Differently

Once you start making a few everyday staples yourself, you begin noticing food labels differently.

Not because every packaged ingredient needs to be avoided.

It simply becomes easier to ask:

What is actually in this?

Could I make a simple version myself?

Do I prefer the ingredients I’d choose at home?

Sometimes the answer will still be, “I’m buying the jar.”

And that’s perfectly reasonable.

But when something takes five minutes and five basic ingredients, having the homemade option is rather nice.

Mayonnaise is a very good place to start.

Categories

Baked candy chocolate Christmas cookies Craft Inspirations cupcakes Drinks Easter fruit Fun With Food Halloween Holidays kids More Recipes non-sweets Parties & entertaining Recipes Thanksgiving Valentines Day

Pumpkin Rolls Recipes For Fall Dinner

DIY Cookie Cutters

Watermelon Cake Balls

Fabulously Meaty Ragu Bolognese Gravy

DIY Monogrammed Mugs

RSS More Articles

  • 10 Fall Leaves Scrapbook Layout Templates for Cosy Autumn Memory Keeping
  • Activities and Crafts for Johnny Appleseed Day
  • Totoro Knitting Patterns
  • Mixed-Fibre Quilts: How to Combine Linen, Hemp and Cotton Lawn Without Regretting It
  • 15 Tapestry Crochet Patterns That Make Colorwork Surprisingly Easy
  • Can You Boil Polymer Clay? The Truth Every Crafter Should Know
  • Easy Homemade Mayonnaise Recipe – Know Exactly What’s in Your Food
  • 10 Dollar Store Home Hacks That Look Surprisingly Expensive
  • DIY Review: Giving a Vintage Milk Can New Life as a Charming Outdoor Side Table
  • 8 FREE Camping Journal and Project Life Cards to Download

Pick Your Blog

  • Sewing
  • Knitting
  • Quilting
  • Crochet
  • Home & Garden
  • Recycled Crafts
  • Scrapbooking
  • Card Making
  • Polymer Clay
  • Cross-Stitch
  • Edible Crafts
  • Felting
  • Glass Art
  • Indie Crafts
  • Kids Crafts
  • Jewelry Making
  • Lesson Plans
  • Needlework
  • Bath & Body
  • Party Ideas
  • Candle Making
  • DIY Weddings
  • Not Craft
  • Free Craft Projects

Explore Edible Crafts

breakfast cake candy chocolate Christmas cookie decorating cookies dessert Easter fruit Halloween Holidays kids lollipop sticks lunch packaging party summer Thanksgiving valentines

Copyright © 2026 · CraftGossip | Start Here | Contact Us | Link to Us | Your Editors | Privacy and affiliate policy