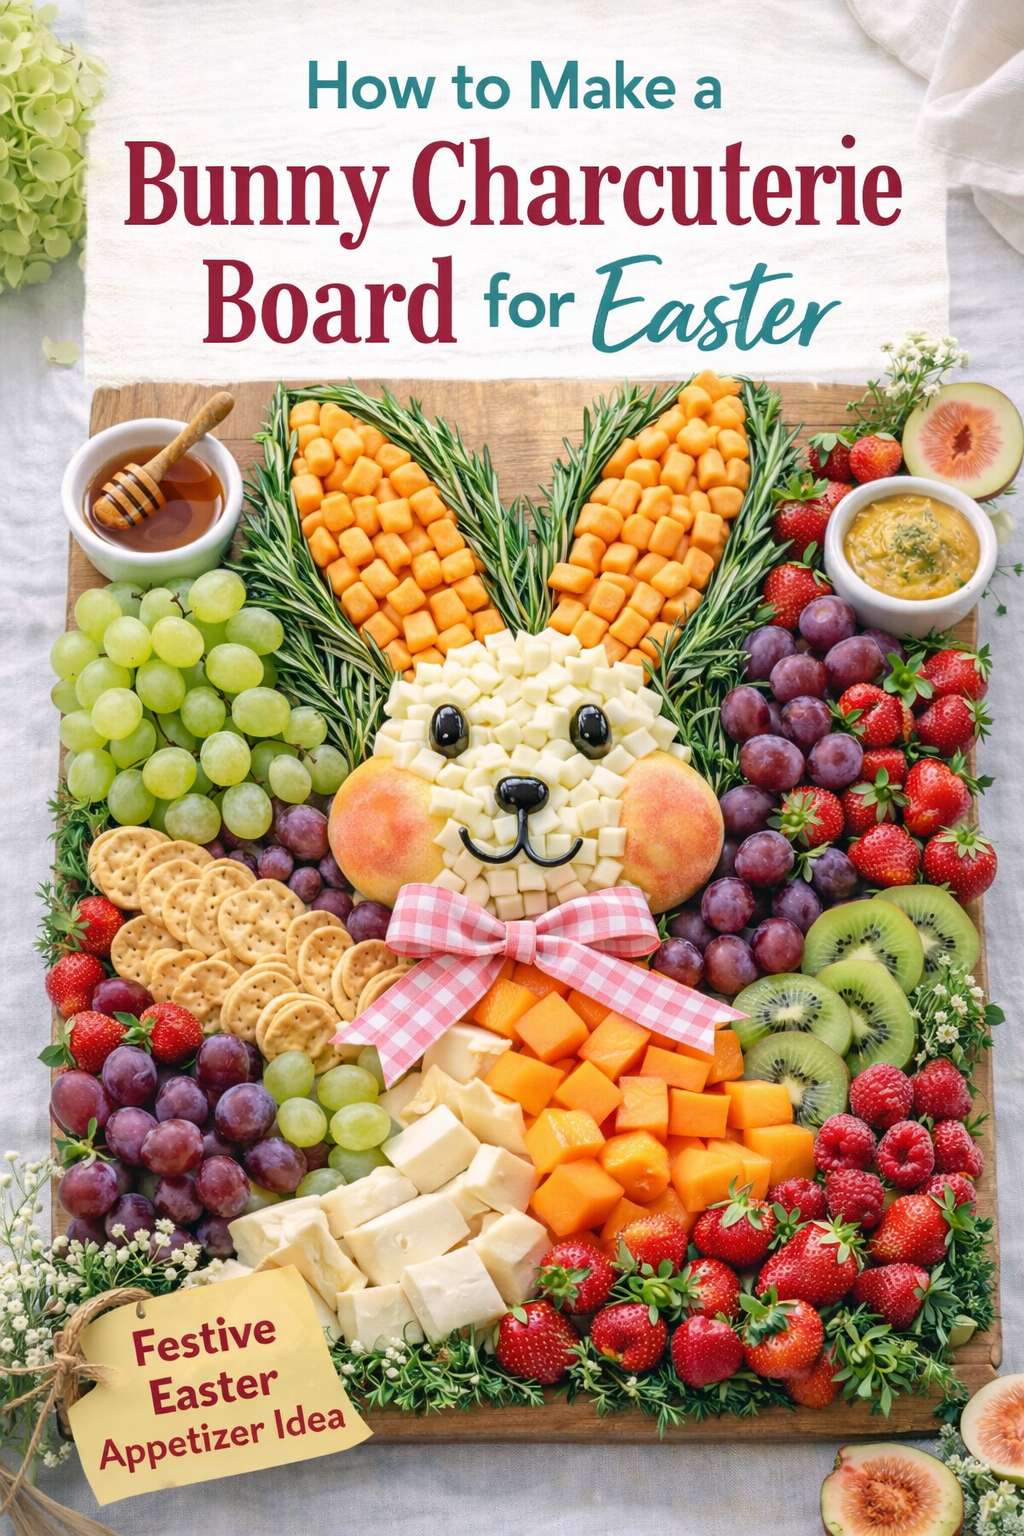
 If you’re looking for a fun Easter food idea that feels festive without being too fussy, this bunny charcuterie board is such a crowd-pleaser. It’s bright, fresh, cheerful, and honestly one of those boards that makes everyone say, “Oh my gosh, that’s too cute to eat,” right before they start stealing the crackers.
What I love about this Easter bunny charcuterie board is that it looks impressive, but it’s actually very achievable once you break it into sections. You’re basically building a snack board in layers, starting with the bunny face, then filling in the fruit, cheese, crackers, and meats around it. No fancy chef skills needed.
This style of board works beautifully for Easter brunch, a family lunch, baby showers, spring parties, or even a school holiday get-together. It’s also a lovely alternative if you want something lighter and fresher than a table full of chocolate.
And let’s be honest, anything that lets me arrange cheese into something adorable is my kind of craft.
What You’ll Need for the Bunny Charcuterie Board
You can follow the board quite closely or swap in similar foods based on what you already have.
Ingredients
- orange cheese cubes for the bunny ears
- white cheese cubes for the bunny face
- black olives for the eyes
- peach or nectarine slices for the cheeks
- green grapes
- red grapes
- strawberries
- kiwi slices
- figs, halved
- cantaloupe or rockmelon cubes
- round crackers
- sliced white cheese or firm cheese blocks
- salami or other cured meat
- fresh rosemary, parsley, dill, or other herbs for the border
Supplies
- one large rectangular serving board or platter
- small knife
- chopping board
- serving picks or tongs
- food-safe marker or soft spread for drawing the bunny face if needed
How to Assemble the Bunny Board
The easiest way to build this board is to think of it as a picture made from snack foods.
1. Start with the bunny ears
At the top centre of the board, make two long oval ear shapes using orange cheese cubes. These are one of the most striking parts of the design, so place them first.
Tuck rosemary sprigs around the outer edges of the ears to help define the shape and make them stand out.
2. Build the bunny face
Under the ears, create a round face using white cheese cubes. Keep it fairly compact so you still have room around the edges for the rest of the grazing foods.
Add two black olives for the eyes.
Use peach or nectarine slices on each side of the lower face to create the cheeks. This gives the bunny that soft pinky look and really brings the design together.
For the mouth and nose, you can use a food-safe marker, a very thin line of olive tapenade, or tiny strips of dark edible garnish.
3. Fill the left side of the board
On the upper left side, add a bunch of green grapes.
Below that, arrange round crackers in a slightly overlapping section.
Under the crackers, add a mixed area of red and green grapes to create fullness and colour contrast.
At the bottom left, place sliced white cheese or chunks of firm cheese.
4. Fill the centre
Directly under the bunny face, add folded salami or other cured meat. This creates a nice transition between the face and the fruit sections.
You can fold the slices loosely, make little salami ribbons, or roll them into soft rosettes if you want the board to look extra fancy.
5. Fill the right side
On the lower right side, pile in cantaloupe or rockmelon cubes. This gives you that bold orange block of colour that balances the board.
Above and around that section, add red grapes, kiwi slices, and strawberries.
The strawberries help the whole board feel fresh and spring-like, and the kiwi adds a lovely pop of green.
6. Add top and bottom details
Tuck halved figs into the top corners.
Scatter extra strawberries around the bottom edge.
Use fresh herbs like rosemary, parsley, or dill around the outer edge of the board to frame everything and fill any little empty gaps.
Easy Tips for Making It Look Good
This is one of those projects where a few simple tricks make a big difference.
Start with the character first.
The bunny face and ears are the most important part, so build those before adding anything else.
Work from large items to small.
Place the melon, grapes, crackers, and cheese first, then fill gaps with strawberries and herbs.
Use colour balance.
Try not to keep all the red fruit on one side or all the green in one corner. Spread the colours around so the board looks balanced.
Keep textures varied.
Soft fruit, crunchy crackers, cubes of cheese, and folded meats all help the board feel more interesting.
Chill before serving.
If you’re making it ahead, cover it lightly and refrigerate. Add crackers at the last minute if you want them to stay crisp.
Simple Swaps and Variations
One of the best things about a DIY charcuterie board is that you can adapt it to suit your family or guests.
You could swap:
- peaches for apple slices or pear slices
- cantaloupe for mango cubes
- salami for prosciutto
- crackers for pretzels or breadsticks
- olives for blueberries if you want a sweeter board
- white cheese cubes for marshmallows if you’re making a dessert-style version
You could also turn this into:
- a kids’ Easter snack board
- a brunch grazing board
- a dessert charcuterie board
- a bunny-themed baby shower platter
Why This Easter Charcuterie Board Works So Well
It’s cute without being overcomplicated, which is always my favourite kind of entertaining. It gives you that wow-factor centrepiece feel, but everything on it is still practical, edible, and easy to grab.
It also works really well for people who like to nibble rather than sit down to one big heavy meal. And because you can prep most of the fruit and cheese ahead of time, it’s a handy option when you’re already juggling Easter baskets, lunch prep, and trying to remember where you hid the good serving board.
Serving Ideas
This bunny snack board is lovely for:
- Easter brunch
- spring baby showers
- church morning teas
- school holiday lunches
- family gatherings
- garden parties
- kids’ birthday parties with an Easter theme
Serve it with:
- fruit dip
- honey
- extra crackers on the side
- small cheese knives
- sparkling drinks or punch
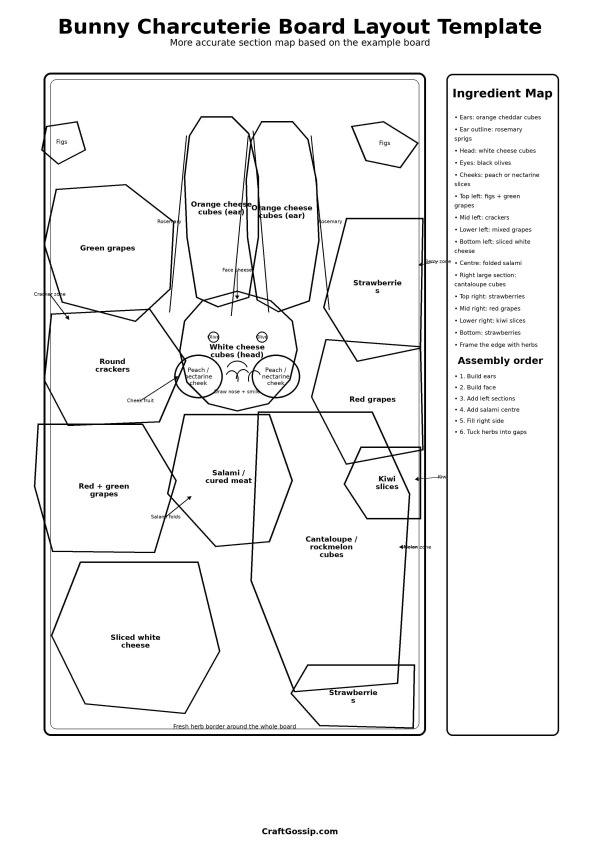
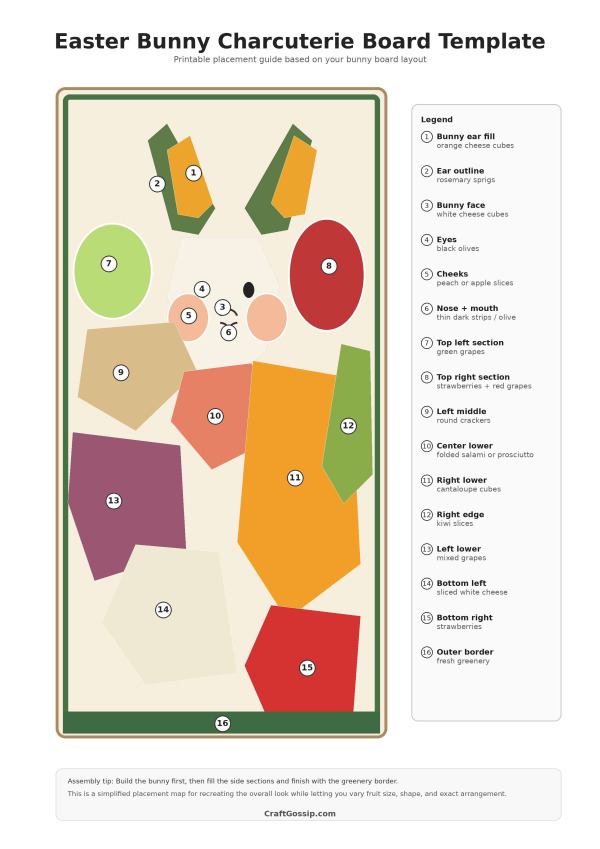
Printable Bunny Charcuterie Template
I created a printable template that shows the main food sections and what to place in each area, including details like:
- peaches for the cheeks
- cheese cubes for the ears and face
- olives for the eyes
- crackers, grapes, melon, strawberries, and herbs around the outside
You can print it out and use it as a visual guide while assembling your board.