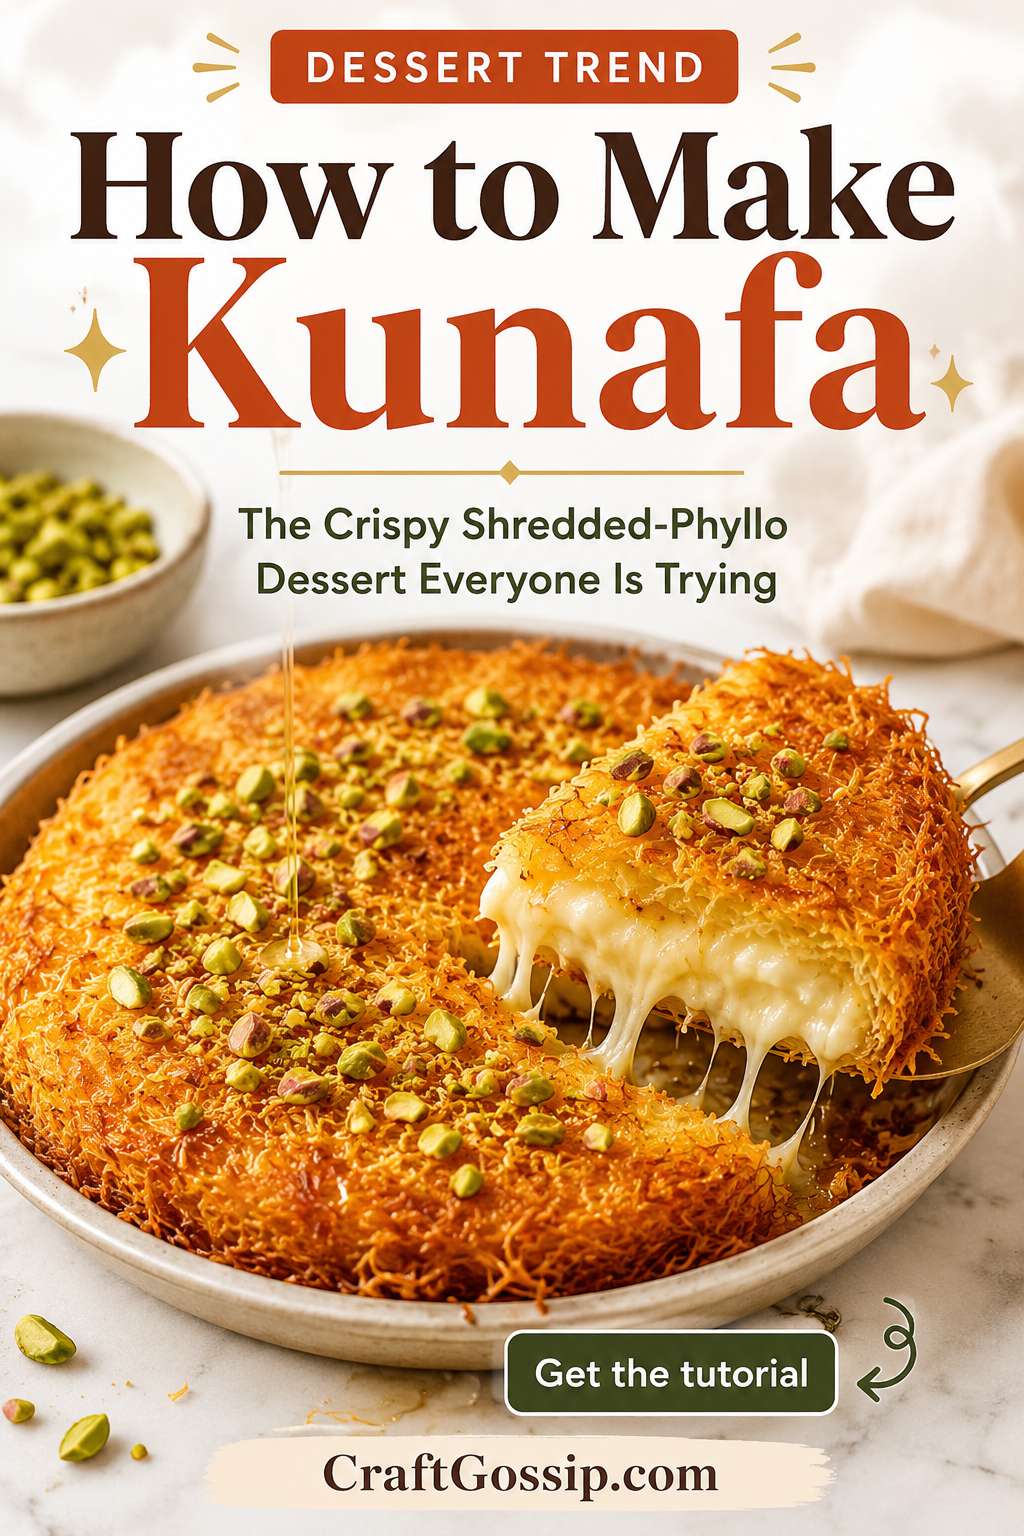
If you’ve been seeing golden, crispy nests of shredded pastry filled with gooey cheese and showered in pistachios all over your social feeds lately, chances are you’ve stumbled across kunafa.
Also spelled knafeh, kanafeh, konafa or künefe, this gorgeous Middle Eastern dessert is absolutely not new. In fact, it has a long history across the Middle East and Levant. What is new is just how many people outside those communities are suddenly discovering it.
And I suspect we can thank the whole pistachio-and-kataifi obsession for at least some of that.
After the viral Dubai chocolate trend introduced thousands of home cooks to kataifi pastry—that wonderful shredded phyllo that looks a little like very fine noodles—kunafa suddenly feels far less mysterious.
If you enjoyed our Dubai Chocolate Chunk Cookies with pistachio, this is a lovely opportunity to discover where that crispy kataifi texture really shines.
Traditional kunafa comes in several regional styles, but the basic idea is irresistible: buttery shredded pastry, a soft cheese or cream filling, fragrant sugar syrup and plenty of pistachios.
And despite looking like something you need to buy from a specialist bakery, it is surprisingly achievable at home.
What Is Kunafa?
Kunafa is a traditional Middle Eastern dessert made with kataifi pastry, which is essentially very finely shredded phyllo dough.
The pastry is coated generously in melted butter or ghee, packed into a pan and layered with cheese or a creamy filling. It is baked until deeply golden and crisp, then finished while warm with a fragrant sugar syrup.
Crushed pistachios are usually scattered over the top.
The magic is in the contrast.
You get:
- crisp buttery pastry
- warm stretchy or creamy cheese
- sweet floral syrup
- crunchy pistachios
It is sweet, salty, crunchy, soft and slightly sticky all at once.
Basically, it is exactly the sort of dessert that makes everyone hover around the kitchen while you’re trying to photograph it.
Easy Homemade Kunafa Recipe
Serves: 8–10
Prep time: 25 minutes
Cooking time: 35–40 minutes
Ingredients
For the Kunafa
- 375g kataifi shredded phyllo pastry, thawed
- 150g unsalted butter or ghee, melted
- 300g low-moisture mozzarella, grated
- 250g ricotta
- 2 tablespoons caster sugar
- 1 teaspoon rose water or orange blossom water, optional
- 1/3 cup finely chopped unsalted pistachios
For the Sugar Syrup
- 1 cup caster sugar
- 1/2 cup water
- 1 teaspoon fresh lemon juice
- 1 teaspoon rose water
- 1 teaspoon orange blossom water, optional
Equipment
You will need:
- 23–25cm round cake tin or baking dish
- large mixing bowl
- saucepan
- pastry brush
- chopping board and sharp knife or kitchen scissors
If kataifi isn’t something your local supermarket carries, check a Middle Eastern grocer first. You can also find kataifi pastry, orange blossom water and rose water online, and they’re the sort of pantry ingredients that tend to lead you down a rather delicious rabbit hole once you start experimenting.
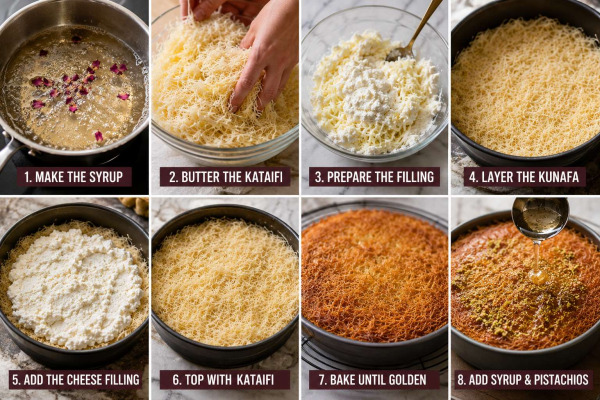
Step 1: Make the Syrup First
Add the sugar, water and lemon juice to a small saucepan.
Bring the mixture gently to the boil, then reduce the heat and simmer for approximately 6–8 minutes.
You want the sugar completely dissolved and the syrup slightly thickened, but don’t cook it into caramel.
Remove from the heat.
Stir through the rose water and orange blossom water, if using.
Set the syrup aside to cool completely while you prepare the kunafa.
Why Make the Syrup First?
This is one of those little details that makes a surprisingly big difference.
Pouring cooler syrup over hot, crisp kunafa helps the pastry absorb the sweetness without immediately turning into a soggy puddle.
And soggy kataifi is a very sad ending to an otherwise glorious dessert.
Step 2: Prepare the Kataifi Pastry
Preheat your oven to 190°C conventional / 170°C fan-forced / 375°F.
Place the thawed kataifi pastry onto a large chopping board.
Using a sharp knife or kitchen scissors, chop it into pieces approximately 1–2cm long.
You don’t need to pulverise it. You’re simply shortening those very long strands so they are easier to coat and press into the pan.
Transfer the chopped pastry to a large bowl.
Pour over the melted butter or ghee.
Using clean hands, gently massage the butter through the pastry until the strands are evenly coated.
Don’t rush this bit.
Those butter-coated strands are what eventually become that fabulous golden crust.
Step 3: Prepare the Filling
Combine the grated mozzarella and ricotta in a bowl.
Stir in the caster sugar and rose or orange blossom water if you’re using it.
If your ricotta is particularly wet, drain it first.
Likewise, avoid very watery fresh mozzarella for this particular beginner-friendly version unless you drain and dry it thoroughly.
Excess moisture is one of the easiest ways to lose the crisp texture we’re trying so hard to create.
Step 4: Build the Kunafa
Generously butter your baking pan.
Add approximately two-thirds of the buttered kataifi.
Press the pastry firmly across the base and slightly up the sides of the pan.
The bottom needs to be quite compact.
I use the bottom of a measuring cup to press it down firmly. Hands work perfectly well too, but the measuring cup gives you a lovely even surface.
Spread the cheese mixture evenly over the pastry, leaving approximately 1cm around the outside edge.
Keeping the filling slightly away from the edge helps prevent cheese escaping and sticking to the pan.
Scatter the remaining kataifi over the cheese.
Press it down gently—not quite as firmly as the bottom layer, but enough to hold everything together.
Step 5: Bake Until Deeply Golden
Bake for approximately 35–40 minutes, or until the kunafa is beautifully golden brown around the edges and across the top.
Don’t pull it out when it is merely pale beige.
This is one dessert where colour equals crunch.
You want a proper golden crust.
Step 6: Add the Syrup
Remove the kunafa from the oven and let it sit for about 2 minutes.
Slowly spoon approximately two-thirds of the cooled syrup over the hot pastry.
You don’t necessarily need every drop.
Start conservatively because you can always serve additional syrup alongside.
Let the kunafa rest for another 5 minutes.
Step 7: Flip and Decorate
Carefully place a large serving plate over the pan.
Holding both together securely, flip the whole thing over.
Lift away the baking pan.
You should now have a glorious golden round of crispy kunafa.
Scatter generously with chopped pistachios.
Drizzle over a little additional syrup if you like.
Serve while still warm.
The Secret to Really Crispy Kunafa
If there’s one thing I would concentrate on, it is moisture control.
Kataifi pastry is wonderfully crunchy when treated properly, but it does not appreciate being drowned.
For the crispiest homemade kunafa:
- thaw frozen kataifi completely
- separate any clumped strands
- coat all of the pastry with butter or ghee
- drain wet cheeses thoroughly
- press the bottom pastry firmly into the pan
- bake until genuinely golden
- add syrup gradually rather than flooding the dessert
Using ghee instead of ordinary butter can give an especially crisp result because it contains less water.
What Cheese Is Traditionally Used in Kunafa?
This is where things get interesting because there isn’t just one single style of kunafa.
One of the best-known versions is Knafeh Nabulsi, associated with the Palestinian city of Nablus and traditionally made with Nabulsi cheese.
Other regional recipes use cheeses such as Akkawi, while some kunafa recipes use ashta or other creamy fillings.
Those cheeses can be difficult to find depending on where you live.
For a very achievable home version, the combination of low-moisture mozzarella and ricotta gives you both stretch and creaminess without requiring a specialist cheese hunt.
If you can source traditional cheese from a Middle Eastern grocer, absolutely experiment with it.
Can I Make Kunafa Without Rose Water?
Definitely.
Rose water is traditional in many Middle Eastern desserts, but it has a strong floral flavour and some people absolutely love it while others feel as though someone has sprayed perfume over their pudding.
Start small.
Orange blossom water is another beautiful option and tends to have a slightly softer citrus-floral character.
Or simply flavour the syrup with lemon.
If you’re already enjoying pistachio-flavoured desserts, you might also like our Dubai-inspired hot chocolate with pistachio whipped cream. It uses many of the same flavours—pistachio, rose water, saffron and cardamom—but turns them into a completely different dessert experience.
Kunafa Variations To Try
Once you’ve mastered the basic recipe, this is where things can get dangerous—in the very best way.
Pistachio Kunafa
Add finely ground pistachios between the cheese and pastry layers and pile extra pistachios over the finished dessert.
Cream-Filled Kunafa
Instead of cheese, use a thick Middle Eastern-style milk pudding or ashta filling.
This gives you a softer, custard-like centre rather than the dramatic stretchy cheese pull.
Mini Kunafa Cups
Press buttered kataifi into muffin tins, add filling and top with more pastry.
These are brilliant for parties because nobody has to politely negotiate over who gets the crispiest corner.
Chocolate Pistachio Kunafa
Now we’re firmly moving into viral-dessert territory.
Add pistachio cream and chocolate to create a dessert inspired by the flavours that made Dubai chocolate so popular.
It isn’t traditional kunafa, but I can certainly understand why people are doing it.
Nut-Filled Kunafa
Some versions swap the cheese for chopped nuts, creating something that sits somewhere between kunafa and baklava in texture.
Where Do You Buy Kataifi Pastry?
Look in the freezer section of:
- Middle Eastern supermarkets
- Mediterranean food stores
- Greek specialty grocers
- Turkish grocery stores
- larger international supermarkets
It may be labelled:
kataifi, kadaif, kadayif, shredded phyllo or shredded filo pastry.
Don’t substitute ordinary sheets of phyllo and expect exactly the same result. They’re technically related, but kataifi’s fine shredded strands are what create that unmistakable crispy texture.
If you’re buying supplies online, kataifi pastry, pistachios, rose water, orange blossom water and a sturdy round baking pan are all useful things to look for. Amazon often has the specialty pantry ingredients, although I would still check your local Middle Eastern grocer—the ingredient aisle alone is worth the visit.
Can Kunafa Be Made Ahead?
You can assemble the kunafa several hours ahead and refrigerate it before baking.
For the best result, though, bake it shortly before you want to serve it.
Fresh kunafa is all about that contrast between crispy pastry and warm filling.
Leftovers can be refrigerated in an airtight container for around 2–3 days.
Reheat individual portions in an oven or air fryer rather than the microwave whenever possible.
The microwave will warm it beautifully.
It will also murder your crispy pastry.
You have been warned.
Why Kunafa Is Suddenly Everywhere
Kunafa itself has been loved across the Middle East for generations, so calling it a “new dessert” would be completely inaccurate.
What’s changing is how widely people outside that food culture are encountering it.
The enormous popularity of pistachio-filled Dubai chocolate introduced a much broader audience to crispy kataifi pastry combined with pistachios and rich fillings.
Once people discover the ingredient, the inevitable next search seems to be:
“What else can I make with kataifi?”
And traditional kunafa deserves to be near the top of that list.
There’s something wonderfully satisfying about cracking through that golden pastry and reaching the soft cheese underneath.
If you’ve been curious about the kunafa dessert trend but assumed it was far too complicated to make at home, give this beginner-friendly version a try.
Just make sure you buy enough kataifi for a second batch.
Because discovering you’ve used the last packet just after everyone asks when you’re making it again is exactly the sort of crafting—I mean, cooking—supply mistake I’ve made more than once.