If you’ve ever made homemade muesli bars and ended up with a tray of crumbly oat chaos, you are definitely not alone.
I swear half my early batches turned into snack crumble instead of proper bars. Tasty? Yes. Practical for lunchboxes? Not even a little bit.
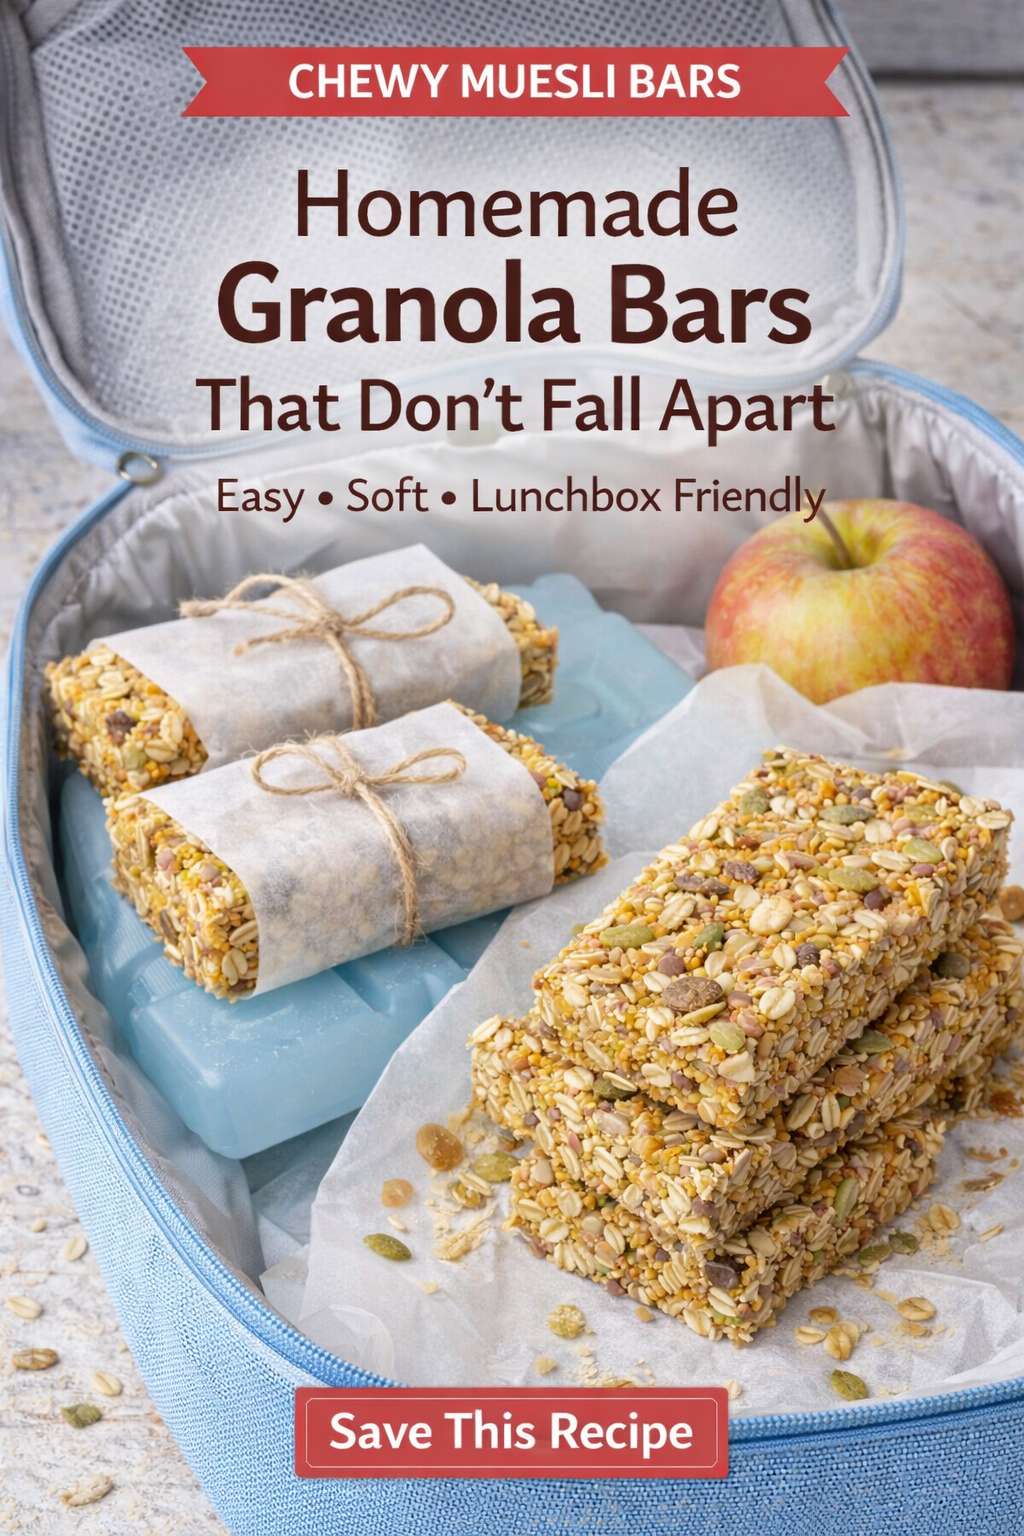
This version is the one I keep coming back to. It’s soft, chewy, easy to slice, and most importantly, it stays together when you pick it up. If you love homemade snack recipes like these, you might also enjoy these homemade granola bars for another pantry-friendly bar idea.
These are the kind of bars you make once and suddenly start side-eyeing the boxed ones at the supermarket.
Why These Muesli Bars Work
There are two things that make or break homemade granola bars:
The binding mixture
How firmly you press them into the pan
That second one sounds minor, but it really is the difference between proper bars and a crumbly mess.
This recipe gives you that chewy texture people actually want, without making things fussy. It’s also the sort of recipe that works beautifully for meal prep, lunchboxes, and after-school snacks. If you’re building out a homemade snack routine, this roundup of the best back-to-school snacks is another handy one to bookmark.
Ingredients for Chewy Muesli Bars
This is a flexible base recipe, which is always my favourite kind.
You’ll Need
- 2 1/2 cups rolled oats
- 1/2 cup desiccated coconut
- 1/2 cup chopped nuts such as almonds, peanuts, or cashews
- 1/3 cup seeds such as sunflower seeds, pepitas, or chia
- 1/2 cup dried fruit such as raisins, cranberries, or chopped apricots
Wet Ingredients
- 125g butter
- 1/2 cup honey
- 1/3 cup brown sugar
- 1 teaspoon vanilla extract
You can also tweak the mix-ins depending on what you have on hand. For a slightly different take, I’d also check out these copycat Kind granola bars if you want something with a more seed-and-nut-forward feel.
How to Make Homemade Muesli Bars
Step 1: Prep Your Pan
Line a slice tin or square baking pan with baking paper, leaving enough overhang to lift the bars out later.
Step 2: Toast the Dry Ingredients
Lightly toast the oats, coconut, nuts, and seeds in the oven or in a dry frying pan.
You can skip this if you’re in a hurry, but it adds a lovely nutty flavour that makes the finished bars taste so much better.
Step 3: Make the Syrup
In a saucepan, melt the butter, honey, and brown sugar together until smooth.
Let it come just to a gentle bubble. That little bit of heat helps everything bind properly.
Step 4: Mix Everything Together
Pour the warm syrup over the dry ingredients and stir until every bit is coated.
Step 5: Press Very Firmly
Tip the mixture into the lined pan and press it down firmly with the back of a spoon, a spatula, or the bottom of a glass.
Not gently. Properly firmly.
This is one of the biggest secrets to homemade bars that slice neatly.
Step 6: Bake
Bake at 160°C for 20 to 25 minutes, or until lightly golden around the edges.
Step 7: Cool Completely Before Slicing
This part matters more than people think. If you cut them while warm, they are much more likely to fall apart.
Tips for Muesli Bars That Don’t Fall Apart
If you want chewy granola bars that hold together well, these are the things that really help:
- Use enough syrup to bind the oats and seeds
- Press the mixture firmly into the pan
- Let the bars cool completely before cutting
- Chop dried fruit and larger nuts into smaller pieces
- Don’t overload the mixture with too many extras
If you enjoy breakfast-style bars and snack prep recipes, this immunity-boosting breakfast bar is another nice related read.
Easy Variations You Can Try
One of the best things about homemade muesli bars is how easy they are to adapt.
Lunchbox-Friendly Muesli Bars
Keep the mix-ins small and simple so they hold together well and are easy for kids to eat.
Nut-Free Muesli Bars
Swap the nuts for extra seeds, and double-check your other ingredients if you need them school-safe.
Fruit and Seed Muesli Bars
Use chopped dried apricots, cranberries, or sultanas for a fruitier version.
Chocolate Drizzle Version
If you want a more treat-style bar, drizzle melted chocolate over the top after they’ve cooled instead of mixing it through.
Are Homemade Muesli Bars a Good Snack?
They can be a really solid option when you want something filling and homemade.
You get oats, seeds, and nuts for texture and substance, and because you’re making them yourself, you can control the sweetness and the add-ins. They’re great for busy mornings, lunchboxes, road trips, or that afternoon slump when you want something a bit more satisfying than a biscuit.
If you like the idea of homemade edible prep and make-ahead treats, this collection of edible gifts you can make is full of useful inspiration too.
Storage Tips
- Store in an airtight container for up to 5 days
- Keep them in the fridge if you like a firmer texture
- Freeze for up to 2 months
They’re ideal for making ahead, which is probably why I like them so much.
Common Mistakes to Avoid
A few things can make homemade muesli bars more frustrating than they need to be:
- Not pressing the mixture firmly enough
- Cutting them while still warm
- Using too many bulky add-ins
- Reducing the syrup too much
- Expecting them to behave if you rushed the cooling stage
We have all been there.
Why This Recipe Is Worth Saving
These homemade muesli bars hit that sweet spot between practical and satisfying. They feel wholesome enough for breakfast, sturdy enough for lunchboxes, and tasty enough that nobody complains they’re too healthy.
And that, honestly, is the dream.