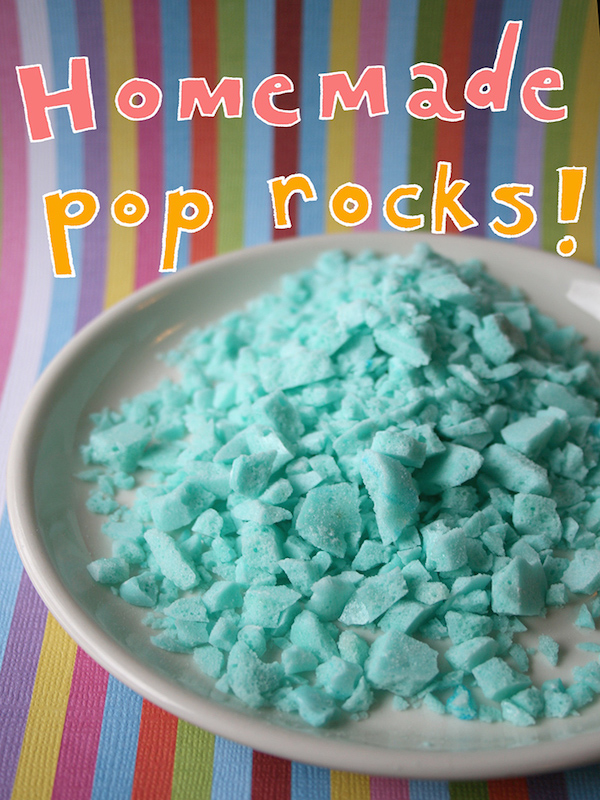
photo credit: Cake Spy
The Pop Rocks tale is extremely intriguing, and it will inform you that the candy was created by a chemist. Pop Rocks, often known as popping candy, were created by accident in 1975 by William Mitchell, a food scientist at General Foods. When he put some sugar flavoring combined with carbon dioxide in his tongue while trying to make a quick soft drink, he discovered the discovery. After it entered the market, the exploding candy became a cultural phenomenon.
Pop rocks first appeared on the confectionery market in 1975 and are still popular today. Pop Rocks are inflated with carbon dioxide, resulting in small pockets of bubbles within the candy.
As every kid knows, Pop Rocks explode when they come into touch with moisture.
I remember the first time I had Pop Rocks as a kid. It was the weirdest edible treat I had ever tried. Luckily, you can still get them today and in lots of flavors. How about making your own Pop Rocks? This is a cool science project to make with your kids. Jessie Olsen Moore shared this recipe at Craftsy. Get your kids in the kitchen and have some fun together.
Click here on Craftsy for the recipe and directions.
Check out our New Cooking and Baking Store Discount items, **Free Worldwide Shipping**
Updated to add our version for home made DIY pop rocks
Pop Rocks are a classic candy known for their fizzy and popping sensation when they dissolve in your mouth. Making Pop Rocks at home involves some scientific principles, but it’s important to note that replicating the commercial version exactly can be quite challenging due to the specific equipment and processes involved. However, here’s a simple recipe for creating homemade pop rocks-inspired candies:
Ingredients:
1 cup granulated sugar
1/3 cup corn syrup
1/4 cup water
1 teaspoon baking soda
Food coloring (optional)
Flavor extracts (e.g., strawberry, watermelon, etc.)
Citric acid powder (available at specialty stores or online)
Tools:
Candy thermometer
Non-stick cooking spray
Small molds or silicone ice cube trays
Plastic wrap or airtight containers for storage
Instructions:
Prepare Molds:
Spray your molds or silicone ice cube trays with non-stick cooking spray. This will help the candy release easily once it’s set.
Combine Sugar, Corn Syrup, and Water:
In a medium saucepan, combine the granulated sugar, corn syrup, and water. Stir the mixture over medium heat until the sugar dissolves completely.
Boil the Mixture:
Insert a candy thermometer into the mixture and let it come to a boil. Continue boiling until the temperature reaches around 300°F (150°C), which is the hard crack stage. This is the stage at which the candy will harden when cooled.
Add Baking Soda:
Once the mixture reaches the desired temperature, remove the saucepan from heat and quickly stir in the baking soda. Be prepared for the mixture to bubble up.
Add Flavor and Color:
Add a few drops of your chosen flavor extract and food coloring to the mixture. Stir well to combine. Keep in mind that the flavor might be less intense once the candy is fully set.
Pour into Molds:
Carefully pour the mixture into your prepared molds or silicone ice cube trays. It’s important to work quickly at this stage, as the candy will start to harden as it cools.
Sprinkle with Citric Acid:
While the candy is still warm and pliable, lightly sprinkle citric acid powder over the surface of each candy. Citric acid will create the “popping” sensation when it reacts with moisture in your mouth.
Let the Candy Cool and Set:
Allow the candy to cool and harden completely in the molds. This can take a couple of hours.
Unmold and Store:
Once the candies are fully set, gently remove them from the molds. Store the homemade pop rocks in an airtight container or wrap them in plastic wrap to keep them fresh and maintain their fizziness.
It’s important to note that homemade pop rocks might not replicate the exact texture and popping sensation of the commercial version due to the specific manufacturing processes used by candy companies. However, this homemade version can still be a fun and fizzy treat to enjoy with friends and family!


Leave a Reply