• Home
  • Suggest A DIY
  • DIY Newsletter

Edible Crafts

Creative food craft ideas

  • About CraftGossip
  • Our Network
    • Bath & Body Crafts
    • Candle Making Ideas
    • Crochet Ideas
    • Cross Stitch
    • Edible Crafts
    • Felting Patterns
    • Glass Art
    • Home & Garden Ideas
    • Indie Crafts
    • Jewelry Making
    • Kids Crafts
    • Knitting Patterns
    • Lesson Plans
    • Needlework
    • Party Ideas
    • Polymer Clay
    • Quilting Ideas
    • Recycled Crafts
    • Scrapbooking
    • Sewing Patterns
    • Card Making
    • DIY Weddings
    • Not Craft Ideas
  • Giveaways
  • Roundups
  • Store
  • Search

Cookbook Giveaway!!!! Two Ways to Go Green: Preserving vs. Eating Fresh

August 16, 2010 by Meaghan Mountford

Thanks to the generosity of From Storey Publishing, I have two yummy books to giveaway! in Put ’em Up: A Comprehensive Home Preserving Guide for the Creative Cook, by Sherri Brooks Vinton and Recipes from the Root Cellar by Andrea Chesman.

My love of things in mason jars is well documented on this blog, so it’s about time I looked into the original purpose of jars: preserving. Everything you ever wanted to learn about canning and preserving can be found in Put ’em Up: A Comprehensive Home Preserving Guide for the Creative Cook. Author Sherri Brooks Vinton easily won me over to the virtues of “putting Up” (aka preserving). She writes “The jams are fruitier, the pickles are more flavorful, and the chutneys and relishes will trick out your dinner table like nothing else.” Aside from greater tasting food, preserving allows you to rely less on imported produce and go green by preserving locally grown foods. The book opens with a section on all the techniques you need to know, the equipment you need and step-by-step instructions with illustrations for each method of preserving. Much of the book is devoted to over 150 recipes for herbs and every fruit and vegetable from apples to watermelon, including such gems as pickled asparagus, szechuan beans, candied citrus rind, charred chilies, fennel confit, rhubarb chutney and spiced pear vodka.

Recipes from the Root Cellar also celebrates the bounty of local harvests, but with an almost contrary premise: that of enjoying local, fresh vegetable in their seasons rather than import say, asparagus in January. As author Andrea Chesman writes, “Between an awareness that processed and exotic foods bring with them a significant carbon footprint and a shortfall in many household economies in the grip of a global recession, eating more humble vegetables makes sense.” The collection offers over 250 recipes with inspiration to enjoy seasonal veggies through the coldest months and pulls hardy greens, winter squashes, and root vegetables from hiding. After a hearty introduction covering  how to buy and store individual greens and veggies and how to cook and prepare them. The book is filled with recipes aplenty, from soups and salads, vegetarian main dishes, main dishes with seafood, poultry and meat, and even desserts. Recipes include Curried Rice Salad with Mango Chutney Dressing, Carrot-Mustard Slaw, Apple-Squash Bisque, Portuguese Kale Soup, Rutabaga Chips, Leek and Goat Cheese Pizza, Lemon-Braised Chicken with Turnips, Spicy Meat Lo Mein, and Pumpkin Waffles.

And now for the GIVEAWAY!!!! Leave a comment to this post before midnight August 30 EST and I will choose a winner randomly to win both Put ’em Up! and Recipes from the Root Cellar. (Be sure your comment links somewhere with contact information or you leave an email address in case you win.)

[tags]giveaway, books, green, preserving, canning, root vegetables[/tags]
«
»

Comments

  1. Audrey says

    August 17, 2010 at 1:46 am

    Love this, hope I win some

  2. Barbara says

    August 17, 2010 at 2:12 am

    It would be great to win these books! Thanks for the chance!
    ricettebarbare at gmail dot com

  3. Tram says

    August 17, 2010 at 6:38 am

    It’s so nice of u to have a giveaway! This is quite different from all my book of recipes and cakes!!!

  4. Katie says

    August 17, 2010 at 7:22 am

    These books look great!

  5. Tori Whiting says

    August 17, 2010 at 8:05 am

    Ohhhh!! These cookbooks look wonderful!! I LOVE to cook, bake…you name it! I am one of those kind of moms who tries a new recipe at least once a week!! Needless to say…I am a cookbook fanatic!

  6. Moira Richardson says

    August 17, 2010 at 8:32 am

    I just found out I got accepted to the local market basket program. Would love to win so that I know what to do with all the lovely veggies!

  7. Debbie Smith says

    August 17, 2010 at 8:44 am

    I would love some new ideas for canning. I love this site. What a great give away. Debbie

  8. Emily says

    August 17, 2010 at 12:43 pm

    I just got my mom into canning too! We started with pickles and salsa they turned out great! The only issue we have is the top to our canning pot is warped – any suggestions on a new canning system? I’ve looked online and the price varies – I would want an affordable one.

  9. amanda says

    August 17, 2010 at 5:22 pm

    PICK ME PLEASE!!!!

  10. Joan says

    August 17, 2010 at 6:12 pm

    I love to cook and can so these books would be a great addition to my collection. I know I’d enjoy using them both.
    [email protected]

  11. aimeeQ says

    August 17, 2010 at 6:45 pm

    Wow these are some awesome books! I checked out put’um up from the library, and was going to copy a few of my favorite pages, but they are all so great, I figured I should just get the book instead. The root cellar book is right up my alley too! If I don’t win these books, they will both end up on my amazon wish list by September 1 🙂
    Thanks for the giveaway!

  12. denise says

    August 17, 2010 at 10:17 pm

    I love cookbooks! Or any books about food!

  13. Paula L. says

    August 18, 2010 at 2:49 am

    Wonderful giveaway! I would so love to win!
    ap_lemos at yahoo dot com

  14. Rose says

    August 18, 2010 at 7:09 am

    I am always looking for more recipes and instruction for preserving food. This is exactly where my focus and energy are going these days. This would be a perfect gift.

  15. Mary Corley says

    August 18, 2010 at 8:47 am

    Would love to have this to complement my collection.

  16. Sara says

    August 18, 2010 at 10:56 am

    Cool site. Storey Publishing brought me here! Please submit me for the lucky drawing.

  17. Paul Knipple says

    August 18, 2010 at 10:59 am

    I like the “one in the jar, one in my belly, one in the jar…” system for handling summer produce.

  18. Meredith says

    August 19, 2010 at 8:17 am

    I would love this book! This is my second year of having my own organic garden and I need ideas on how to preserve all my fresh produce. I am also working on trying to integrate more local products into my diet. Thanks!

  19. Catherine says

    August 19, 2010 at 10:35 am

    I really have a things for Mason Jar too!
    I often use one as a glass 🙂
    I started doing this after I went to a bar where they serve drinks only in jars.

  20. Jessica says

    August 19, 2010 at 11:43 am

    I love canning and these would make a great addition to my cookbook collection!

  21. Ruth Hill says

    August 19, 2010 at 9:09 pm

    Great books! Please enter me to win!

  22. KELLY HEFNER says

    August 20, 2010 at 7:27 am

    i LOVE BOOKS ABOUT FOOD

  23. Stacie.Make.Do. says

    August 20, 2010 at 12:16 pm

    I just checked out several books on the subject of preserving food from my local library – but these look better!

  24. Amy in SC says

    August 20, 2010 at 5:16 pm

    Those look like great books!

  25. Abril says

    August 20, 2010 at 11:13 pm

    I’ve been meaning to strat making my own jams and pickles, this would be a great incentive!
    abrilgmolina at gmail dot com

  26. Racheal Mahlknecht says

    August 20, 2010 at 11:41 pm

    My son, who has just started his apprenticeship as a chef, would love these.
    Thanks for the comp.

  27. susanna says

    August 21, 2010 at 5:33 am

    Love to cook! Love your website

  28. Chic Mummy says

    August 22, 2010 at 8:10 am

    I have just started canning, so the put em up book would be perfect. I also struggle with interesting ways to cook root veg, so that book would be great as well.

  29. Judith says

    August 22, 2010 at 9:34 am

    Wow! I’d love to try the pumpkin waffles recipe.

  30. Erin says

    August 22, 2010 at 12:30 pm

    I’ve been canning for several years and my daughters are learning to do the same. These would be great books for them in the future. Thanks!

  31. karen604 says

    August 22, 2010 at 2:39 pm

    Two new books on putting food up! I am thrilled. These will need to become part of my cookbook collection.

  32. Stephanie Belleque says

    August 22, 2010 at 3:11 pm

    This would be great! I’ve been wanting to start canning for awhile now. I remember doing it with my Grandma as a child and want to share it with my children, too. Plus, it all tastes so yummy!

  33. Jody says

    August 23, 2010 at 2:08 pm

    I just had my first garden this summer. We’ve been canning salsa, pizza sauce, pasta sauce & green beans and have frozen limas and corn. These books would be awesome for me as we are already starting to plan our sophomore garden…which is being enlarged to about 1/2 acre…yippee!!

  34. farmkat says

    August 23, 2010 at 6:52 pm

    These books sound great! Love any type of “back to the land” books. Thanks for the giveaway.

  35. Jacoba Evans says

    August 25, 2010 at 1:46 am

    Would love to win this book. Might help me to eat more vegies, not to mention the kids. This book can only be helpful and improve my diet and lifestyle.

  36. jasmin says

    August 25, 2010 at 8:10 am

    would love to get my hands on those books 🙂

    huge fan of your site!!

  37. Emma says

    August 26, 2010 at 8:33 pm

    Oooh love these books x

  38. Anna says

    August 26, 2010 at 8:57 pm

    I’ve been on a jam making spree lately finding inspiration on the blogs, but I’d love to try out some of the recipes in these books. Thanks for the opportunity 😀

  39. Sue says

    August 28, 2010 at 9:22 am

    Looks like two GREAT books!

  40. Paula says

    August 28, 2010 at 3:03 pm

    oh, I don`t have any of such books so it would be really useful for me 🙂

  41. Jessica Brannon says

    August 29, 2010 at 8:22 am

    I just canned some peach salsa! Would so love to learn more. Pick me!

  42. Alison says

    August 29, 2010 at 8:54 am

    I am new to this site and have just taken up crochet and trying to learn to cook – both are having some interesting results! So I got myself a crochet book and now just need some nice lovely cook books to help me on my way ?

  43. Suzanne says

    August 29, 2010 at 7:40 pm

    I love canning but I have only been doing fruit. I would love to really branch out and get more brave.

  44. Kristen at Miss Prissy Paige says

    August 31, 2010 at 7:55 pm

    ohhhh – I’ve wanted to learn to can and preserve. This cookbooks would be great!

« Older Comments

Have you read?

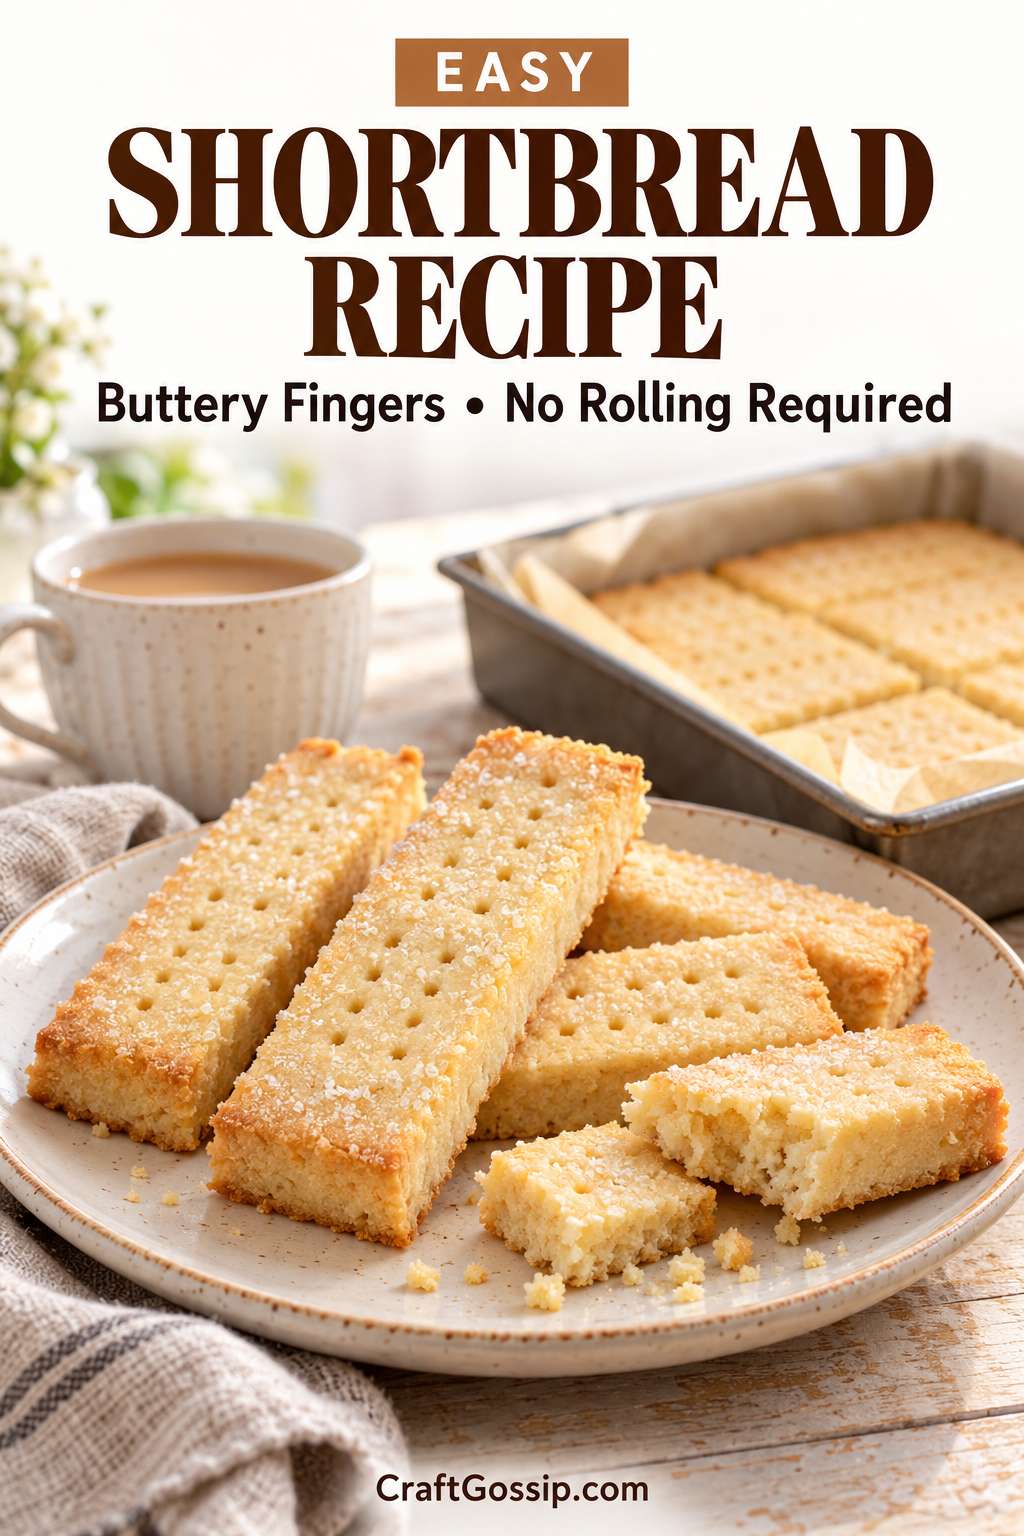
Easy Shortbread Recipe: Buttery Fingers With No Rolling Required

A good shortbread recipe should be wonderfully simple. Butter, sugar, flour and something warm to drink while you wait for the biscuits to cool. Preferably with nobody hovering beside the oven asking whether they’re ready yet.

But simple recipes still have their little traps. Butter that’s too warm, an enthusiastic handful of extra flour or cutting the shortbread at the wrong moment can turn a lovely afternoon bake into a tin of crumbs.

This easy shortbread recipe keeps the shaping straightforward. You press the dough into a tin, bake it as one slab and cut it into fingers while it’s still warm. There’s no rolling pin, no biscuit cutters and no pile of scraps to gather up for another round.

It uses the traditional shortbread ratio of three parts flour, two parts butter and one part sugar by weight. For the most consistent result, use kitchen scales rather than converting the ingredients into cups.

Easy Shortbread Recipe

Makes: 16 shortbread fingers
Preparation: Approximately 15 minutes
Chilling: 20 minutes
Baking: Approximately 35 to 45 minutes
Tin: 20 cm square metal baking tin

Ingredients

  • 200 g unsalted butter, softened but still cool
  • 100 g caster sugar
  • 300 g plain flour
  • ¼ teaspoon fine salt
  • 1 teaspoon vanilla extract, optional
  • 1 to 2 teaspoons extra caster sugar for sprinkling, optional

What You’ll Need

  • Kitchen scales
  • Mixing bowl
  • Electric mixer or sturdy wooden spoon
  • 20 cm square metal baking tin
  • Baking paper
  • Fork
  • Sharp knife
  • Cooling rack

A digital kitchen scale is particularly useful here. Shortbread has so few ingredients that measuring each one accurately makes a noticeable difference.

How to Make Shortbread Fingers

1. Prepare the Tin

Lightly grease the tin and line it with baking paper, leaving an overhang on two opposite sides.

The overhang gives you something to hold when lifting the shortbread out. Keep the paper reasonably smooth so it doesn’t create deep folds in the edges.

2. Mix the Butter and Sugar

Beat the butter and caster sugar until smooth and combined, scraping down the bowl as needed.

You don’t need a very pale, fluffy mixture. Stop once the sugar is evenly incorporated and the butter looks creamy.

Mix in the vanilla, if using.

Butter check: It should take a gentle fingerprint but still hold its shape. If it looks oily or is collapsing into a puddle, cool it before continuing.

3. Add the Flour and Salt

Stir the flour and salt together, then add them to the butter mixture.

Mix on low speed or use a wooden spoon until the mixture forms moist crumbs and small clumps.

Squeeze a little between your fingers. It should hold together. The dough doesn’t need to look like a smooth ball before you put it in the tin.

4. Press Into the Tin

Tip the mixture into the prepared tin and press it into an even layer, including the corners.

Use the back of a spoon or the flat base of a measuring cup to smooth it. A piece of baking paper between the dough and your pressing tool can help prevent sticking.

Aim for an even thickness so the middle and edges bake at a similar rate.

5. Mark the Fingers and Chill

Lightly score the dough into 16 fingers. Divide the square into eight strips, then mark a line across the middle to halve them.

Prick the surface gently with a fork and sprinkle with the extra sugar, if using.

Refrigerate for 20 minutes. Meanwhile, preheat the oven to 160°C conventional or 140°C fan-forced.

6. Bake Until Lightly Golden

Bake on the middle shelf for approximately 35 to 45 minutes, checking from 35 minutes.

Look for a set, dry-looking surface and lightly golden edges. The center should no longer look wet or greasy.

Ovens vary, so use these cues alongside the timer. If the surface is coloring quickly while the center still looks underdone, loosely cover with foil and continue checking.

7. Cut While Warm

Let the shortbread rest in its tin for about 10 minutes.

Carefully lift it onto a board using the baking paper. Support the base so the warm slab doesn’t bend.

Cut along the marked lines with a sharp knife. Allow the fingers to cool completely before moving them into a container.

Warm shortbread is delicate. Give it time to firm up rather than testing every piece while it’s still on the board.

The Small Details That Make Shortbread Easier

Weigh the Flour

Too much flour can make shortbread dry and difficult to bring together.

Weighing avoids the variation that comes from scooping flour into a cup. For this recipe, use the gram measurements as written.

Use Block Butter

Butter provides much of the flavor and texture.

Spreadable butter blends, reduced-fat spreads and margarine can behave differently. For your first batch, use ordinary block butter.

Keep Mixing Brief Once the Flour Goes In

Mix until the dough holds together when pressed. Avoid prolonged kneading or beating.

You’re making a tender biscuit, so there’s no need to treat the dough like bread.

Keep the Tin Size Consistent

A larger tin spreads the dough more thinly and changes the baking time. A smaller tin makes a thicker slab that takes longer to bake through.

Use the specified tin before experimenting with other shapes.

Shortbread Troubleshooting

Why Is My Dough Too Crumbly?

Shortbread dough can look crumbly before it’s pressed together. Try the squeeze test first.

If a handful holds its shape, it’s ready for the tin.

If it falls apart completely, check whether the butter is still too cold and whether the flour was weighed correctly. Let cold dough soften slightly, then mix briefly again. Avoid immediately pouring in milk or water.

Why Is My Shortbread Hard?

Possible causes include excess flour, too much handling or baking longer than needed.

Next time, weigh the ingredients, keep mixing brief and start checking at the earlier end of the baking range.

Why Did It Break When I Cut It?

It may have been too hot and fragile, or completely cold and brittle.

For this slab method, let it rest briefly after baking, then cut while it’s still warm. Use a sharp knife and support the slab on a flat board.

Why Is the Middle Soft?

Check the tin size, oven temperature and thickness of the dough.

Some tenderness while warm is normal, but the surface should be set before the shortbread leaves the oven. A thicker slab may need more time.

Easy Shortbread Variations

Start with the plain version, then try one small change at a time.

Lemon shortbread: Add the finely grated zest of one lemon to the butter and sugar. For a different citrus bake, our lemon-lime shortbread thumbprint cookies feature offers another recipe to explore.

Chocolate-dipped fingers: Dip one end of each completely cooled biscuit into melted chocolate. Place on baking paper and allow the chocolate to set before packing.

Christmas shortbread: Finish cooled fingers with a little melted chocolate and a few festive sprinkles. Keep the decoration modest so the buttery biscuit still shines.

If you want shaped biscuits rather than a slab, these hedgehog shortbread cookies are a lovely separate project. Follow their linked shaping recipe rather than assuming the baking time above will suit them.

How to Serve Homemade Shortbread

A cup of tea is the obvious companion, but shortbread also makes a useful little dessert.

Serve a finger alongside fresh strawberries and a spoonful of yogurt or cream. Our shortbread with strawberries and yogurt feature offers inspiration for that combination.

You can also crumble a broken biscuit over ice cream. Any pieces that don’t survive slicing have simply volunteered for another job.

Packing Shortbread for Gifts

Let the biscuits cool completely before wrapping them.

Use food-safe bags or containers, with baking paper between layers. A ribbon and handwritten tag are plenty of decoration.

Include an ingredient note when gifting, particularly for wheat and milk, plus any nuts or other ingredients used in your decorations.

Keep the finished biscuits in an airtight container in a cool, dry place. For the best gift presentation, bake close to the day you plan to give them.

Can I Use Salted Butter?

Yes. Use the same weight of salted block butter and omit the added salt.

The flavor will vary slightly depending on the brand.

Can I Use Self-Raising Flour?

Use plain flour for this recipe. Self-raising flour contains raising agents and will change the result.

Does This Shortbread Need Eggs?

No. The dough comes together with butter, sugar and flour. There are no eggs in this recipe.

A Simple Bake Worth Keeping

What I like about shortbread is that it doesn’t need much dressing up. A few fork marks, a little sugar on top and a batch of buttery fingers are enough.

Keep the measurements accurate, give the dough gentle handling and watch the baking cues. Once you’re comfortable with the plain version, you can add a little citrus or chocolate without turning it into an entirely different project.

And do put a few pieces aside before packing the gifts. The baker deserves something to go with her tea.

Categories

Baked candy chocolate Christmas cookies Craft Inspirations cupcakes Drinks Easter fruit Fun With Food Halloween Holidays kids More Recipes non-sweets Parties & entertaining Recipes Thanksgiving Valentines Day

Peeps Sunflower Brownie

Game of Thrones Cupcakes

St. Patrick’s Day Free Printables

Sunflower Marshmallow Pops

Mini Football Cookies Ready to Kick Off of Mini Grass Cookies

RSS feed: More Articles More Articles

  • Christmas on a Budget – How to Style Your Christmas Table for Under $50 Without Buying New Tableware
  • 14 Free Crochet Christmas Ornament Patterns for Yarn Scraps and Handmade Gifts
  • 27 FREE Witchy SVG Cut Files and Printables
  • Learn About Greenland for Kids
  • Book Review: Patty Lyons’ Knitting ER
  • 10 Scrapbook Layout Ideas with Mixed Patterns for Fall and Halloween
  • Easy Shortbread Recipe: Buttery Fingers With No Rolling Required
  • Make Rustic Christmas Ribbon from Old Bed Sheets and Tiny Stamps
  • Free Crochet Hot Chocolate Mug Ornament Pattern For Christmas
  • Hanukkah Cross Stitch Projects

Pick Your Blog

  • Sewing
  • Knitting
  • Quilting
  • Crochet
  • Home & Garden
  • Recycled Crafts
  • Scrapbooking
  • Card Making
  • Polymer Clay
  • Cross-Stitch
  • Edible Crafts
  • Felting
  • Glass Art
  • Indie Crafts
  • Kids Crafts
  • Jewelry Making
  • Lesson Plans
  • Needlework
  • Bath & Body
  • Party Ideas
  • Candle Making
  • DIY Weddings
  • Not Craft
  • Free Craft Projects

Explore Edible Crafts

breakfast cake candy chocolate Christmas cookie decorating cookies dessert Easter fruit Halloween Holidays kids lollipop sticks lunch packaging party summer Thanksgiving valentines

Copyright © 2026 · CraftGossip | Start Here | Contact Us | Link to Us | Your Editors | Privacy and affiliate policy