• Home
  • Suggest A DIY
  • DIY Newsletter

Edible Crafts

Creative food craft ideas

  • About CraftGossip
  • Our Network
    • Bath & Body Crafts
    • Candle Making Ideas
    • Crochet Ideas
    • Cross Stitch
    • Edible Crafts
    • Felting Patterns
    • Glass Art
    • Home & Garden Ideas
    • Indie Crafts
    • Jewelry Making
    • Kids Crafts
    • Knitting Patterns
    • Lesson Plans
    • Needlework
    • Party Ideas
    • Polymer Clay
    • Quilting Ideas
    • Recycled Crafts
    • Scrapbooking
    • Sewing Patterns
    • Card Making
    • DIY Weddings
    • Not Craft Ideas
  • Giveaways
  • Roundups
  • Store
  • Search

Classic Pulled Pork By Martha Stewart

July 20, 2015 by Vikram Goyal

classic-pulled-pork

Editors Note: We are fortunate to be able to bring to our readers a full recipe on making a classic pulled pork from the latest issues of Martha Stewart Living. This is a recipe that takes time, but the end result is absolutely delicious!

Active Time: 1 hr. 15 min. Total Time: 81/2 hr., plus overnight

Serves: 8 to 12

The meat cooks on a char-charcoal grill for up to eight hours. It doesn’t require much work during that time, but you do need to add more coals every hour to maintain the temperature. For a less hands-on method, cook the meat for the first two hours on the grill, then transfer it to a 300° oven for the rest of the time (set the meat on a rack over a pan of water).

MEAT

1?2 boneless pork shoulder (about 4 pounds), trimmed but with a layer of fat left on

2 tablespoons coarse salt

5 medium cloves garlic, pressed through a garlic press or mashed to a paste

2 tablespoons safflower oil

1 tablespoon granulated sugar

2 tablespoons packed light-brown sugar

1 tablespoon sweet paprika

3/4 teaspoon freshly ground black pepper

1/4 teaspoon dry mustard

1/4 teaspoon dried thyme

Sauce

1 cup white vinegar

1/3 cup ketchup

1/3 cup packed light- brown sugar

1 tablespoon coarse salt

3?4 teaspoon red-pepper flakes

1 teaspoon freshly ground black pepper

Potato buns, coleslaw, thinly sliced seedless cucumber, and pickles, for serving

TIP: A chimney makes it easy to start your fire. Fill the bottom with newspaper and the top with charcoal briquettes (not the instant-light kind), then ignite. It’s ready when the top layer is turning ash gray.

Step 1: Season pork the night before!

Season pork all over with salt. Cover with plastic wrap and refrigerate overnight. The next day, stir together garlic and oil. Mix together sugars, paprika, pepper, mustard, and thyme. Rub oil mixture over pork, then sugar mixture. Let stand while you heat grill.

Step 2: Prepare grill

Open grill vents. Prepare a chimney with 80 charcoal briquettes; place on small lower grate. Ignite; let burn until top layer is turning ash gray, about 20 minutes. Place a small disposable roasting pan on one side of grate. Add 2 cups hot water. Pour coals in on other side. Top with main grill grate.

Step 3: Cook pork

Place pork on grill, over pan of water. Cover grill with lid, keeping top and bottom vents halfway open. Every hour, add briquettes (about 16) as needed to keep grill temperature at a steady 300°. Cook until a thermometer inserted in thickest part of pork registers about 200°, 7 to 8 hours.

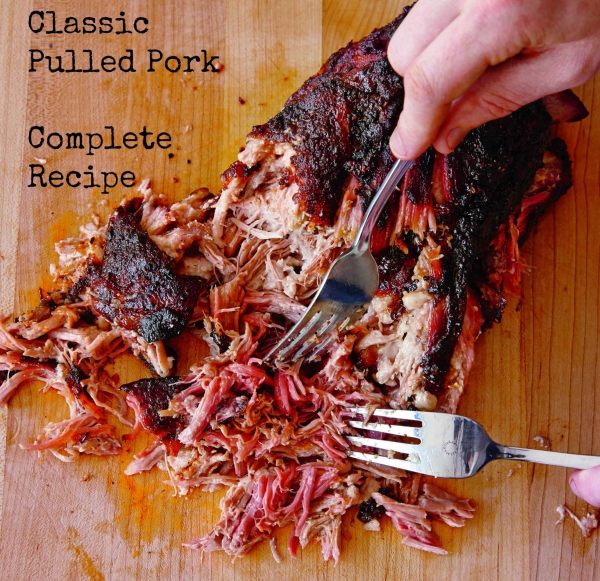
Step 4: Shred meat, make sauce, and serve

Let meat stand 20 minutes before pulling apart with two forks. Meanwhile, whisk together sauce ingredients in a bowl. Toss pulled pork with 1 cup sauce. Pile pork on buns, then top with slaw and cucumber. Serve, with pickles and remaining sauce on the side.

MSL JulyAug 2015 Cover

Reprinted with permission from Martha Stewart Living.

Related Posts:

  • 5 Easy No-Bake Slices You Can Make and Gift This…
  • 5 Grown-Up Ways to Turn Easter Eggs into Elegant…
«
»

Have you read?

How to Make Thick Yoghurt Smoothie Bowls in the Ninja Slushie Maker

A quick, creamy breakfast with fresh fruit added on top

Smoothie bowls are one of those beautiful breakfasts that feel healthy and a little indulgent at the same time. Thick, cold, creamy, and pretty enough that you almost don’t want to eat them… almost.

The Ninja Slushie Maker takes all the effort out of it.
Instead of dealing with frozen fruit bricks or blenders that complain loudly, you simply mix your yoghurt base, chill it, and let the Ninja turn it into the perfect thick smoothie-bowl texture — no ice required.

If you are like me and come addicted to these smoothie bowls then you will want to invest in these double walled bowls, this is my favorite brand and these have been great. 

Then you top it with your fresh fruit afterwards so the bowl stays thick, cold, and spoon-worthy.

It’s easy, quick, and a lovely way to start the day.

Why Yoghurt Works So Well in the Ninja Slushie Maker

Yoghurt freezes into a silky, firm slush — similar to soft-serve but healthier and lighter. Because the machine creates the icy texture itself (instead of relying on ice cubes), the mixture never becomes watery or gritty.

Just smooth, cold, creamy perfection you can decorate to your heart’s content.

The Basic Yoghurt Slush Base

Once you learn this base recipe, you can create endless flavour combinations.

Ingredients

  • 2 cups plain or Greek yoghurt, chilled 
  • ½–1 cup milk of your choice (just enough to loosen the mixture) 
  • 1–3 tablespoons honey or maple syrup (optional) 
  • 1 teaspoon vanilla extract (optional) 

Method

  1. Stir all ingredients together until smooth. 
  2. Chill the mixture in the fridge until very cold. 
  3. Pour the chilled mixture into the Ninja Slushie Maker. 
  4. Blend on the slush setting until thick, creamy, and icy. 
  5. Spoon into a bowl and add your fruit and toppings. 

This base has enough body to hold granola, berries, and nut butter without sinking.

Topping Ideas (Add These After Blending)

Fresh Fruit

  • Strawberries 
  • Blueberries 
  • Banana slices 
  • Mango 
  • Kiwi 
  • Peaches 

Crunchy Toppers

  • Granola 
  • Toasted coconut 
  • Chopped nuts 
  • Cacao nibs 

Extras

  • Honey drizzle 
  • Peanut butter 
  • Chia seeds 
  • Freeze-dried fruit crumbs 

Easy Flavour Variations

Berries & Cream Smoothie Bowl

Use vanilla yoghurt as your base. Top with raspberries, strawberries, and a sprinkle of granola.

Tropical Coconut Bowl

Add a splash of coconut milk to the base. Top with mango, pineapple, kiwi, and toasted coconut flakes.

Chocolate Yoghurt Bowl

Mix 1 tablespoon cocoa powder or chocolate protein powder into the base. Top with banana slices and a peanut-butter drizzle.

Meal-Prep Tip

Prepare the yoghurt base the night before and store it in small jars.
In the morning, just pour one jar directly into the Ninja Slushie Maker and you’ve got a thick, cold, ready-to-top breakfast in minutes.


Categories

Baked candy chocolate Christmas cookies Craft Inspirations cupcakes Drinks Easter fruit Fun With Food Halloween Holidays kids More Recipes non-sweets Parties & entertaining Recipes Thanksgiving Valentines Day

Watermelon Cupcake

Free Printable – Country Easter Bunny Cupcake Toppers

Ice Shot Glasses

Leprechaun “Poop” Candy Jars with Free Printable Poem

Christmas Grinch Vanilla Milkshake Ninja Slushie

RSS More Articles

  • Cross Stitch Ice Cream and Frozen Treats
  • 15 Charity Sewing Projects That Let You Sew Something Useful For A Good Cause
  • Sunflower Ribbon Embroidery Tutorials and Kits to Brighten Your Hoop
  • Decorating Mistakes That Make Your Living Room Feel Cluttered
  • Remembering Jill Smokler, Founder Of Scary Mommy
  • In the Garden Layer Cake – A Bloom-Filled Fabric Collection for Spring Sewing
  • How To Do Kitchener Stitch: A Beginner-Friendly Guide To Grafting Knitting Seamlessly
  • Pattern Review: Georgie Granny Square Bucket Hat Crochet Pattern
  • 12 Handmade Patriotic 4th of July Card Ideas
  • Shark Week Learning for Kids

Explore Edible Crafts

breakfast cake candy chocolate Christmas cookie decorating cookies dessert Easter fruit Halloween Holidays kids lollipop sticks lunch packaging party summer Thanksgiving valentines

Copyright © 2026 · CraftGossip | Start Here | Contact Us | Link to Us | Your Editors | Privacy and affiliate policy