• Home
  • Suggest A DIY
  • DIY Newsletter

Edible Crafts

Creative food craft ideas

  • About CraftGossip
  • Our Network
    • Bath & Body Crafts
    • Candle Making Ideas
    • Crochet Ideas
    • Cross Stitch
    • Edible Crafts
    • Felting Patterns
    • Glass Art
    • Home & Garden Ideas
    • Indie Crafts
    • Jewelry Making
    • Kids Crafts
    • Knitting Patterns
    • Lesson Plans
    • Needlework
    • Party Ideas
    • Polymer Clay
    • Quilting Ideas
    • Recycled Crafts
    • Scrapbooking
    • Sewing Patterns
    • Card Making
    • DIY Weddings
    • Not Craft Ideas
  • Giveaways
  • Roundups
  • Store
  • Search

How To Make Your Own Biscoff Cookies Cookie Butter

March 26, 2016 by Carolyn Bickford

If you’ve ever dipped a spoon into Biscoff or Speculoos cookie butter, you know just how addictive it can be. That silky-smooth, spiced spread tastes like crushed cookies turned into dessert heaven. But here’s the secret: you don’t need a fancy jar from the store—you can actually make homemade cookie butter in just a few minutes with everyday ingredients.

This quick recipe transforms humble biscuits into a luscious, creamy spread that’s perfect for slathering on toast, dipping fruit, or sneaking straight from the jar. It’s the ultimate treat for cookie lovers and a clever homemade gift idea, too.

What You’ll Love About Homemade Cookie Butter

  • Budget-Friendly: Uses pantry staples instead of pricey jars. 
  • Customizable: Try it with Biscoff, graham crackers, or even gingersnaps. 
  • Versatile: Spread it on toast, swirl it into milkshakes, or use it as a dip for fruit and celery sticks. 
  • Quick & Easy: Ready in under 10 minutes with no special equipment. 

Ingredients

  • 2 cups crushed cookies (Biscoff, Speculoos, or your favorite spiced biscuit) 
  • ½ cup sweetened condensed milk 
  • ¼ cup evaporated milk (or regular milk) 
  • 2 tbsp brown sugar 
  • 2 tbsp butter (melted) 
  • ½ tsp vanilla extract 
  • Pinch of cinnamon (optional, for extra warmth) 

Method

  1. Crush cookies into fine crumbs using a food processor. 
  2. In a small saucepan, warm the condensed milk, evaporated milk, brown sugar, and melted butter until smooth. 
  3. Stir in vanilla and cinnamon, then pour mixture into the cookie crumbs. 
  4. Blend again until thick and creamy. 
  5. Spoon into a jar, refrigerate for at least 1 hour before using. 

Ways to Enjoy Cookie Butter

  • Spread on toast, pancakes, or waffles. 
  • Dip apple slices, celery sticks, or pretzels. 
  • Swirl into milkshakes, smoothies, or yogurt. 
  • Use as frosting or filling for cupcakes and cakes. 
  • Enjoy straight off the spoon (no judgment!). 

Storage

Keep your homemade cookie butter in a sealed jar in the fridge. It will last up to two weeks—though it usually disappears much faster!

Homemade cookie butter is one of those recipes that feels magical. A handful of simple ingredients transforms into something rich, spiced, and utterly indulgent. Whether you’re making it for yourself or as a thoughtful foodie gift, this spread will quickly become a household favorite.
Malted Nutella and Biscoff Brownie Torte – The Most Indulgent Cake For Chocolate Lovers [Edible Crafts]

23 Easy To Make Whoopie Pies

«
»

Comments

  1. Kitchenmusingstoday says

    March 26, 2016 at 8:28 pm

    You are correct better buy an extra package of the cookies! I know that my family can’t get enough of this cookie butter, better hide it after it is made.

Have you read?

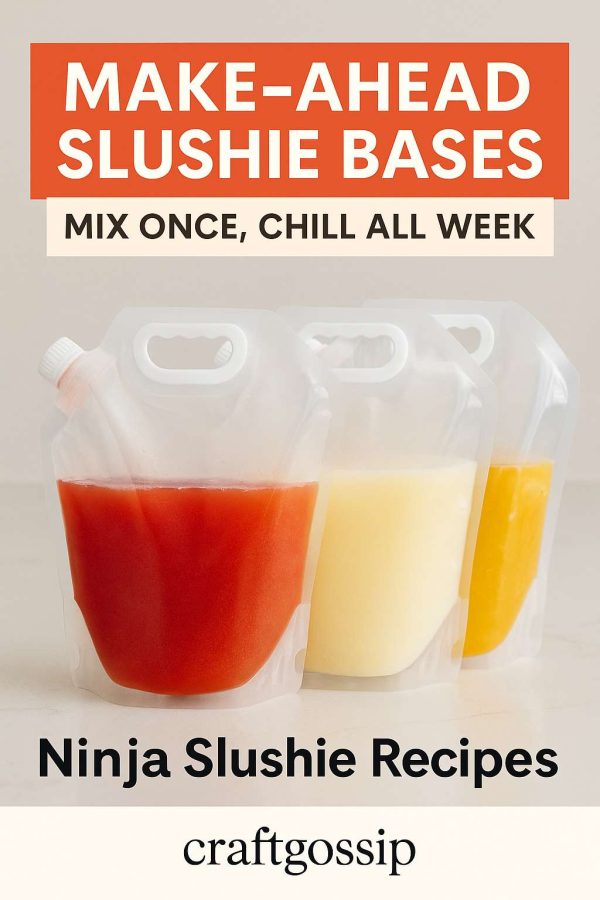
Make-Ahead Slushie Bases: Mix Once, Chill All Week

The easiest way to keep the whole family happy (without living at the kitchen bench)

There are weeks where everyone in the house suddenly becomes obsessed with slushies. The kids want after-school slushies. Your partner wants a “grown-up” slushie after dinner. You want a fruit slushie because it’s hot and you haven’t sat down in seven hours.

And somehow, despite having zero interest in making them, everyone assumes you will magically appear and whip up a fresh slushie every single time.

This is where make-ahead slushie bases save your sanity.

I have to give a shout out to my all time favorite slushie cup these Margarita double wall tumblers are perfect for all cocktail types. I was gifted a pair of these for Christmas and I am in Love and use mine every slushie mix! 

Instead of mixing a new drink every time someone wants one, you simply make a big batch of your favourite slushie base, store it chilled in the fridge, and pour it straight into the Ninja Slushie Maker whenever needed.

No measuring.
No mess.
No last-minute panic.
Just cold, delicious slushies all week long.

It’s honestly a life hack disguised as a recipe.

Why Make-Ahead Slushie Bases Work So Well

The Ninja Slushie Maker only needs one thing from you: cold liquid.
The colder it is, the thicker and smoother your slushie becomes.

So keeping a bag of slushie base in your fridge means you’re always 30 seconds away from something frosty and delicious.

Perfect for:

  • hot summer afternoons 
  • after-school snack time 
  • teenagers who “constantly need a drink” 
  • quick morning smoothie bowls 
  • evening mocktails or cocktails 
  • Christmas week chaos 
  • weekends when everyone is home and thirsty 

It’s the closest thing to having a slushie machine at the local cinema — except cleaner, cheaper, and right there in your kitchen.

How to Make a Slushie Base

(The simple mix-and-chill method)

Every slushie base follows this structure:

1 part strong flavour
1 part liquid base
sweetener to taste
flavour boosters if desired

Mix everything in a jug, give it a taste, chill it until cold, and you’re done.
The Ninja does the rest.

5 Make-Ahead Slushie Bases You Can Store All Week

These keep beautifully for 3–5 days in the fridge.
Just give them a gentle shake before pouring into the Ninja Slushie Maker.

1. Strawberry Lemonade Slushie Base

Sweet, refreshing, and kid-approved.

Ingredients

  • 2 cups strawberry juice or berry cordial 
  • 2 cups water 
  • Juice of 1 lemon 
  • 1–2 tablespoons sugar (optional) 

Flavor Booster

Add fresh basil after blending.

2. Mango Coconut Sunshine Base

Tastes like a holiday in a glass.

Ingredients

  • 2 cups mango nectar 
  • 1 cup coconut water 
  • 1 tablespoon lime juice 
  • Honey to taste 

Flavor Booster

Pinch of chilli for a surprising twist.

3. Apple Cinnamon Slushie Base

A cosy yet refreshing option — perfect for warm Christmas mornings.

Ingredients

  • 2 cups apple juice 
  • 1 cup cloudy apple cider (non-alcoholic or alcoholic) 
  • 1 teaspoon cinnamon syrup 
  • 1 teaspoon lemon juice 
  • Brown sugar (optional) 

Flavor Booster

Add a cinnamon stick to the jug overnight for extra warmth.

4. Creamy Vanilla Milkshake Slushie Base

For kids who want dessert without the ice cream.

Ingredients

  • 2 cups whole milk 
  • 1 cup half-and-half 
  • 2 tablespoons sugar 
  • 2 teaspoons vanilla 
  • Optional: 1 tablespoon vanilla pudding mix for thickness 

Flavor Booster

Crushed cookies added after slushing.

5. Fruit Punch Party Base

Perfect for gatherings or thirsty teens.

Ingredients

  • 1 cup tropical juice 
  • 1 cup cranberry juice 
  • 1 cup lemonade 
  • Squeeze of lime 
  • 1 tablespoon honey (optional) 

Flavor Booster

Fresh mint added after blending.

How to Store Your Slushie Bases

This makes life so much easier.

  • Use large glass jars or drink bottles 
  • Label each flavour (trust me, everything looks the same at 6pm) 
  • Keep them in the coldest part of your fridge 
  • Shake gently before using 
  • Use within 3–5 days for best freshness 

When You’re Ready for a Slushie

Just pour your cold base into the Ninja Slushie Maker, hit the button, and you’re done.

Cold + flavour + Ninja = perfect every time.

Extra Ninja Slushie Tips

Because once you get the hang of it, you’ll never stop experimenting.

  • Add fresh herbs only after blending 
  • Add citrus before blending for chilled brightness 
  • Don’t oversweeten — flavour dulls slightly when cold 
  • For kids, freeze fruit pieces and stir in after blending 
  • For adults, add your spirit after slushing so texture stays thick


Categories

Baked candy chocolate Christmas cookies Craft Inspirations cupcakes Drinks Easter fruit Fun With Food Halloween Holidays kids More Recipes non-sweets Parties & entertaining Recipes Thanksgiving Valentines Day

9 Ways To Use Zucchini In Your Baked Goods

Christmas Pudding

Frankenstein Rice Krispies Treats

Homemade Hanukkah Gelt

Rose Topped Cupcakes

RSS feed: More Articles More Articles

  • Giant Coloring Pages for Kids and Adults: Free Printables, Posters and Classroom Ideas
  • Cozy Crochet Bauble – A Scrap-Busting Holiday Ornament
  • DIY Gift Tags Using Scrapbooking Supplies You Already Have
  • 5 Elegant Christmas Table Ideas Without Buying Flowers
  • Chaos at the Christmas Knit-Along: A Cosy Knitting Mystery to Watch
  • How To Make A Christmas Lace Bowl From An Old Doily
  • How to Sew a Christmas Stocking: An Easy Beginner Tutorial
  • 10 Handmade Christmas Necklaces That Make Sweet Holiday Gifts
  • Make-Ahead Slushie Bases: Mix Once, Chill All Week
  • Snowflake Quilt Blocks for Winter and Christmas Quilts

Pick Your Blog

  • Sewing
  • Knitting
  • Quilting
  • Crochet
  • Home & Garden
  • Recycled Crafts
  • Scrapbooking
  • Card Making
  • Polymer Clay
  • Cross-Stitch
  • Edible Crafts
  • Felting
  • Glass Art
  • Indie Crafts
  • Kids Crafts
  • Jewelry Making
  • Lesson Plans
  • Needlework
  • Bath & Body
  • Party Ideas
  • Candle Making
  • DIY Weddings
  • Not Craft
  • Free Craft Projects

Explore Edible Crafts

breakfast cake candy chocolate Christmas cookie decorating cookies dessert Easter fruit Halloween Holidays kids lollipop sticks lunch packaging party summer Thanksgiving valentines

Copyright © 2026 · CraftGossip | Start Here | Contact Us | Link to Us | Your Editors | Privacy and affiliate policy