 What fun for…er…kids. Very clever idea from Family Fun. Use a new paintbrush and food colors to paint whatever inspires you on your sandwich. I’m picturing the Mona Lisa on my ham and cheese. (hmmm, wonder how it tastes.)
Have you read?
Pumpkin Man Doughnut Treats With a Free Halloween Printable
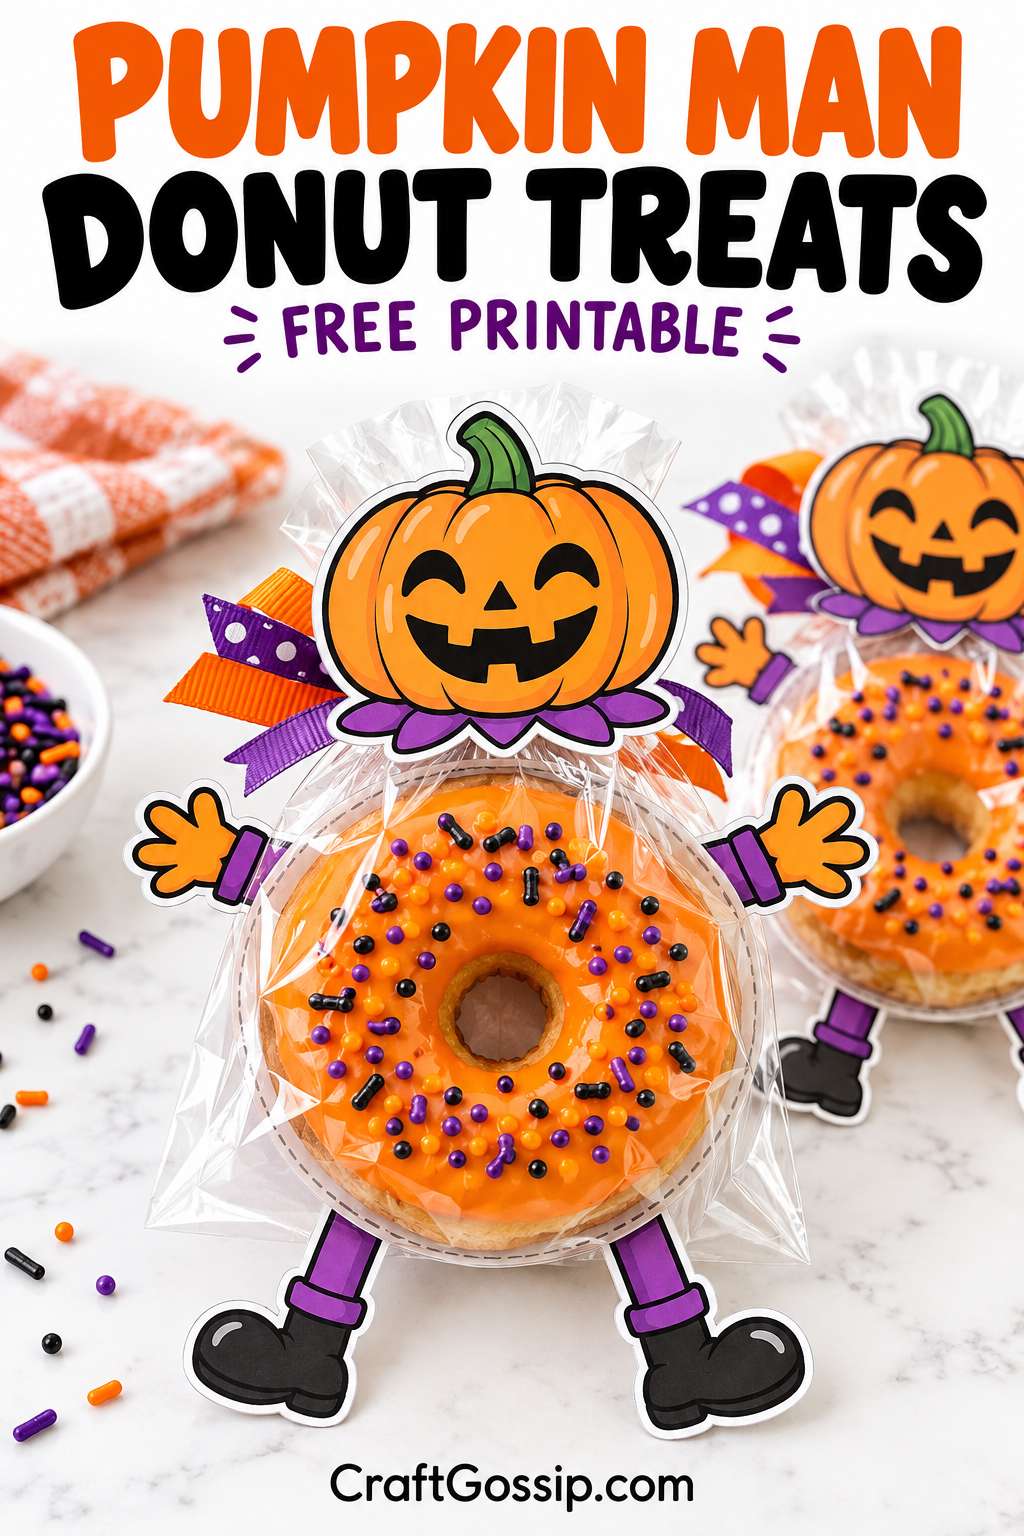
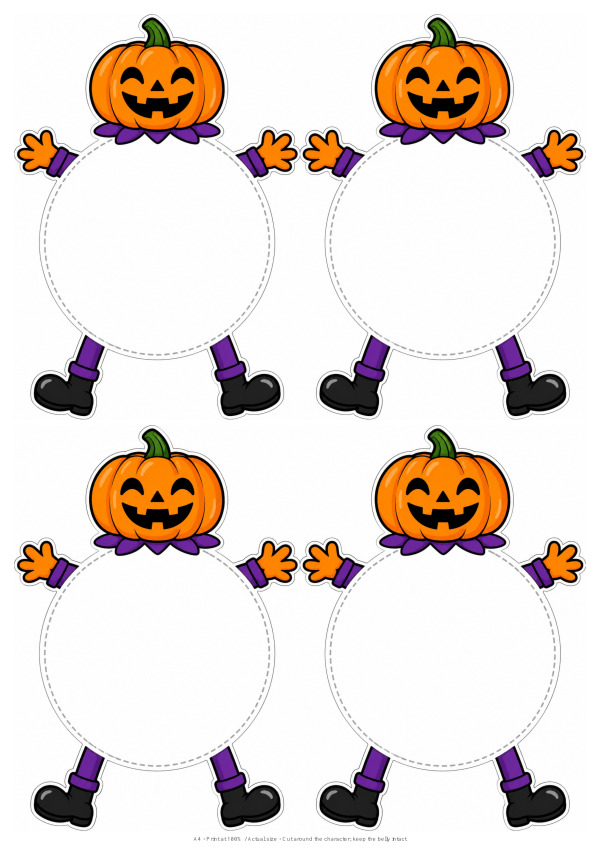
There is something very satisfying about a Halloween treat that looks impressive but takes just a few minutes to put together. These little pumpkin men are exactly that sort of project. Print the characters, cut them out and add a doughnut to each one’s tummy. Suddenly, a simple bakery treat becomes a cheerful Halloween party favour.
The printable features a smiling jack-o’-lantern head, outstretched hands, purple trousers and little black boots. The large round space in the middle is where your doughnut sits, turning it into the pumpkin man’s belly. Orange-iced doughnuts give these treats a particularly festive look, especially with a scattering of black and purple sprinkles.
I love this idea for a Halloween morning tea, a classroom celebration where food treats are permitted, or a little surprise for the grandchildren. It is also a handy option when you want to make something festive without baking a whole batch of decorated cupcakes.
Our free printable has four pumpkin men on one A4 sheet, so you can make several treats without using a stack of paper. Each character has a belly space approximately 8 cm across. Measure your doughnuts before printing a large batch, as bakery sizes vary.
Free Printable pumpkin-man-donut-holders-a4
What You’ll Need
- A4 white cardstock suitable for your printer
- Colour printer
- Scissors
- Four ring doughnuts, approximately 7–8 cm across
- Clear food-safe treat bags large enough to hold your doughnuts
- Clear tape or adhesive dots for attaching the bags to the cardstock
- Optional orange or purple ribbon
- Optional orange icing and Halloween sprinkles, if decorating plain doughnuts
White cardstock gives the characters enough support to hold their shape behind the doughnuts. Ordinary printer paper will work for a quick version, but it may bend once the treat is attached.
Download the Free Pumpkin Man Printable
The sheet contains four matching characters, each approximately 10 cm wide and 14.2 cm tall.
Choose A4 paper and print at 100% or Actual Size. Settings such as “Fit to Page” can shrink the design, making the doughnut space smaller than intended.
Print one test sheet first and place a wrapped doughnut over the belly circle to check the fit.
How to Make Pumpkin Man Doughnut Treats
1. Print the characters
Print the downloaded sheet onto white cardstock using your printer’s colour setting.
Allow the ink to dry before cutting, particularly if you are using an inkjet printer.
2. Cut around each pumpkin man
Cut around the outside of each character, following the pumpkin head, hands, round belly and boots.
Leave the white belly circle intact. It forms the backing for the doughnut. The dashed circle is a placement guide, so there is no need to cut it out.
For younger children, an adult can cut out the characters beforehand and let them help with bagging, positioning and decorating.
3. Prepare your doughnuts
Use ready-made orange-iced doughnuts, or decorate plain ring doughnuts with orange icing and a few Halloween sprinkles.
If you are decorating them yourself, let the icing set before placing them in bags. This helps keep the icing on the doughnuts and makes the packaging much tidier.
Chocolate icing, a simple glaze or cinnamon sugar also work beautifully if you prefer a different finish.
4. Bag the doughnuts
Place each doughnut inside a clear food-safe treat bag. Arrange it so the decorated side faces forward, then close the bag with a twist tie or ribbon.
If the bag is much larger than the doughnut, fold the excess neatly behind it. Keeping the packaging tidy makes the pumpkin man’s hands and boots easier to see.
The doughnut stays inside its bag throughout assembly.
5. Position the doughnut belly
Lay a pumpkin man flat on the table and place the bagged doughnut over the white circle.
Centre it beneath the head, with the boots visible below. The hands should peek out on either side.
A doughnut approximately 7–8 cm across should sit comfortably within the intended space. A slightly smaller one will leave a little white cardstock showing around the edge.
6. Attach the treat bag
Use small loops of clear tape or adhesive dots to secure the outside of the bag to the cardstock backing.
Add the adhesive behind the doughnut where it will be hidden. Gently lift the finished character to check that the bag stays in place.
7. Add a ribbon or tag
An orange ribbon looks lovely against the purple details on the printable. You could also use purple ribbon, black-and-white twine or whatever you already have in your craft supplies.
Position the bag closure and bow behind or just above the pumpkin head so the smiling face stays visible.
For an extra little touch, add a gift tag with one of these messages:
- “Happy Halloween!”
- “Donut be scared!”
- “A little treat for my favourite pumpkin.”
- “Have a sweet Halloween!”
Which Doughnuts Work Best?
The printable is designed around a doughnut approximately 7–8 cm in diameter, rather than a particular brand or bakery size.
Orange-iced ring doughnuts create the pumpkin-inspired look shown in our mockup. Chocolate iced doughnuts make a lovely contrast with the orange head, while plain glazed doughnuts keep the project especially simple.
Choose doughnuts that sit reasonably flat in their bags. Very tall toppings or soft decorations can be harder to package neatly.
For larger doughnuts, enlarge the printable and use fewer characters per sheet. Check the print preview carefully, as enlarging the four-character layout may crop the designs.
Can I Make These Ahead of Time?
You can print and cut the pumpkin men ahead of your celebration, then keep them flat until you are ready to assemble the treats.
Add the wrapped doughnuts closer to serving so they stay fresh. Follow the bakery’s storage instructions, particularly for doughnuts with fillings or toppings that need refrigeration.
If you are making these with children, having the cutouts ready turns the project into a quick activity. They can choose ribbon colours, write gift tags and help position the doughnuts on the pumpkin backing.
Easy Ways to Use Your Pumpkin Men
Arrange the finished treats flat on a platter for a Halloween breakfast, place one at each party setting or hand them out as individual favours. You can also write a name on the back of each character.
For a classroom activity, check the school’s food and allergy requirements before bringing treats. The printed characters can be prepared in advance to make assembly easier.
These would also make a lovely little Halloween delivery for friends or family. Pack them flat in a shallow box so the paper hands and boots stay neat on the journey.
A cheerful pumpkin face, a pair of little boots and an orange doughnut tummy are all this project needs. Whether you are making four for the family or a whole tray for a Halloween gathering, it is a playful way to dress up a simple treat.