• Home
  • Suggest A DIY
  • DIY Newsletter

Edible Crafts

Creative food craft ideas

  • About CraftGossip
  • Our Network
    • Bath & Body Crafts
    • Candle Making Ideas
    • Crochet Ideas
    • Cross Stitch
    • Edible Crafts
    • Felting Patterns
    • Glass Art
    • Home & Garden Ideas
    • Indie Crafts
    • Jewelry Making
    • Kids Crafts
    • Knitting Patterns
    • Lesson Plans
    • Needlework
    • Party Ideas
    • Polymer Clay
    • Quilting Ideas
    • Recycled Crafts
    • Scrapbooking
    • Sewing Patterns
    • Card Making
    • DIY Weddings
    • Not Craft Ideas
  • Giveaways
  • Roundups
  • Store
  • Search

Lace Heart Pancakes For A Romantic Breakfast

February 14, 2014 by Carolyn Bickford

Lace Pancakes

Happy Valentine’s Day!

I hope Mother Nature hasn’t hampered your ability to get items for Valentine’s Day. You still have the whole weekend to spoil your loved ones! Here is a cute idea for breakfast on Valentine’s Day or any day of the year!

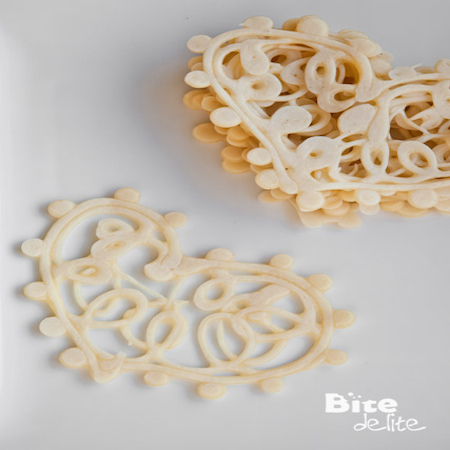
Bite Delite gives you the recipe and shows how to make these cute and yet beautiful pancakes. Reminds me of the funnel cakes you get at the fair, but with a little more elegance. I would make a couple of these to place on top of the regular pancakes.

Making lace heart pancakes is such a fun and creative way to add a personal touch to your breakfast, especially for special occasions like Valentine’s Day. However, they do require a bit of patience and practice to get just right. Here are some tips and tricks to help you master the art of lace heart pancakes:

1. Use a Squeeze Bottle for Precision

For the best lace design, you’ll want to use a squeeze bottle or a piping bag. This allows you to control the flow of batter and create those delicate, intricate lace patterns. It might take a little trial and error, but once you get the hang of it, you’ll be able to create beautiful, detailed designs.

2. Low and Slow Is the Key

Patience is essential when making lace pancakes. Cook your pancakes on a low heat to ensure that the batter has time to cook through without burning. If you cook them too quickly, the intricate lacework will burn before the pancake has fully cooked. Give it time to set and bubble up before flipping.

3. Don’t Rush the Flipping

Flipping these delicate pancakes can be tricky! Wait until the edges of the lace are firm and the center has set before flipping. This will help ensure the design stays intact. A good rule of thumb is to let the pancakes cook on the first side for about 2-3 minutes, then gently slide a spatula under the pancake to check if it’s ready to flip.

4. Use a Non-Stick Pan

A non-stick pan makes a huge difference here. The delicate lacework needs a smooth surface to cook evenly, and a non-stick surface helps avoid any sticking or tearing of your pancake design. Make sure to lightly grease your pan before starting to prevent sticking.

5. Patience, Patience, Patience

Making lace heart pancakes requires time and patience, especially if you’re new to pancake art. Don’t get frustrated if your first few attempts don’t turn out as expected. It’s all about learning how to control the heat, the batter flow, and the timing. It might take a couple of tries before you’re creating picture-perfect pancakes, but keep practicing, and you’ll get there!

Related Posts:

  • 30 Make Ahead Easy Brunch Ideas
  • 18 Healthy Breakfast Recipes for 2026
«
»

Have you read?

How to Make Thick Yoghurt Smoothie Bowls in the Ninja Slushie Maker

A quick, creamy breakfast with fresh fruit added on top

Smoothie bowls are one of those beautiful breakfasts that feel healthy and a little indulgent at the same time. Thick, cold, creamy, and pretty enough that you almost don’t want to eat them… almost.

The Ninja Slushie Maker takes all the effort out of it.
Instead of dealing with frozen fruit bricks or blenders that complain loudly, you simply mix your yoghurt base, chill it, and let the Ninja turn it into the perfect thick smoothie-bowl texture — no ice required.

If you are like me and come addicted to these smoothie bowls then you will want to invest in these double walled bowls, this is my favorite brand and these have been great. 

Then you top it with your fresh fruit afterwards so the bowl stays thick, cold, and spoon-worthy.

It’s easy, quick, and a lovely way to start the day.

Why Yoghurt Works So Well in the Ninja Slushie Maker

Yoghurt freezes into a silky, firm slush — similar to soft-serve but healthier and lighter. Because the machine creates the icy texture itself (instead of relying on ice cubes), the mixture never becomes watery or gritty.

Just smooth, cold, creamy perfection you can decorate to your heart’s content.

The Basic Yoghurt Slush Base

Once you learn this base recipe, you can create endless flavour combinations.

Ingredients

  • 2 cups plain or Greek yoghurt, chilled 
  • ½–1 cup milk of your choice (just enough to loosen the mixture) 
  • 1–3 tablespoons honey or maple syrup (optional) 
  • 1 teaspoon vanilla extract (optional) 

Method

  1. Stir all ingredients together until smooth. 
  2. Chill the mixture in the fridge until very cold. 
  3. Pour the chilled mixture into the Ninja Slushie Maker. 
  4. Blend on the slush setting until thick, creamy, and icy. 
  5. Spoon into a bowl and add your fruit and toppings. 

This base has enough body to hold granola, berries, and nut butter without sinking.

Topping Ideas (Add These After Blending)

Fresh Fruit

  • Strawberries 
  • Blueberries 
  • Banana slices 
  • Mango 
  • Kiwi 
  • Peaches 

Crunchy Toppers

  • Granola 
  • Toasted coconut 
  • Chopped nuts 
  • Cacao nibs 

Extras

  • Honey drizzle 
  • Peanut butter 
  • Chia seeds 
  • Freeze-dried fruit crumbs 

Easy Flavour Variations

Berries & Cream Smoothie Bowl

Use vanilla yoghurt as your base. Top with raspberries, strawberries, and a sprinkle of granola.

Tropical Coconut Bowl

Add a splash of coconut milk to the base. Top with mango, pineapple, kiwi, and toasted coconut flakes.

Chocolate Yoghurt Bowl

Mix 1 tablespoon cocoa powder or chocolate protein powder into the base. Top with banana slices and a peanut-butter drizzle.

Meal-Prep Tip

Prepare the yoghurt base the night before and store it in small jars.
In the morning, just pour one jar directly into the Ninja Slushie Maker and you’ve got a thick, cold, ready-to-top breakfast in minutes.


Categories

Baked candy chocolate Christmas cookies Craft Inspirations cupcakes Drinks Easter fruit Fun With Food Halloween Holidays kids More Recipes non-sweets Parties & entertaining Recipes Thanksgiving Valentines Day

Rudolph Candy Bars

Halloween Pancake Ideas For Fun Party Food

Ham and Cheese Acorn Sandwiches

Sweet Designs by Amy Atlas Giveaway!

More Ideas for Halloween Leftovers

RSS More Articles

  • Cross Stitch Ice Cream and Frozen Treats
  • 15 Charity Sewing Projects That Let You Sew Something Useful For A Good Cause
  • Sunflower Ribbon Embroidery Tutorials and Kits to Brighten Your Hoop
  • Decorating Mistakes That Make Your Living Room Feel Cluttered
  • Remembering Jill Smokler, Founder Of Scary Mommy
  • In the Garden Layer Cake – A Bloom-Filled Fabric Collection for Spring Sewing
  • How To Do Kitchener Stitch: A Beginner-Friendly Guide To Grafting Knitting Seamlessly
  • Pattern Review: Georgie Granny Square Bucket Hat Crochet Pattern
  • 12 Handmade Patriotic 4th of July Card Ideas
  • Shark Week Learning for Kids

Pick Your Blog

  • Sewing
  • Knitting
  • Quilting
  • Crochet
  • Home & Garden
  • Recycled Crafts
  • Scrapbooking
  • Card Making
  • Polymer Clay
  • Cross-Stitch
  • Edible Crafts
  • Felting
  • Glass Art
  • Indie Crafts
  • Kids Crafts
  • Jewelry Making
  • Lesson Plans
  • Needlework
  • Bath & Body
  • Party Ideas
  • Candle Making
  • DIY Weddings
  • Not Craft
  • Free Craft Projects

Explore Edible Crafts

breakfast cake candy chocolate Christmas cookie decorating cookies dessert Easter fruit Halloween Holidays kids lollipop sticks lunch packaging party summer Thanksgiving valentines

Copyright © 2026 · CraftGossip | Start Here | Contact Us | Link to Us | Your Editors | Privacy and affiliate policy