• Home
  • Suggest A DIY
  • DIY Newsletter

Edible Crafts

Creative food craft ideas

  • About CraftGossip
  • Our Network
    • Bath & Body Crafts
    • Candle Making Ideas
    • Crochet Ideas
    • Cross Stitch
    • Edible Crafts
    • Felting Patterns
    • Glass Art
    • Home & Garden Ideas
    • Indie Crafts
    • Jewelry Making
    • Kids Crafts
    • Knitting Patterns
    • Lesson Plans
    • Needlework
    • Party Ideas
    • Polymer Clay
    • Quilting Ideas
    • Recycled Crafts
    • Scrapbooking
    • Sewing Patterns
    • Card Making
    • DIY Weddings
    • Not Craft Ideas
  • Giveaways
  • Roundups
  • Store
  • Search

Halloween Party Food – Monster Cupcakes

August 25, 2017 by Shellie Wilson

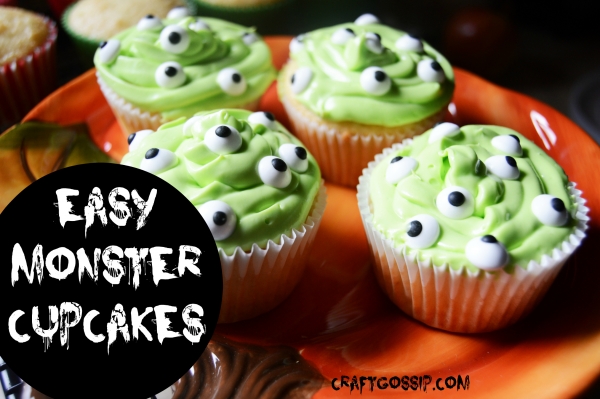
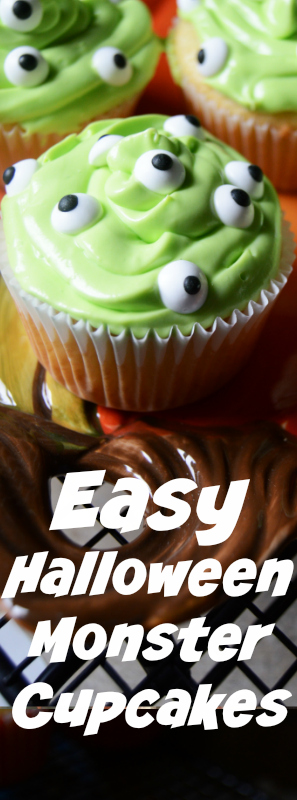
These Monster cupcakes are perfect for Halloween parties and Halloween lunch box ideas. You can make them really quickly which means you can make them in big batches for your Halloween party food.

Hosting a Halloween Party? Check out these Halloween Party Decorations or maybe you want to download and print your own Halloween designs? Check out these Halloween printables, digital stamps, invitations and files from Design bundles.

Ingredients:

White Cake Mix
White Frosting
Neon Green Food Coloring
Candy Eyes


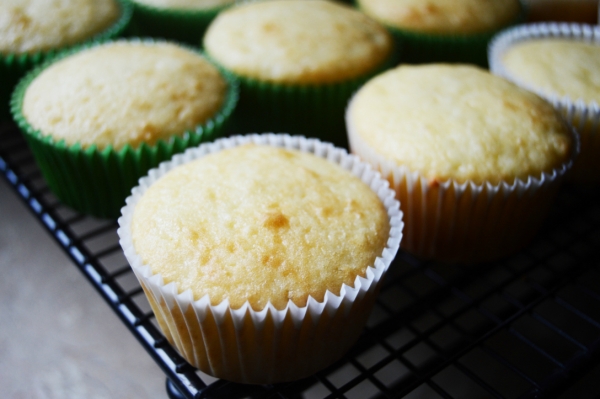
Bake your cupcakes as directed on the package. Use fun colored cupcake liners. You can use Halloween themed ones to make them spooky, or you can keep them bright and fun for a more kid-friendly version. Allow your cupcakes to cool, before frosting them.
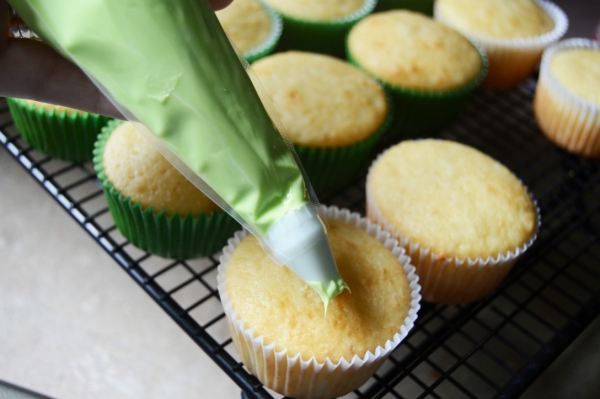
Mix the white frosting with a generous amount of neon green food coloring. We used gel food coloring, because liquid can sometimes thin the frosting too much, making it difficult to frost the cupcakes. Mix the frosting well, to ensure there are no white streaks. You could also make your monsters different colors if you wanted to mix it up as well!


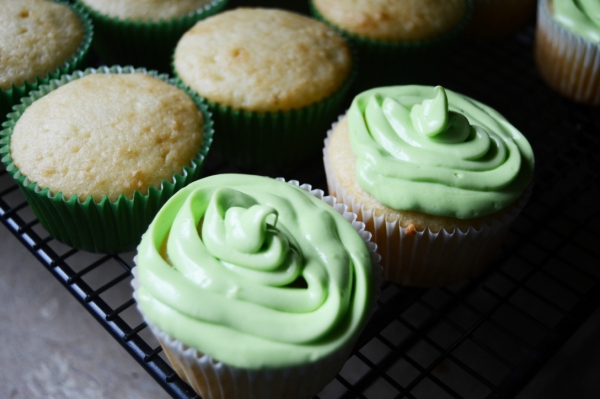
Frost your cupcakes using a large tip frosting applicator. This recipe is the perfect treat for those who don’t feel they can make perfect frosting swirls, because you intentionally need to leave gas in the swirls and make them uneven, so they give off a monster feel.
 

Sprinkle 8-10 of the candy eyes on top of the frosting on the cupcakes. Spread out the eyes and leave plenty of space in between each eye, so the person eating the cupcake doesn’t get a mouthful of sprinkles. Feel free to make them face different directions, they’re monster eyes!
 

Store your Monster Cupcakes in an air-tight container until they’re ready to eat, Your cupcakes will stay soft for 3-5 days, so you can make them in advance for your next party or function. Each box of cake should make 24 Monster Cupcakes.
«
»

Have you read?

I Tried Biscoff Millionaire’s Shortbread and OMG—It’s Better Than Caramel

If you thought Millionaire’s Shortbread couldn’t get any more indulgent, let me introduce you to my latest obsession: Biscoff Millionaire’s Shortbread. It takes the classic buttery shortbread base, swaps out the caramel for creamy cookie butter, and tops it all off with smooth chocolate. The result? A decadent traybake that tastes like a million bucks—without the effort.

I’ve always had a thing for Biscoff spread (okay, obsession might be more accurate). Pairing it with crumbly shortbread and rich chocolate just made sense. The spiced caramel notes of the cookie butter balance perfectly with the sweetness of the chocolate, making every bite a little piece of heaven.

Why You’ll Love This Recipe

  • Three dreamy layers – buttery shortbread, creamy Biscoff, and rich chocolate. 
  • No candy thermometer required – easier than classic caramel shortbread. 
  • Crowd-pleaser – perfect for bake sales, coffee breaks, or gifting. 
  • Customizable – add sea salt flakes, white chocolate drizzle, or extra crushed biscuits on top. 

Ingredients

For the Shortbread Base:

  • 250g (2 cups) all-purpose flour 
  • 175g (¾ cup) unsalted butter (softened) 
  • 75g (? cup) sugar 
  • Pinch of salt 

For the Biscoff Layer:

  • 300g (about 1¼ cups) Biscoff spread (smooth or crunchy) 

For the Chocolate Topping:

  • 250g (9 oz) milk chocolate (or dark chocolate for a richer taste) 
  • 1 tbsp vegetable oil or butter (to help with a smooth set) 
  • Optional: crushed Biscoff biscuits or sea salt flakes for topping 

Method

Step 1 – Make the Shortbread

  1. Preheat oven to 180°C / 350°F. 
  2. In a bowl, cream butter and sugar until light and fluffy. 
  3. Mix in flour and salt until a soft dough forms. 
  4. Press dough evenly into a lined 8×8-inch (20x20cm) baking tin. 
  5. Prick with a fork and bake for 20–25 minutes until lightly golden. 
  6. Allow to cool completely in the tin. 

Step 2 – Add the Biscoff Layer

  1. Warm Biscoff spread slightly in the microwave (10–15 seconds) until pourable. 
  2. Spread evenly over the cooled shortbread base. 
  3. Place tin in the fridge for at least 30 minutes to firm up. 

Step 3 – Finish with Chocolate

  1. Melt chocolate with oil/butter until smooth. 
  2. Pour over the chilled Biscoff layer and smooth with a spatula. 
  3. While still soft, sprinkle with crushed biscuits or sea salt (if using). 
  4. Chill for another 1–2 hours until fully set. 

Step 4 – Slice & Serve

  • Use a sharp knife dipped in hot water (wipe clean between cuts) to slice clean squares. 
  • Serve with coffee, wrap as gifts, or hide them for your own secret stash—I won’t judge. 

Tips for Perfect Layers

  • Patience is key – let each layer chill properly before adding the next. 
  • For clean cuts – score the chocolate layer lightly before it fully sets. 
  • Switch up the chocolate – try white chocolate for a sweeter version, or a half-and-half swirl for a marbled effect. 

Where to Get Biscoff

Don’t have Biscoff spread at home? Grab a jar of Biscoff on Amazon for convenience, or whip up your own Homemade Cookie Butter Recipe.

This Biscoff Millionaire’s Shortbread is rich, indulgent, and dangerously addictive. With its buttery base, silky cookie butter filling, and glossy chocolate topping, it’s the kind of bake that never lasts long in my kitchen. One bite and you’ll see why I’m calling this the ultimate twist on a classic.


Categories

Baked candy chocolate Christmas cookies Craft Inspirations cupcakes Drinks Easter fruit Fun With Food Halloween Holidays kids More Recipes non-sweets Parties & entertaining Recipes Thanksgiving Valentines Day

CheeriOs Jewelry

leopard print easter egg

Leopard Print Easter Eggs

Wonder Woman Party

Red Velvet for Valentine’s Day

Halloween Candy Tree

RSS More Articles

  • DIY Margarita Face Scrub – A Zesty Skincare Treat for Glowing Summer Skin
  • Gourds to Stitch for Harvest Time
  • 10 Halloween Scrapbook Layout Templates with Fun Shape-Based Designs
  • Book Review – Needle Felting Miniatures for Beginners
  • Add Mushrooms to Your Knits with these Fun Knitting Patterns
  • Weekly Precut Fabrics For Quilting Inspiration
  • I Tried Biscoff Millionaire’s Shortbread and OMG—It’s Better Than Caramel
  • Girls Crochet Handbags – A Sweet Little Crochet Bag Pattern With Vintage Charm
  • 45 Genius Ways to Upcycle a World Globe, That Will Spin You Right Out
  • Barrel Pants for Women: 12 Summer Bottoms Sewing Patterns

Pick Your Blog

  • Sewing
  • Knitting
  • Quilting
  • Crochet
  • Home & Garden
  • Recycled Crafts
  • Scrapbooking
  • Card Making
  • Polymer Clay
  • Cross-Stitch
  • Edible Crafts
  • Felting
  • Glass Art
  • Indie Crafts
  • Kids Crafts
  • Jewelry Making
  • Lesson Plans
  • Needlework
  • Bath & Body
  • Party Ideas
  • Candle Making
  • DIY Weddings
  • Not Craft
  • Free Craft Projects

Explore Edible Crafts

breakfast cake candy chocolate Christmas cookie decorating cookies dessert Easter fruit Halloween Holidays kids lollipop sticks lunch packaging party summer Thanksgiving valentines

Copyright © 2026 · CraftGossip | Start Here | Contact Us | Link to Us | Your Editors | Privacy and affiliate policy