• Home
  • Suggest A DIY
  • DIY Newsletter

Edible Crafts

Creative food craft ideas

  • About CraftGossip
  • Our Network
    • Bath & Body Crafts
    • Candle Making Ideas
    • Crochet Ideas
    • Cross Stitch
    • Edible Crafts
    • Felting Patterns
    • Glass Art
    • Home & Garden Ideas
    • Indie Crafts
    • Jewelry Making
    • Kids Crafts
    • Knitting Patterns
    • Lesson Plans
    • Needlework
    • Party Ideas
    • Polymer Clay
    • Quilting Ideas
    • Recycled Crafts
    • Scrapbooking
    • Sewing Patterns
    • Card Making
    • DIY Weddings
    • Not Craft Ideas
  • Giveaways
  • Roundups
  • Store
  • Search

Halloween Monster Chocolate Oreos

October 9, 2020 by Shellie Wilson

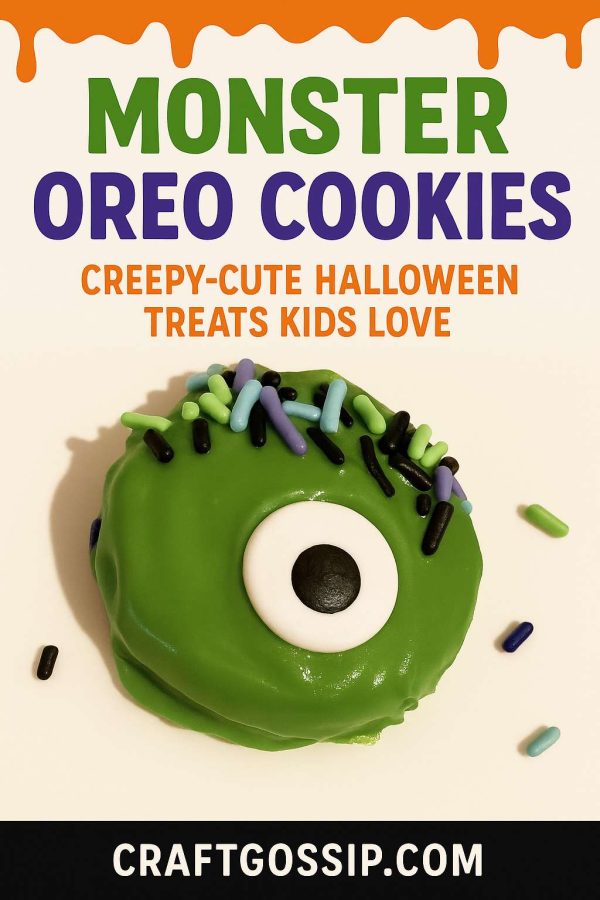
Looking for a spooky yet sweet treat to wow your Halloween party guests? These Halloween Monster Chocolate Oreos are the ultimate no-bake dessert that’s as fun to make as it is to eat. With their bright green candy coating, candy eyeballs, and colorful Halloween sprinkles, they transform ordinary Oreos into creepy-cute monsters perfect for kids and adults alike. Whether you’re planning a school party, hosting a neighborhood gathering, or just want a festive snack for movie night, these monster cookies check all the boxes—easy, affordable, and irresistibly delicious. Plus, they’re an ideal make-ahead Halloween dessert that doubles as a fun family activity in the kitchen.

I cannot tell you how excited I was for Halloween this year! Ahhh… a deserved break from the terror of 2020. Unfortunately, it looks like plans are off for this year.

But… we don’t have to completely forgo the excitement of the spooky season. Stay in, bake some treats, and watch a scary movie. Halloween – but without the sore legs from walking miles for candy!

This recipe is scrumptious and a good one to enlist the kiddos for. Create a production line to keep the fun going and let everyone do their own job. The kids will love personalising their own monster oreo – and probably enjoy eating them too!

Ingredients:
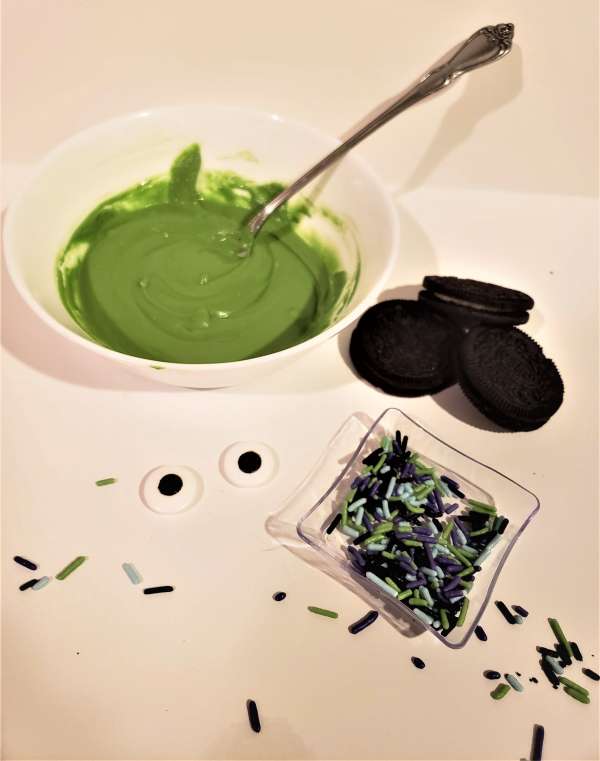
? Oreo’s (any size will do)
? Melting Chocolate – Green
? Candy Eye’s (any size)
? Sprinkles in your choice of colors
? Edible pen or black gel
Additional Tools Needed:
? Wax or parchment paper
? Glass bowl
? Fork and spoon

Directions:
1. Place the candy melts in a microwave safe bowl. Microwave in 20-30 second increments
until melted, stirring occasionally. **The chocolate can sometimes be temperamental so
be sure to watch for any signs of burning**


2. Use a fork to dip each Oreo in the chocolate. Gently tap the fork against the side of the
bowl to remove any excess chocolate from the Oreos. * You can also use a spoon to
make sure all areas of the Oreo are coated thoroughly. **


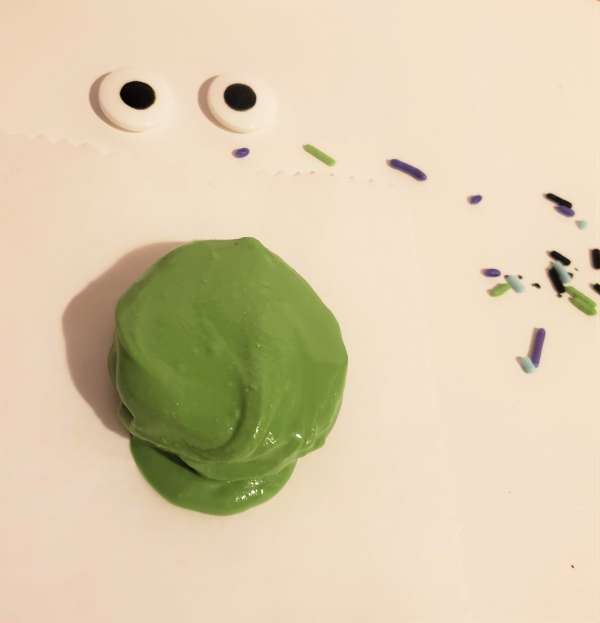
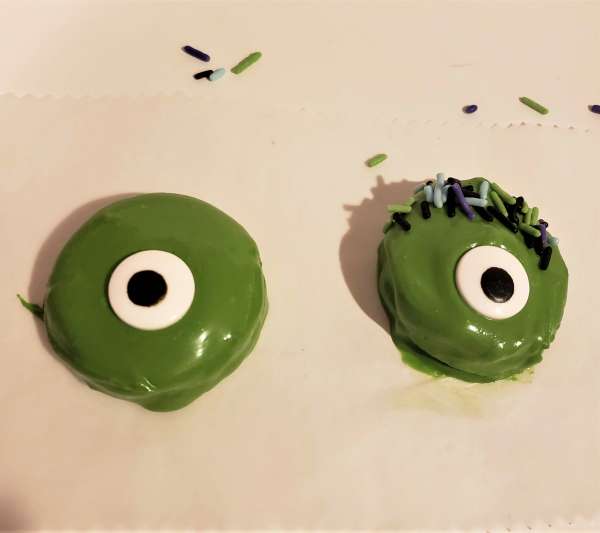
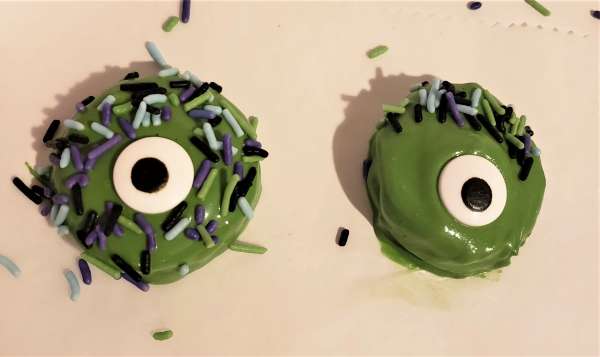
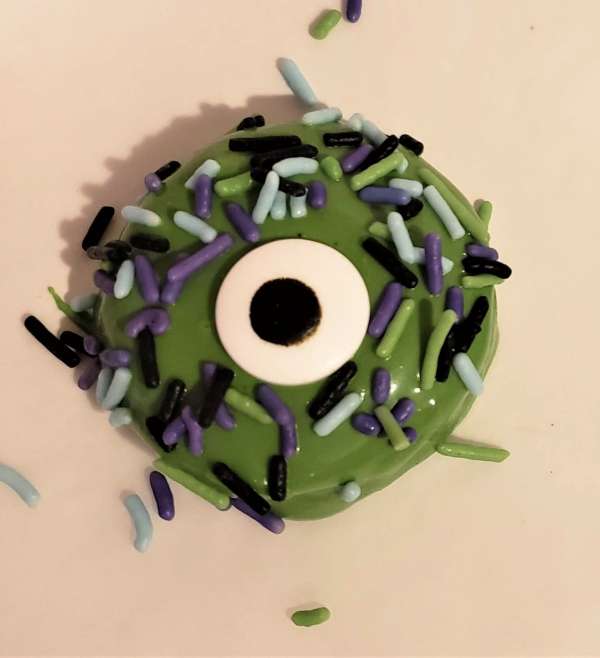
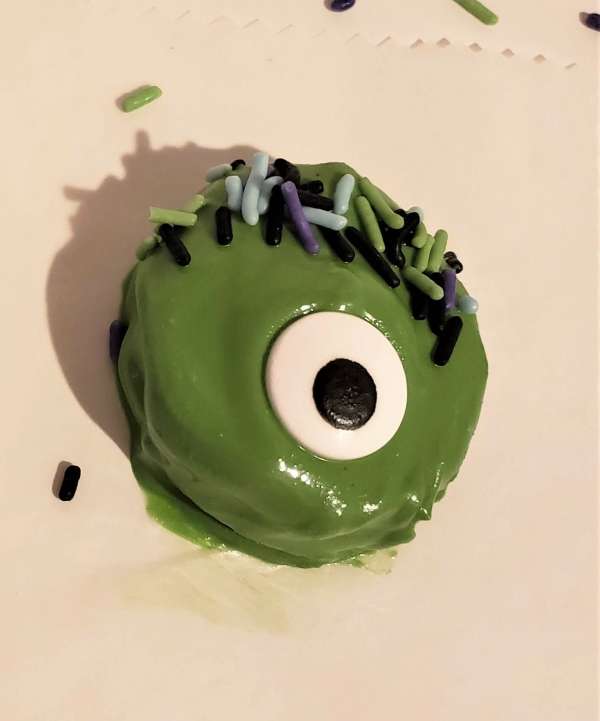
3. Place the Oreos on a sheet of wax or parchment paper. Place eye or eye’s in the middle
of the Oreo. Add sprinkles to the top of each Oreo or all over depending on the look you
are going trying to achieve.


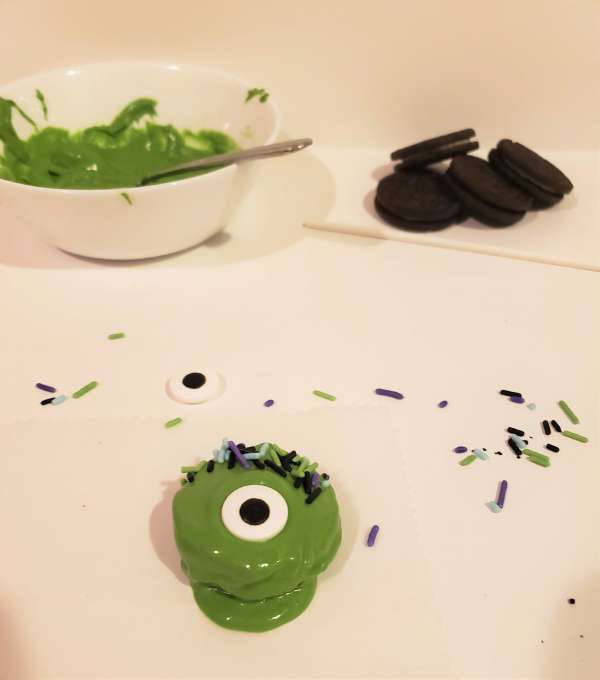
4. Let the cookies sit until completely dry.


5. Serve, or store in an airtight container for up to 2 weeks.

Related Posts:

  • 30 Vegetarian Recipes For The Airfryer
  • 35 Make Ahead Christmas Brunch Ideas
«
»

Have you read?

How to Make Thick Yoghurt Smoothie Bowls in the Ninja Slushie Maker

A quick, creamy breakfast with fresh fruit added on top

Smoothie bowls are one of those beautiful breakfasts that feel healthy and a little indulgent at the same time. Thick, cold, creamy, and pretty enough that you almost don’t want to eat them… almost.

The Ninja Slushie Maker takes all the effort out of it.
Instead of dealing with frozen fruit bricks or blenders that complain loudly, you simply mix your yoghurt base, chill it, and let the Ninja turn it into the perfect thick smoothie-bowl texture — no ice required.

If you are like me and come addicted to these smoothie bowls then you will want to invest in these double walled bowls, this is my favorite brand and these have been great. 

Then you top it with your fresh fruit afterwards so the bowl stays thick, cold, and spoon-worthy.

It’s easy, quick, and a lovely way to start the day.

Why Yoghurt Works So Well in the Ninja Slushie Maker

Yoghurt freezes into a silky, firm slush — similar to soft-serve but healthier and lighter. Because the machine creates the icy texture itself (instead of relying on ice cubes), the mixture never becomes watery or gritty.

Just smooth, cold, creamy perfection you can decorate to your heart’s content.

The Basic Yoghurt Slush Base

Once you learn this base recipe, you can create endless flavour combinations.

Ingredients

  • 2 cups plain or Greek yoghurt, chilled 
  • ½–1 cup milk of your choice (just enough to loosen the mixture) 
  • 1–3 tablespoons honey or maple syrup (optional) 
  • 1 teaspoon vanilla extract (optional) 

Method

  1. Stir all ingredients together until smooth. 
  2. Chill the mixture in the fridge until very cold. 
  3. Pour the chilled mixture into the Ninja Slushie Maker. 
  4. Blend on the slush setting until thick, creamy, and icy. 
  5. Spoon into a bowl and add your fruit and toppings. 

This base has enough body to hold granola, berries, and nut butter without sinking.

Topping Ideas (Add These After Blending)

Fresh Fruit

  • Strawberries 
  • Blueberries 
  • Banana slices 
  • Mango 
  • Kiwi 
  • Peaches 

Crunchy Toppers

  • Granola 
  • Toasted coconut 
  • Chopped nuts 
  • Cacao nibs 

Extras

  • Honey drizzle 
  • Peanut butter 
  • Chia seeds 
  • Freeze-dried fruit crumbs 

Easy Flavour Variations

Berries & Cream Smoothie Bowl

Use vanilla yoghurt as your base. Top with raspberries, strawberries, and a sprinkle of granola.

Tropical Coconut Bowl

Add a splash of coconut milk to the base. Top with mango, pineapple, kiwi, and toasted coconut flakes.

Chocolate Yoghurt Bowl

Mix 1 tablespoon cocoa powder or chocolate protein powder into the base. Top with banana slices and a peanut-butter drizzle.

Meal-Prep Tip

Prepare the yoghurt base the night before and store it in small jars.
In the morning, just pour one jar directly into the Ninja Slushie Maker and you’ve got a thick, cold, ready-to-top breakfast in minutes.


Categories

Baked candy chocolate Christmas cookies Craft Inspirations cupcakes Drinks Easter fruit Fun With Food Halloween Holidays kids More Recipes non-sweets Parties & entertaining Recipes Thanksgiving Valentines Day

Olympic Rings Candy Favors

Avengers-Themed Party Food

Vegetable Chickpea Pot Pie

Pinata Cookies? Go Bigger. Pinata Cake.

Pea Pod Baby Shower Cookies

RSS More Articles

  • FIFA Soccer Crafts For Kids, Crochet Fans And Game-Day Makers
  • Cross Stitch Ice Cream and Frozen Treats
  • Sunflower Ribbon Embroidery Tutorials and Kits to Brighten Your Hoop
  • 15 Charity Sewing Projects That Let You Sew Something Useful For A Good Cause
  • Decorating Mistakes That Make Your Living Room Feel Cluttered
  • Remembering Jill Smokler, Founder Of Scary Mommy
  • In the Garden Layer Cake – A Bloom-Filled Fabric Collection for Spring Sewing
  • How To Do Kitchener Stitch: A Beginner-Friendly Guide To Grafting Knitting Seamlessly
  • Pattern Review: Georgie Granny Square Bucket Hat Crochet Pattern
  • Free Giant Squishy Octopus Crochet Pattern

Pick Your Blog

  • Sewing
  • Knitting
  • Quilting
  • Crochet
  • Home & Garden
  • Recycled Crafts
  • Scrapbooking
  • Card Making
  • Polymer Clay
  • Cross-Stitch
  • Edible Crafts
  • Felting
  • Glass Art
  • Indie Crafts
  • Kids Crafts
  • Jewelry Making
  • Lesson Plans
  • Needlework
  • Bath & Body
  • Party Ideas
  • Candle Making
  • DIY Weddings
  • Not Craft
  • Free Craft Projects

Explore Edible Crafts

breakfast cake candy chocolate Christmas cookie decorating cookies dessert Easter fruit Halloween Holidays kids lollipop sticks lunch packaging party summer Thanksgiving valentines

Copyright © 2026 · CraftGossip | Start Here | Contact Us | Link to Us | Your Editors | Privacy and affiliate policy