• Home
  • Suggest A DIY
  • DIY Newsletter

Edible Crafts

Creative food craft ideas

  • About CraftGossip
  • Our Network
    • Bath & Body Crafts
    • Candle Making Ideas
    • Crochet Ideas
    • Cross Stitch
    • Edible Crafts
    • Felting Patterns
    • Glass Art
    • Home & Garden Ideas
    • Indie Crafts
    • Jewelry Making
    • Kids Crafts
    • Knitting Patterns
    • Lesson Plans
    • Needlework
    • Party Ideas
    • Polymer Clay
    • Quilting Ideas
    • Recycled Crafts
    • Scrapbooking
    • Sewing Patterns
    • Card Making
    • DIY Weddings
    • Not Craft Ideas
  • Giveaways
  • Roundups
  • Store
  • Search

General Mills Monster Cereals

September 22, 2014 by Carolyn Bickford

Monsters Collage
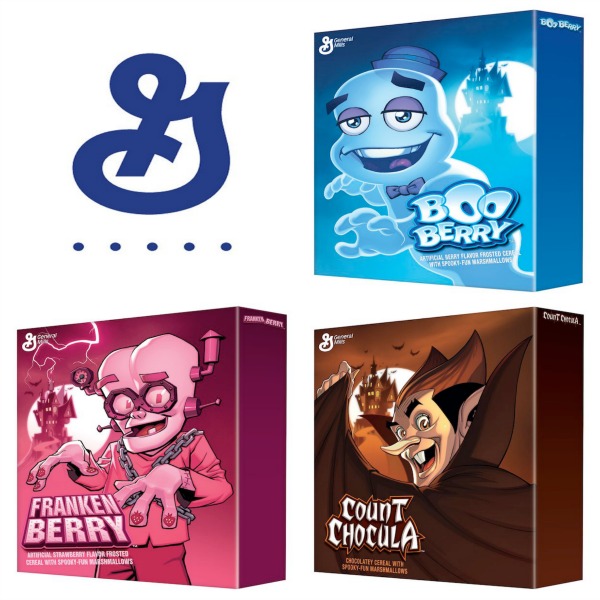
Do you love the classic Monster Cereals featuring Boo Berry, Franken Berry and Count Chocula? How about DC Comics? Well then you are in luck for 2014, 3 DC Comic artists from DC Entertainment joined forces with General Mills to give these monsters a new look. This is a limited edition collector’s item that is only available through Halloween this year. Not only do the Monsters have a new look, the artists even created a unique comic strip for each monster on the back.

Jim Lee created the new look for Boo Berry, Dave Johnson created the look for Franken Berry and Terry and Rachel Dodson collaborated on Count Chocula’s look.

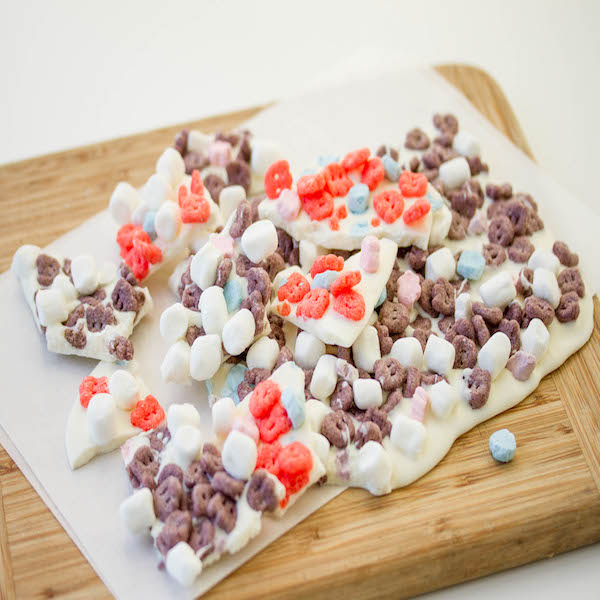
If you can handle opening the box give this recipe a try using the Boo Berry Cereal:
Boo Berry™ Bark

Boo-Berry-Bark

Prep Time: 20 min
Start to Finish: 1 Hr 20 Min

16 oz white chocolate baking bars or vanilla-flavored candy coating (almond bark)
2 cups desired monster cereal (such as Boo Berry™, Franken Berry™ and/or Count Chocula™)
1 cup miniature marshmallows

—————

1. Line cookie sheet with waxed paper.

2. Break white chocolate into small pieces into medium microwavable bowl. Microwave uncovered on High about 2 minutes, stirring after each minute, until almost melted. Stir until smooth. Spread on cookie sheet to 1/4-inch thickness, about a 13×9-inch rectangle.

3. Immediately top with cereal and marshmallows; press into melted chocolate. Let stand about 1 hour, or refrigerate about 30 minutes or until firm. Break into 2-inch pieces. Store tightly covered at room temperature.

40 servings

1 Serving: Calories 70 (Calories from Fat 35); Total Fat 3.5g (Saturated Fat 2.5g, Trans Fat 0g); Cholesterol 0mg; Sodium 20mg; Total Carbohydrate 9g (Dietary Fiber 0g, Sugars 1g); Protein 1g

% Daily Value: Vitamin A 0%; Vitamin C 0%; Calcium 2%; Iron 0%

Exchanges: 1/2 Starch, 1/2 Fat

Carbohydrate Choices: 1/2

Run to the stores quickly! This is available in the US and some Canadian Stores.

“Disclosure: The product, giveaway samples and information have been provided by General Mills. All opinions are my own.”

Related Posts:

  • 20 Festive Things to Make with Canned Crescent Roll Dough
  • 25 Easy Halloween Party Food Ideas Everyone Will Love
«
»

Have you read?

How to Make Thick Yoghurt Smoothie Bowls in the Ninja Slushie Maker

A quick, creamy breakfast with fresh fruit added on top

Smoothie bowls are one of those beautiful breakfasts that feel healthy and a little indulgent at the same time. Thick, cold, creamy, and pretty enough that you almost don’t want to eat them… almost.

The Ninja Slushie Maker takes all the effort out of it.
Instead of dealing with frozen fruit bricks or blenders that complain loudly, you simply mix your yoghurt base, chill it, and let the Ninja turn it into the perfect thick smoothie-bowl texture — no ice required.

If you are like me and come addicted to these smoothie bowls then you will want to invest in these double walled bowls, this is my favorite brand and these have been great. 

Then you top it with your fresh fruit afterwards so the bowl stays thick, cold, and spoon-worthy.

It’s easy, quick, and a lovely way to start the day.

Why Yoghurt Works So Well in the Ninja Slushie Maker

Yoghurt freezes into a silky, firm slush — similar to soft-serve but healthier and lighter. Because the machine creates the icy texture itself (instead of relying on ice cubes), the mixture never becomes watery or gritty.

Just smooth, cold, creamy perfection you can decorate to your heart’s content.

The Basic Yoghurt Slush Base

Once you learn this base recipe, you can create endless flavour combinations.

Ingredients

  • 2 cups plain or Greek yoghurt, chilled 
  • ½–1 cup milk of your choice (just enough to loosen the mixture) 
  • 1–3 tablespoons honey or maple syrup (optional) 
  • 1 teaspoon vanilla extract (optional) 

Method

  1. Stir all ingredients together until smooth. 
  2. Chill the mixture in the fridge until very cold. 
  3. Pour the chilled mixture into the Ninja Slushie Maker. 
  4. Blend on the slush setting until thick, creamy, and icy. 
  5. Spoon into a bowl and add your fruit and toppings. 

This base has enough body to hold granola, berries, and nut butter without sinking.

Topping Ideas (Add These After Blending)

Fresh Fruit

  • Strawberries 
  • Blueberries 
  • Banana slices 
  • Mango 
  • Kiwi 
  • Peaches 

Crunchy Toppers

  • Granola 
  • Toasted coconut 
  • Chopped nuts 
  • Cacao nibs 

Extras

  • Honey drizzle 
  • Peanut butter 
  • Chia seeds 
  • Freeze-dried fruit crumbs 

Easy Flavour Variations

Berries & Cream Smoothie Bowl

Use vanilla yoghurt as your base. Top with raspberries, strawberries, and a sprinkle of granola.

Tropical Coconut Bowl

Add a splash of coconut milk to the base. Top with mango, pineapple, kiwi, and toasted coconut flakes.

Chocolate Yoghurt Bowl

Mix 1 tablespoon cocoa powder or chocolate protein powder into the base. Top with banana slices and a peanut-butter drizzle.

Meal-Prep Tip

Prepare the yoghurt base the night before and store it in small jars.
In the morning, just pour one jar directly into the Ninja Slushie Maker and you’ve got a thick, cold, ready-to-top breakfast in minutes.


Categories

Baked candy chocolate Christmas cookies Craft Inspirations cupcakes Drinks Easter fruit Fun With Food Halloween Holidays kids More Recipes non-sweets Parties & entertaining Recipes Thanksgiving Valentines Day

Goblin Halloween Cookie

“Pumpkin Pie” Cheese and Crackers Appetizers

Lollipops…in 30 Minutes or Less

Death by Chocolate Poke Cake

Natural Food Dyes

RSS More Articles

  • Cross Stitch Ice Cream and Frozen Treats
  • 15 Charity Sewing Projects That Let You Sew Something Useful For A Good Cause
  • Sunflower Ribbon Embroidery Tutorials and Kits to Brighten Your Hoop
  • Decorating Mistakes That Make Your Living Room Feel Cluttered
  • Remembering Jill Smokler, Founder Of Scary Mommy
  • In the Garden Layer Cake – A Bloom-Filled Fabric Collection for Spring Sewing
  • How To Do Kitchener Stitch: A Beginner-Friendly Guide To Grafting Knitting Seamlessly
  • Pattern Review: Georgie Granny Square Bucket Hat Crochet Pattern
  • 12 Handmade Patriotic 4th of July Card Ideas
  • Shark Week Learning for Kids

Pick Your Blog

  • Sewing
  • Knitting
  • Quilting
  • Crochet
  • Home & Garden
  • Recycled Crafts
  • Scrapbooking
  • Card Making
  • Polymer Clay
  • Cross-Stitch
  • Edible Crafts
  • Felting
  • Glass Art
  • Indie Crafts
  • Kids Crafts
  • Jewelry Making
  • Lesson Plans
  • Needlework
  • Bath & Body
  • Party Ideas
  • Candle Making
  • DIY Weddings
  • Not Craft
  • Free Craft Projects

Explore Edible Crafts

breakfast cake candy chocolate Christmas cookie decorating cookies dessert Easter fruit Halloween Holidays kids lollipop sticks lunch packaging party summer Thanksgiving valentines

Copyright © 2026 · CraftGossip | Start Here | Contact Us | Link to Us | Your Editors | Privacy and affiliate policy