• Home
  • Suggest A DIY
  • DIY Newsletter

Edible Crafts

Creative food craft ideas

  • About CraftGossip
  • Our Network
    • Bath & Body Crafts
    • Candle Making Ideas
    • Crochet Ideas
    • Cross Stitch
    • Edible Crafts
    • Felting Patterns
    • Glass Art
    • Home & Garden Ideas
    • Indie Crafts
    • Jewelry Making
    • Kids Crafts
    • Knitting Patterns
    • Lesson Plans
    • Needlework
    • Party Ideas
    • Polymer Clay
    • Quilting Ideas
    • Recycled Crafts
    • Scrapbooking
    • Sewing Patterns
    • Card Making
    • DIY Weddings
    • Not Craft Ideas
  • Giveaways
  • Roundups
  • Store
  • Search

California Olives and Googly-Eyed Crudites

October 19, 2011 by Meaghan Mountford

When the good people at California Ripe Olives asked if they could send me a Halloween kit to make something spooky with olives, I thought, “I like free stuff.” So yes, please. I got a big box covered with spiders, eek! (Even my delivery guy was curious.) Inside, I found cans of California Black Ripe Olives, a spider web tray and bowl with the cutest Halloween spatula, a can opener (side note: thank you, ours is about 20 years old), a gorgeous bamboo cutting board and even a gift card for ingredients.

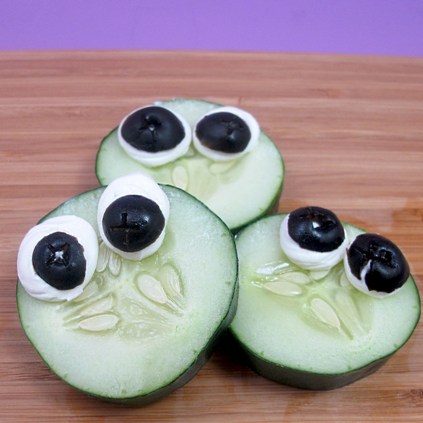
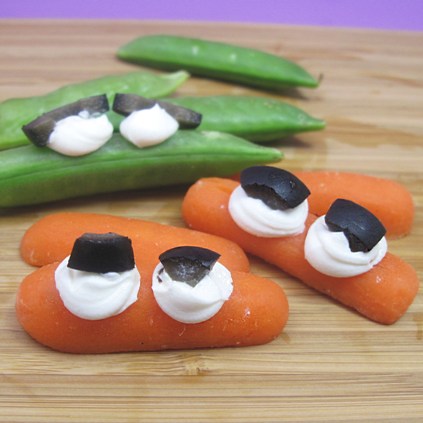
So I got to work. What can I do with olives? I’m usually a sweets girl. Naturally, I overthought and made a way-too long list of possibilities. I was going to make these. Or these. Or this. And I scrapped all the ideas for the sake of simplicity. What do I keep saying is big this year? Eyes. So I made Googly-Eyed Crudites. Very easy, very doable. Be sure to check out the California Ripe Olives site for more recipes, and find their facebook page here.

How to make googly-eyed crudite

You will need:

  • can of pitted black olives
  • cutting board and knife
  • raw veggies (cucumber, bell pepper, carrots, celery, broccoli, snap peas, etc.)
  • paper towels
  • disposable decorating bag (available in the craft store)
  • soft cream cheese
  • scissors

What to do:

Drain and rinse the olives, then cut into slices. Wash and cut your veggies, then pat them dry with paper towels. Scoop some cream cheese in the decorating bag, and close tightly with a rubber band (or just twist and hold with your hand). Snip about 1/2 inch from the tip. Pipe dots of cream cheese on the veggies and add a slice of olive. That’s it.

The broccoli are my favorite.

And a bit more about California Ripe Olives (in their words!):

·         California olive growers produce more than 95 percent of the black ripe olives grown in the US.  These growers operate multi-generational family farms from the inland valleys of California from San Diego County to far north of Sacramento County.

·         From breakfast to dinner. January to December. And from every day to gourmet. Olives are as casual or as elegant as you like, adding color, texture and flavor to any meal.

·         Since California Black Ripe Olives are fruits, they have no cholesterol.  And each large olive has only 7 calories. That’s a lot of flavor per calorie!

·         California Black Ripe Olives may be grown in California, but they’re available in supermarkets, club stores and local markets all over the country.

 

«
»

Comments

  1. Beth @ Hungry Happenings says

    October 21, 2011 at 9:34 am

    What a wonderfully simple way to add something healthy, cute, and a bit creepy to a Halloween buffet. Love it!

Have you read?

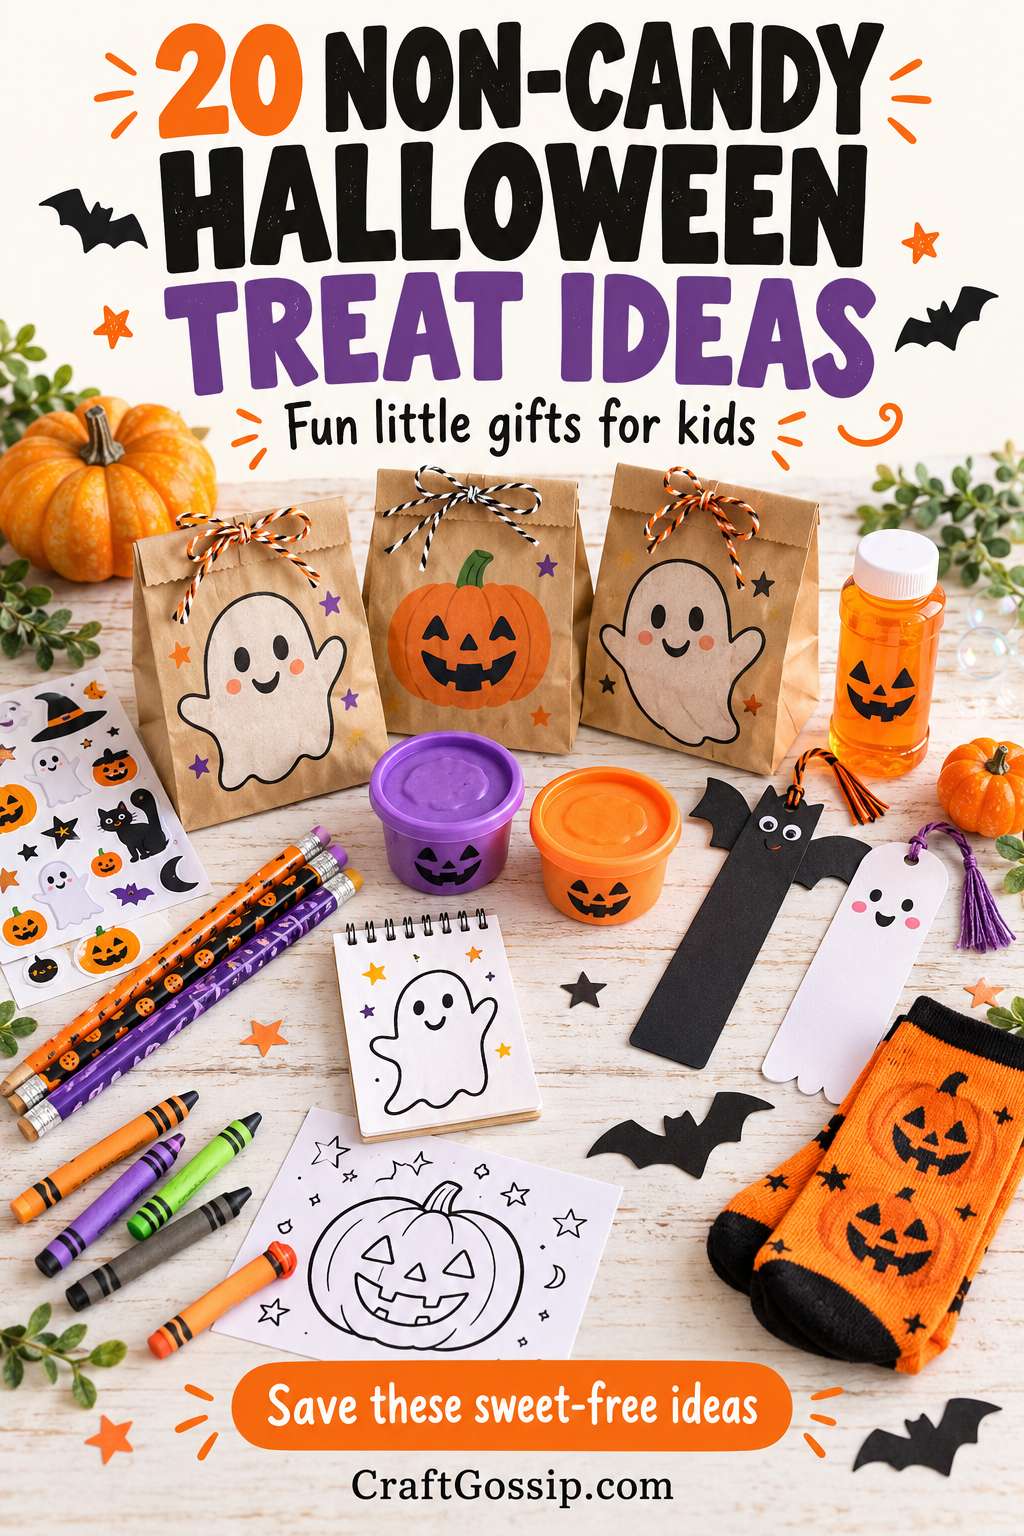
20 Non-Candy Halloween Treat Ideas for Kids, Classrooms and Trick-or-Treaters

20 Non-Candy Halloween Treat Ideas for Kids, Classrooms and Trick-or-Treaters

Halloween treats don’t have to come wrapped in chocolate. Sometimes a sheet of ghost stickers, a little colouring kit or a spooky bookmark makes a lovely surprise, especially when the trick-or-treat bag is already overflowing with sweets.

I love the idea of handing out something children can use, make or play with after Halloween night. It gives you another option for classroom gifts, party favours and those little Halloween surprises for grandchildren. And if you enjoy making the packaging yourself, this is practically an invitation to rummage through the paper stash.

These non-candy Halloween treat ideas include inexpensive ready-made goodies and simple handmade alternatives. There are options for a busy front-door treat bowl, smaller classroom gifts and more personal Halloween boo bags.

You don’t need to put together an elaborate gift for every visitor, either. One thoughtfully chosen item can be plenty.

Choosing Non-Candy Halloween Treats

Start with the children’s ages and where you’ll be handing out the treats. Stickers and colouring sheets are easy to distribute to a mixed group, while small craft kits suit children who can use them with adult supervision.

Check product age labels, keep small parts away from children under three, and follow school rules for classroom gifts. Non-food items also vary in their materials, so keep packaging and ingredient information available rather than describing everything as “allergy-safe.”

For a large number of trick-or-treaters, buy multipacks and work out the cost per individual treat. It’s surprisingly easy to turn a “cheap little favour” into a rather expensive evening once you start adding ribbon, bags and three extra things.

1. Halloween Sticker Sheets

Pumpkins, bats, friendly ghosts and black cats make cheerful little treats. Stickers are easy to store, easy to hand out and don’t need fancy packaging.

Choose individual sheets or cut larger sheets into smaller sections without cutting through the stickers. Pop them into a paper envelope if you want to add a handmade touch.

Packaging idea: Stamp a ghost onto the envelope and write “Stick around for some spooky fun!”

2. Halloween Pencils

A pencil decorated with pumpkins or spiders is a practical classroom favour. Plain orange, purple or green pencils work beautifully too, especially with a handmade paper topper.

Cut a pumpkin or ghost from cardstock, decorate it, then make two small slits so the pencil slides through. Keep the topper removable so the pencil is comfortable to use.

Packaging idea: Add a tag that says “Have a frightfully fun Halloween!”

3. Mini Notepads

Little notebooks give children somewhere to draw monsters, write secret messages or plan their next very important adventure.

Decorate plain notebook covers with stamped images, patterned paper or a simple ghost cutout. Use flat decorations so the notebooks still stack neatly.

Packaging idea: Pair a notepad with a pencil for a small Halloween writing kit.

4. Bubbles

Small bottles of bubbles make a playful alternative to sweets, particularly for outdoor Halloween parties.

Keep the original product information visible when adding decorations, and choose bottles with secure lids.

Packaging idea: Add a small “Boo Bubbles” tag around the bottle neck. No need to redesign the entire bottle.

5. Mini Play-Dough Tubs

A sealed tub of modelling dough can become a little pumpkin, monster or witch’s cauldron with a paper label.

Check the ingredients and school policy before using it for classroom gifts. Some dough contains wheat, so it isn’t suitable for every child.

Packaging idea: Decorate the lid with a pumpkin face and add “Squish up some spooky fun!”

6. Glow Bracelets or Glow Sticks

Glow items suit the Halloween theme without needing much decoration. Choose products labelled for the intended age group and hand them out unactivated so families can use them when ready.

These need adult supervision and should never be chewed or opened.

Packaging idea: Attach one to a cardstock tag reading “You light up Halloween!”

7. Temporary Tattoos

Friendly Halloween designs make compact party favours that fit easily into a treat bowl.

Choose reputable products labelled for use on skin, and keep the application instructions with them. Offer another option for children who prefer stickers or have sensitive skin.

Packaging idea: Slide a small sheet into an envelope stamped with bats or stars.

8. Handmade Halloween Bookmarks

Bookmarks are one of my favourite options because they’re useful and wonderfully easy to make in batches.

Cut rectangles from sturdy cardstock and decorate them with stamped pumpkins, paper ghosts or drawn monster faces. Round the corners and keep embellishments flat so they won’t damage book pages.

For a different handmade approach, our cross-stitch Halloween bookmark inspiration offers ideas for a more personal gift for an older child or keen reader.

Packaging idea: Add “A little treat for your next spooky read.”

9. Small Colouring Packs

Pair a Halloween colouring sheet with a small, age-appropriate crayon pack for a treat that comes with its own activity.

Use artwork you created yourself or printables whose terms allow your intended use. Keep any required creator credit intact.

Our free Halloween-themed printables for kids feature activity ideas worth exploring when you’re putting together a paper-based Halloween pack.

Packaging idea: Fold the sheet neatly and secure the crayons with a paper belly band.

10. Halloween Erasers

Pumpkin and ghost erasers are cute additions to school stationery gifts for older children.

Check the recommended age, especially for tiny novelty erasers or designs with removable pieces. For younger children, a sticker sheet is a simpler choice.

Packaging idea: Pair an eraser with a pencil rather than filling a bag with lots of little pieces.

11. Mini Flashlights

A small torch feels like a proper little Halloween gift and can be useful long after the decorations come down.

Choose a sturdy design with a securely fastened battery compartment, preferably using standard batteries rather than button batteries. Check it works before gifting.

Packaging idea: Add “For little Halloween adventures.”

12. Halloween Bracelets

Ready-made fabric or silicone bracelets can make simple wearable treats for older children.

Check sizing and age guidance, and avoid designs with detachable charms or small beads when gifting to younger children.

Packaging idea: Wrap one around a small card decorated with a pumpkin face.

13. Seed Packets

A seed packet makes an unusual Halloween treat for a child who enjoys gardening. Choose something suitable for your local climate and planting season, and leave the growing instructions visible.

This is best given as an activity to do with an adult. Seeds are for planting, and packets should be kept away from very young children.

Packaging idea: Add a tag saying “Grow a little Halloween magic.”

14. DIY Paper Craft Kits

Create a small kit for making a paper pumpkin, ghost or bat.

Include pre-cut paper shapes and a simple instruction card. Draw eyes directly onto the shapes for younger children rather than including loose googly eyes.

Our creepy Halloween craft collection includes inspiration such as bat corner bookmarks and craft-stick spiderwebs, which could help you choose a project for a supervised party activity.

Packaging idea: Label the envelope “Make Your Own Friendly Monster.”

15. Origami Paper Packs

A few squares of colourful paper and instructions for one simple fold make a compact creative gift.

Pick a project suitable for the children’s ages, then make it yourself before assembling the packs. If the instructions leave you muttering at the kitchen table, they probably need simplifying.

Packaging idea: Use orange and black paper and call it a “Little Halloween Folding Kit.”

16. Halloween Activity Cards

Make a small set of cards with drawing prompts, jokes or simple puzzles.

Try prompts such as:

  • Draw a pumpkin wearing a funny hat.
  • Design a house for a friendly ghost.
  • Invent a monster with three silly talents.
  • Draw a witch’s pet.

For younger children, keep the instructions short and leave plenty of space to draw.

Packaging idea: Tie the cards together with a paper band rather than loose string.

17. Scratch-Art Shapes

Ready-made scratch-art pumpkins, bats or bookmarks provide an activity and a finished decoration in one.

Choose age-appropriate kits and retain the instructions. Any included scratch tool should be used as directed with adult supervision.

Packaging idea: Add “Reveal a little Halloween magic.”

18. Felt Finger Puppets

For a small group of children or grandchildren, handmade finger puppets make charming Halloween gifts.

A ghost is an easy starting point: cut two matching felt shapes, stitch around the sides and top, and leave the bottom open. Embroider the face instead of adding loose buttons or eyes.

Check the finished stitching and sizing before gifting, and supervise young children during play.

Packaging idea: Present the puppet on a card with a tiny story starter: “This little ghost was afraid of…”

19. Halloween Socks

Socks are better suited to boo bags and gifts for grandchildren than a busy trick-or-treat bowl, but they’re a useful non-candy surprise.

Choose the right size and roll them into a little bundle with a paper band. Pumpkins, cats, stripes or autumn colours all suit the theme.

Packaging idea: Add “A cosy little Halloween treat.”

20. A Mini Spooky Storybook

A small book makes a lovely Halloween gift for a child you know well. Choose friendly seasonal stories for younger children and save scarier tales for readers who enjoy them.

Add a handmade bookmark and you have a thoughtful gift with very little packaging.

Packaging idea: Write “For a cosy night of spooky stories” on the gift tag.

Easy Handmade Packaging for Non-Candy Treats

You don’t need specialised Halloween bags to make these gifts feel festive. Plain paper envelopes, small kraft bags and cardstock wraps are all easy to decorate.

Try one of these simple approaches:

  • Ghost bags: Draw a face on a white paper bag.
  • Pumpkin envelopes: Use orange envelopes with black paper features.
  • Stamped kraft bags: Repeat one bat, pumpkin or star stamp.
  • Paper belly bands: Wrap patterned paper around notebooks or colouring packs.
  • Scrap-paper tags: Turn leftover cardstock into small stamped labels.

For classroom gifts, batch each step. Cut all the tags, stamp all the images, then assemble everything. It’s much quicker than finishing each bag individually, particularly when you discover you need another twelve.

Simple Non-Candy Halloween Gift Combinations

For trick-or-treaters, one item is usually enough. For party guests or grandchildren, a small themed combination can feel more personal.

Little artist pack: A colouring sheet, crayons and stickers.

Spooky reader pack: A bookmark and a small storybook.

Mini stationery pack: A pencil, notepad and Halloween sticker sheet.

Creative play pack: A sealed dough tub and an activity card.

Cosy boo bag: Halloween socks, a book and a handmade bookmark.

Choose one main idea and build around it. A bag with two useful things often feels more thoughtful than one packed with tiny fillers.

What Are the Cheapest Non-Candy Halloween Treats?

Stickers, pencils, handmade bookmarks and activity sheets are good places to start when you need a large quantity.

Compare the price per treat, including packaging. A multipack only saves money if you can use the contents, and a plain pencil doesn’t become less festive because it lacks twelve dancing skeletons.

My favourite budget approach is one useful item with a handmade tag. You get the fun of making something without turning every favour into a full afternoon’s project.

Which Ideas Work Best for School?

Start by checking the school’s rules. Simple paper-based gifts such as stickers, bookmarks, notepads and colouring sheets are easy to distribute and keep tidy.

If you’re unsure about dough, wearable items or little toys, stick with a pencil and a paper activity. Teachers have enough to manage without twenty leaking bubble bottles appearing before lunch.

Halloween can still feel generous, playful and full of surprises without another handful of sweets. Whether you make a stack of ghost bookmarks or hand out cheerful sticker sheets, a little creativity goes a long way.

And if it gives you an excuse to use those orange paper scraps you’ve been saving since approximately forever, all the better.

Categories

Baked candy chocolate Christmas cookies Craft Inspirations cupcakes Drinks Easter fruit Fun With Food Halloween Holidays kids More Recipes non-sweets Parties & entertaining Recipes Thanksgiving Valentines Day

4th of July Desserts (and Free Printables)

Grill Candy

Easy Cake Decorating Idea – Candy Bar Stash Chocolate Cake

Frosted Graham Cracker Turkey

Cupcake Macarons

RSS feed: More Articles More Articles

  • Freebie Friday – Vintage Halloween Candy Wrappers (Printable Ephemera)
  • Free Felting Tutorial Friday: Firm Felting with Armature
  • Five Senses Crafts and Activities for Preschool
  • Knit a Sweet Blanket with a Pocket for Treasures
  • Cute Halloween Scrapbook Mini Album
  • Breast Cancer Care Package In A Jar – A Thoughtful Pink Ribbon Gift You Can Make In Minutes
  • Designer Spotlight: And Wabi Sabi
  • Stitch a Play Mat with a Gorgeous Butterfly
  • 20 Non-Candy Halloween Treat Ideas for Kids, Classrooms and Trick-or-Treaters
  • DIY Snowman Door Hanger Using Tulle and Fairy Lights

Pick Your Blog

  • Sewing
  • Knitting
  • Quilting
  • Crochet
  • Home & Garden
  • Recycled Crafts
  • Scrapbooking
  • Card Making
  • Polymer Clay
  • Cross-Stitch
  • Edible Crafts
  • Felting
  • Glass Art
  • Indie Crafts
  • Kids Crafts
  • Jewelry Making
  • Lesson Plans
  • Needlework
  • Bath & Body
  • Party Ideas
  • Candle Making
  • DIY Weddings
  • Not Craft
  • Free Craft Projects

Explore Edible Crafts

breakfast cake candy chocolate Christmas cookie decorating cookies dessert Easter fruit Halloween Holidays kids lollipop sticks lunch packaging party summer Thanksgiving valentines

Copyright © 2026 · CraftGossip | Start Here | Contact Us | Link to Us | Your Editors | Privacy and affiliate policy