Halloween doesn’t have to be all candy and sugar highs—sometimes the grown-ups want something a little more sophisticated to nibble on while the kids are raiding their trick-or-treat stash. I’m certainly not turning down a chocolate or two, but a little cheese, some savoury crackers and a few slices of salami make a welcome change from another handful of sweets. That’s where these adorable Halloween charcuterie cups come in. They’re festive, individual-sized, and a whole lot less fussy than putting together a giant grazing board.
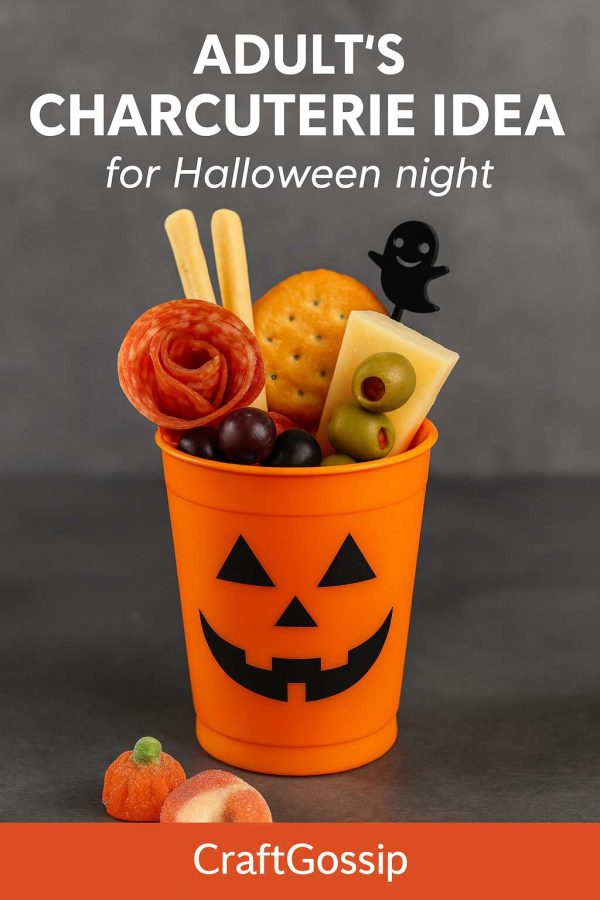
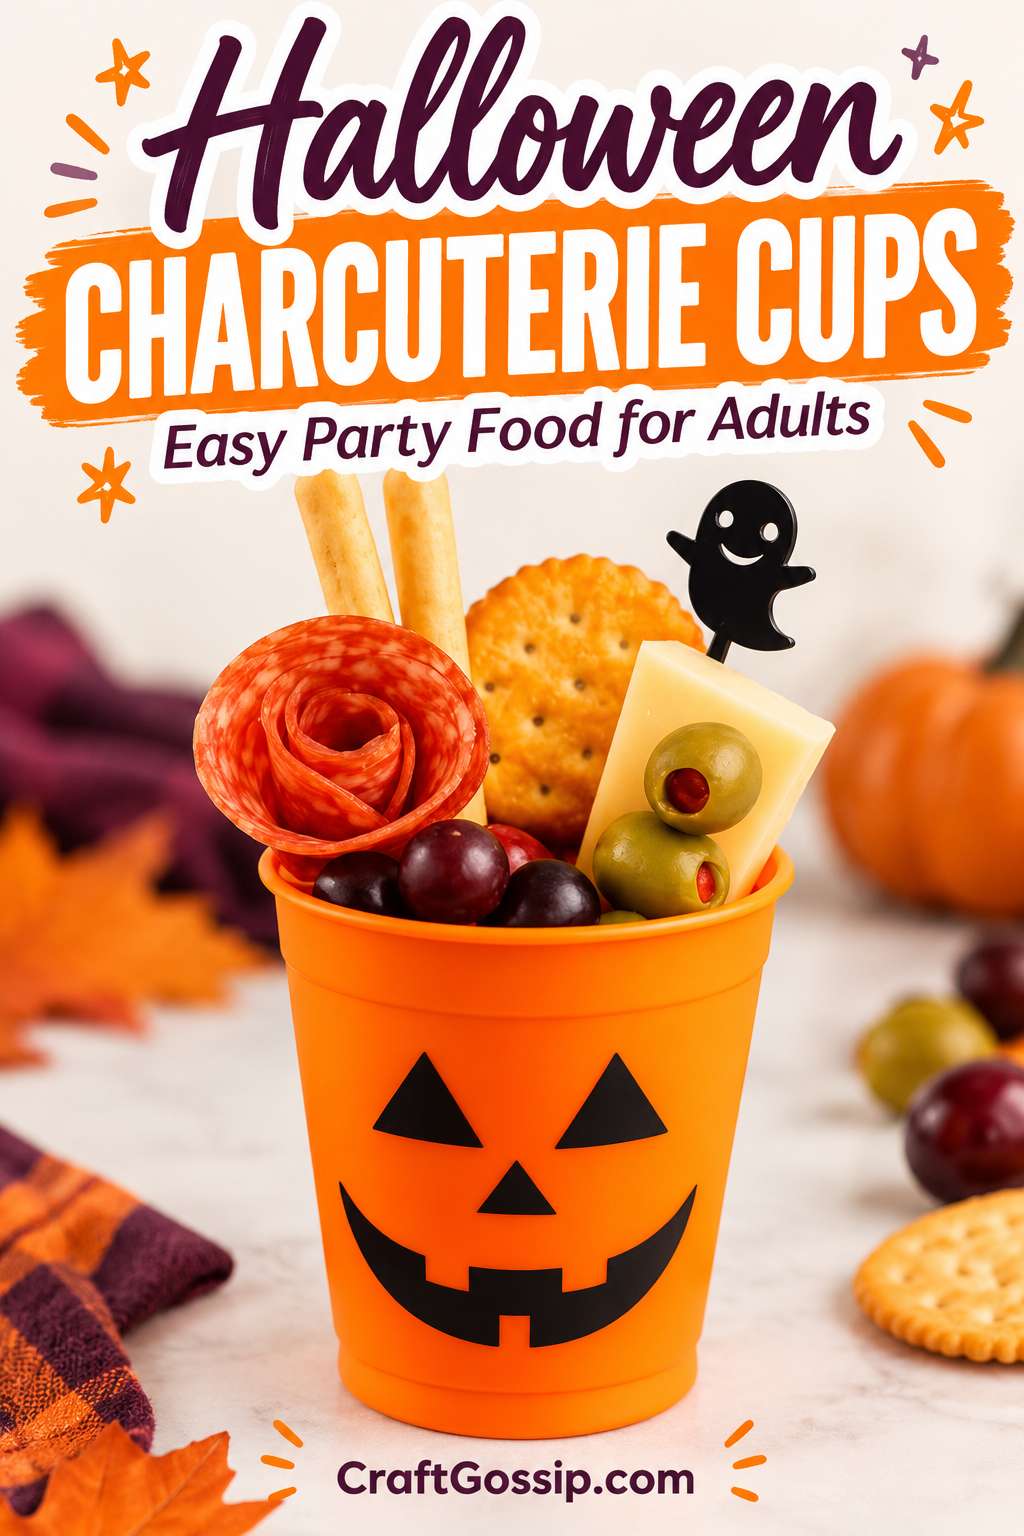
Think of them as miniature grazing platters tucked into cheerful pumpkin cups. You get all those lovely combinations of flavour and texture—creamy cheese, salty olives, crunchy breadsticks and juicy grapes—with a playful Halloween twist. A salami rose and a little ghost pick make each cup look party-ready, without needing complicated food carving or hours of decorating. The bright orange jack-o’-lantern faces do plenty of the work for you.
What I particularly like about this easy Halloween party food idea is how well it suits a casual gathering. Guests can grab a cup and settle in for a spooky movie marathon, wander out to the verandah for a chat, or nibble while waiting for the next knock at the door. There’s no need to make room for an enormous platter, and you can prepare just a few cups for a cosy night in or fill a whole tray for friends.
You can also make these as simple or as generous as you like. Use the cheese you already have in the fridge, choose your favourite crackers, and add whichever cured meats your guests enjoy. Dark grapes and green olives bring a lovely Halloween colour contrast, while a small pumpkin-shaped sweet adds a little treat without turning the whole cup into dessert. If you’re catering for different tastes, it’s easy to put together a few variations.
These are also a handy way to make a small gathering feel special without buying a mountain of themed decorations. Set the filled cups on a black tray or wooden board, add a few little pumpkins nearby, and you’ve got a festive snack station that looks inviting and feels achievable. Keep the chilled ingredients refrigerated until needed, then tuck in the crackers and breadsticks just before serving to preserve their crunch.
If you’d like to recreate the same look, here are the cups I used. Fill them with your favourite savoury bites, pop in a Halloween pick, and you’ve got a little grown-up treat to enjoy alongside all that trick-or-treat excitement.
Why Mini Charcuterie Cups Work So Well
- Portion Control: Everyone gets their own little serving, no more hovering awkwardly over the big platter.
- Less Mess: No double-dipping or chasing runaway grapes across the table.
- Festive Presentation: Serving in bright orange jack-o’-lantern cups makes the whole spread look instantly Halloween-ready.
- Easy Prep: You can prep these in advance and keep them chilled until guests arrive.
What to Include in Your Halloween Charcuterie Cups
The trick is to keep the balance between savory, sweet, and a touch of spooky. Here’s a list of ideas that fit perfectly in an 8oz party cup:
Cheese
- Cheddar cubes or Red Leicester for that Halloween orange pop
- Gouda or Havarti for a creamy bite
- Fun shapes like bat or ghost cutouts using small cookie cutters
Meats
- Rolled salami roses (beautiful and easy to tuck in)
- Prosciutto wrapped around breadsticks for “mummy wraps”
- Slices of pepperoni or chorizo for a bold flavor kick
Crackers & Breads
- Mini breadsticks
- Round buttery crackers tucked in for height
- Charcoal or black sesame crackers for a dramatic look
Fruits & Veggies
- Black grapes or red grapes (like clusters of eyeballs)
- Olives stuffed with pimentos (instant “eyeball” effect)
- Dried apricots or figs for seasonal autumn flavor
Sweets (Optional for Balance)
- A sprinkle of candy corn at the base for color
- Gummy worms peeking out for a cheeky touch
- Pumpkin-shaped jelly candies
Garnishes
- A sprig of rosemary or thyme adds a lovely visual touch
- Halloween-themed picks (ghosts, bats, witches) to skewer cheese and olives
How to Assemble Your Halloween Cups
- Start with a base – pop a few candy corns, nuts, or grapes into the bottom to help anchor items.
- Add height first – place crackers, breadsticks, or cheese skewers at the back.
- Layer in the meats and cheeses – alternate colors and textures for visual appeal.
- Fill the gaps – tuck in grapes, olives, and dried fruits so no empty spots show.
- Finish with fun – top with a Halloween pick or a little gummy spider for spook factor.
Hosting Tip
Set up a tray of these cups on a rustic wooden board or black serving tray. Surround with mini pumpkins, candles, and maybe a little faux cobweb for that extra Halloween magic. Guests can just grab a cup and mingle—no plates needed.
Why Adults Will Love These
While the kids are going door-to-door, the adults get their own “treat” that feels indulgent without being overly sweet. It’s classy, seasonal, and just a little bit cheeky. Pair with a glass of mulled wine, apple cider sangria, or a spooky cocktail and you’ve got yourself a grown-up Halloween night to remember.