• Home
  • Suggest A DIY
  • DIY Newsletter

Edible Crafts

Creative food craft ideas

  • About CraftGossip
  • Our Network
    • Bath & Body Crafts
    • Candle Making Ideas
    • Crochet Ideas
    • Cross Stitch
    • Edible Crafts
    • Felting Patterns
    • Glass Art
    • Home & Garden Ideas
    • Indie Crafts
    • Jewelry Making
    • Kids Crafts
    • Knitting Patterns
    • Lesson Plans
    • Needlework
    • Party Ideas
    • Polymer Clay
    • Quilting Ideas
    • Recycled Crafts
    • Scrapbooking
    • Sewing Patterns
    • Card Making
    • DIY Weddings
    • Not Craft Ideas
  • Giveaways
  • Roundups
  • Store
  • Search

What to do with Leftover Peeps? Make Vodka

April 4, 2013 by Meaghan Mountford

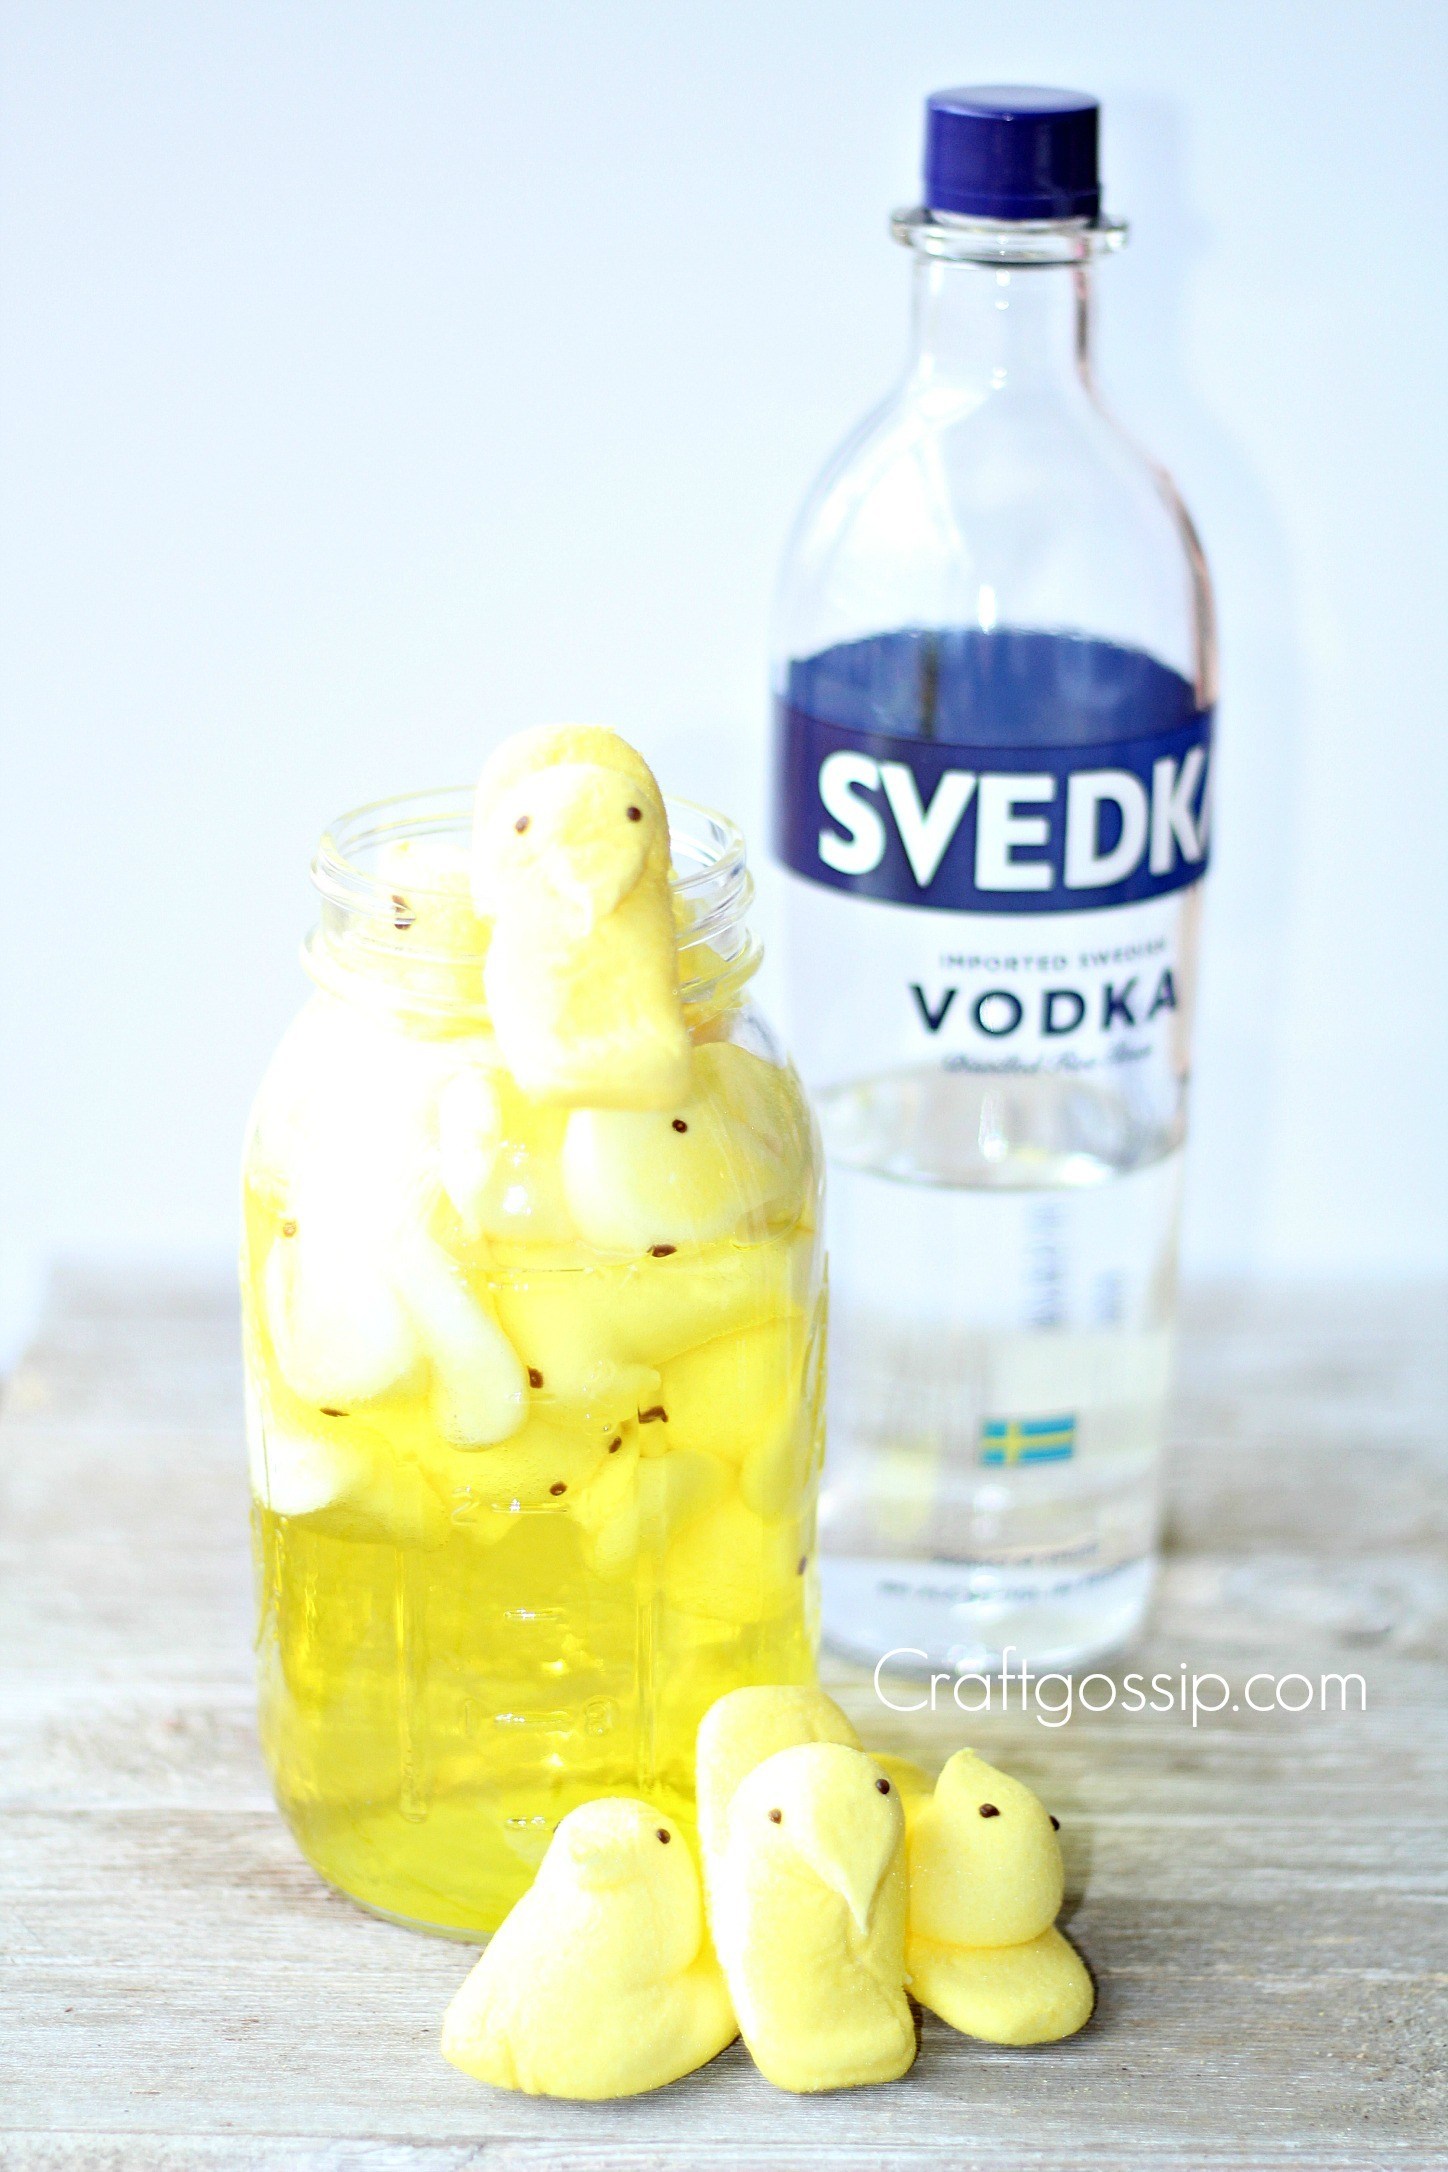
I once asked that very same question here. I wish I had thought of this. Find the how-tos to infuse vodka with Peeps.

This Easter Peep infused Vodka is perfect for Easter Picnics or gifting in small mason jars to friends and family as little Easter Gifts.

Fill your mason jar 1/2 way with the Peeps. Pour the Vodka into the mason jar until it is full. Allow the vodka to infuse 2-3 days or until the Marshmallow as started to dissolve. You may wish to strain your vodka for a clean pure finish or serve it with frothy marshmallow bits inside. Top the glass with a fresh Peep to finish it off.


Whilst peeps are found in most supermarkets and drugstores did you know that there are actual brick and mortar peep stores? Oh, how we could get lost in there. Thinking about flying to visit one? Did you know that in 1956 the original Peep lost its wings? Yep, the little chicken had its wings plucked so it could streamline the design process and did you know that Vodka originated from Poland and not Russia

We have some more vodka infused recipes if you are keen to try out some other combinations. You can see the full post here. DIY Vodka infusions.


Oringally inspired by this postERE at Baking Bites. 
 

«
»

Have you read?

Quick and Easy Dubai Chocolate-Dipped Dates

I’m completely smitten with the idea of Dubai-style desserts — elegant, a touch exotic, and somehow always Instagram-ready. I haven’t made it to Dubai (yet), but these chocolate-dipped dates bring that luxe, golden glow right into my kitchen. They’re the kind of treat that looks like you spent hours making them, but really, you’re done in under twenty minutes.

They’re sweet, sticky, nutty, and just the right amount of fancy. Perfect for gifting, nibbling with coffee, or impressing that friend who thinks “homemade” means complicated.

Ingredients

  • 12 Medjool dates, pitted 
  • ¼ cup pistachios or almonds (to stuff inside) 
  • 100g dark chocolate (or milk chocolate if you prefer it sweet) 
  • 1 tsp coconut oil (optional, for smoother chocolate) 
  • Crushed pistachios, shredded coconut, or edible gold flakes for decoration 

Instructions

  1. Prep the Dates:
    Slice each date along one side to remove the pit, keeping the date mostly intact. Fill the cavity with a whole almond or a few chopped pistachios. Gently close the date back up.
  2. Melt the Chocolate:
    Place chocolate and coconut oil in a microwave-safe bowl. Heat in 30-second bursts, stirring between each, until smooth and glossy.
  3. Dip and Decorate:
    Dip each stuffed date halfway into the melted chocolate, letting the excess drip off. Lay them on a parchment-lined tray. Before the chocolate sets, sprinkle with crushed pistachios, coconut, or a pinch of edible gold flakes for that Dubai sparkle.
  4. Chill and Serve:
    Pop the tray into the fridge for about 10–15 minutes, just until the chocolate firms up. Serve on a pretty platter or package them in small gift boxes.

Optional Flavor Twists

  • Rose Touch: Add a drop of rose water to the melted chocolate for a floral note. 
  • Saffron Luxe: Dust the top with crushed saffron threads before chilling. 
  • Coffee Kick: Dip in mocha-flavored chocolate for a bolder bite. 

Why You’ll Love These

They’re everything Dubai desserts stand for — rich, refined, and effortlessly elegant. A little old-world tradition wrapped in modern chocolate bliss. Keep a few in the fridge for when you need something sweet but can’t be bothered to turn on the oven.


Categories

Baked candy chocolate Christmas cookies Craft Inspirations cupcakes Drinks Easter fruit Fun With Food Halloween Holidays kids More Recipes non-sweets Parties & entertaining Recipes Thanksgiving Valentines Day

Banana Bread Granola

Valentine’s Day Candy Buttons

Strawberry Chocolate Cake

40+ Healthy Super Bowl Recipes

Pretzel Eiffel Tower

RSS More Articles

  • Honey Baby Bear Applique Machine Embroidery Design – Etsy Review
  • 80’s Inspired Boombox Shaped Mini Album
  • How to Crochet the Suzette Stitch: An Easy Textured Crochet Stitch for Beginners
  • Free Baby Star Crochet Pattern: A Cosy Hooded Cocoon for Newborns
  • Sewing Pattern Saturday Review: Snood with Ears Beanie Hat Sewing Pattern (PDF)
  • Peyote Stitch Ring Patterns: Tiny Seed Bead Projects You Can Finish Fast
  • Book Review- Scrappiness Is Happiness – Inside The Book
  • 13 Modern Western Crochet Patterns for Line Dancers, Cowgirls and Horse Lovers
  • 12 Quick Fingering Weight Yarn Knitting Patterns For Using Up Sock Yarn
  • Free Labradoodle Digital Stamps for Card Making and Paper Crafts

Pick Your Blog

  • Sewing
  • Knitting
  • Quilting
  • Crochet
  • Home & Garden
  • Recycled Crafts
  • Scrapbooking
  • Card Making
  • Polymer Clay
  • Cross-Stitch
  • Edible Crafts
  • Felting
  • Glass Art
  • Indie Crafts
  • Kids Crafts
  • Jewelry Making
  • Lesson Plans
  • Needlework
  • Bath & Body
  • Party Ideas
  • Candle Making
  • DIY Weddings
  • Not Craft
  • Free Craft Projects

Explore Edible Crafts

breakfast cake candy chocolate Christmas cookie decorating cookies dessert Easter fruit Halloween Holidays kids lollipop sticks lunch packaging party summer Thanksgiving valentines

Copyright © 2026 · CraftGossip | Start Here | Contact Us | Link to Us | Your Editors | Privacy and affiliate policy