• Home
  • Suggest A DIY
  • DIY Newsletter

Edible Crafts

Creative food craft ideas

  • About CraftGossip
  • Our Network
    • Bath & Body Crafts
    • Candle Making Ideas
    • Crochet Ideas
    • Cross Stitch
    • Edible Crafts
    • Felting Patterns
    • Glass Art
    • Home & Garden Ideas
    • Indie Crafts
    • Jewelry Making
    • Kids Crafts
    • Knitting Patterns
    • Lesson Plans
    • Needlework
    • Party Ideas
    • Polymer Clay
    • Quilting Ideas
    • Recycled Crafts
    • Scrapbooking
    • Sewing Patterns
    • Card Making
    • DIY Weddings
    • Not Craft Ideas
  • Giveaways
  • Roundups
  • Store
  • Search

Snail Hot Dog, Snake Burrito, Kebabs, and a…Cupcake?

August 30, 2012 by Meaghan Mountford

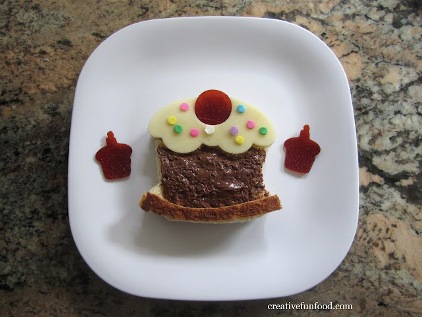
With so many ideas for turning a kid’s lunch or dinner into something way more interesting than a boring hot dog on a bun or a sandwich, I should really pick up my game in the kitchen for my kid. Make a hot dog-turned snail HERE, a snake burrito HERE at Kitchen Fun with My 3 Sons, sandwich kebabs at Super Healthy Kids, and a cupcake sandwich HERE at Creative Food.

stick sandwiches

«
»

Have you read?

Ghost S’mores Favour Bags: Easy Halloween Treat Gifts

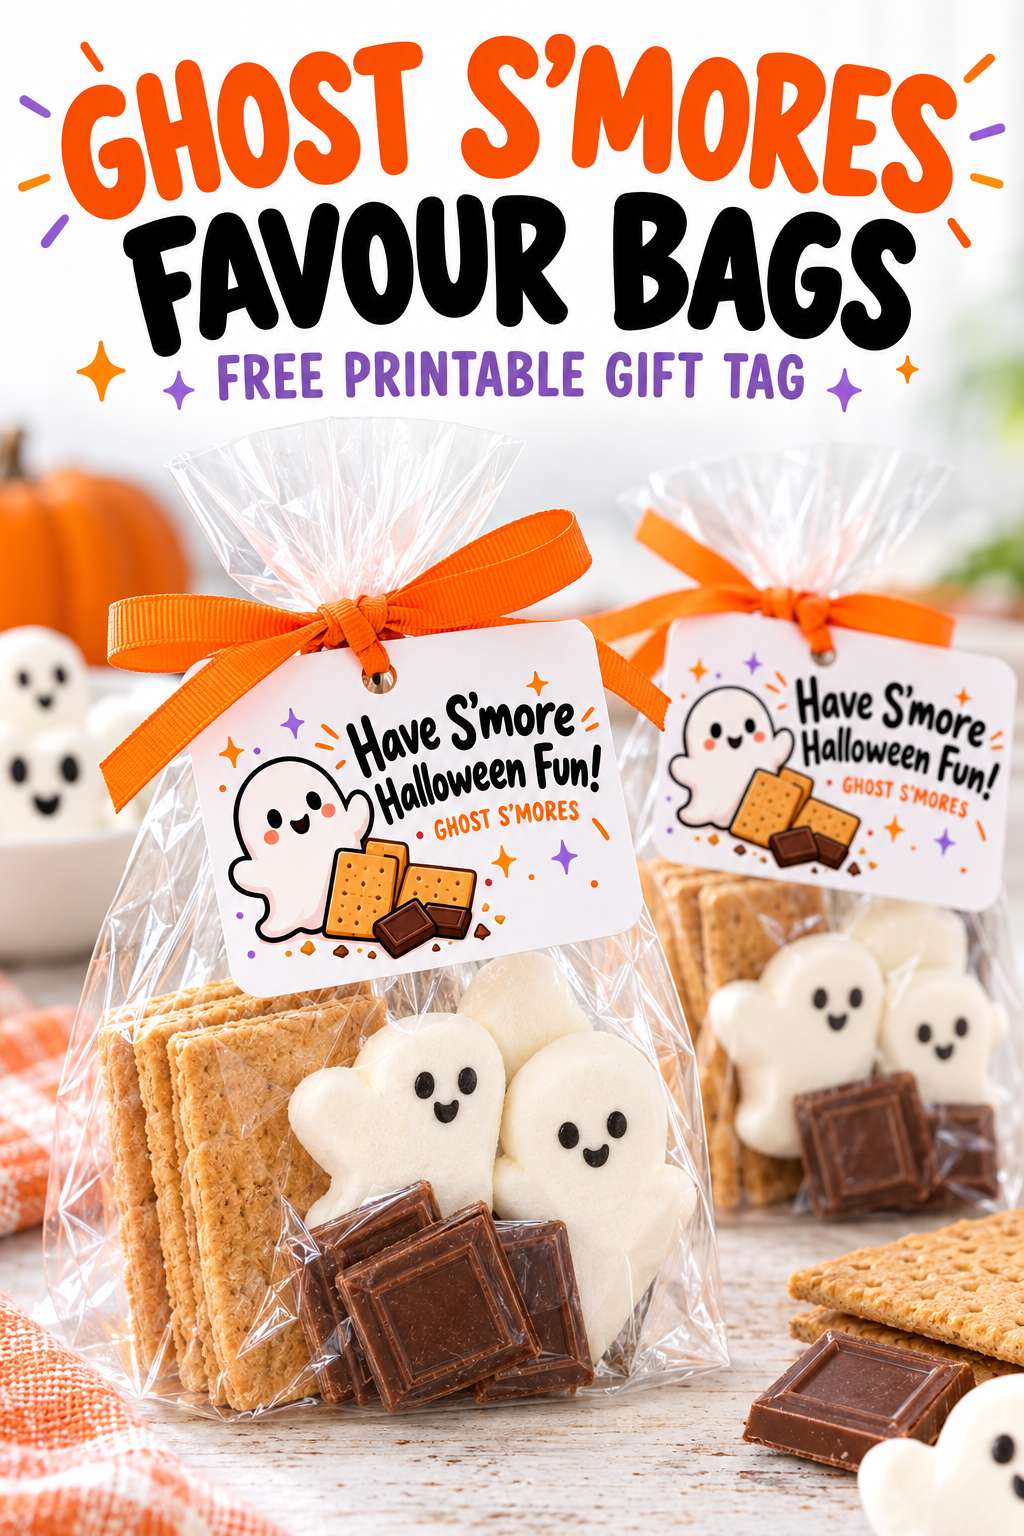
There’s something about a marshmallow with a tiny ghost face that makes me ridiculously happy. Two eyes, one surprised mouth, and suddenly an ordinary packet of marshmallows becomes a whole gathering of little Halloween characters.

These ghost s’mores favour bags combine decorated marshmallows, chocolate and graham crackers in a clear gift bag, finished with ribbon and a cheerful tag. They’re little make-at-home dessert kits, ready for the recipient to unpack and turn into warm, gooey s’mores.

I love this idea for Halloween parties, grandchildren, sleepovers or a small October surprise for a neighbour. You don’t need to bake anything while assembling the gifts, and the decorating is simple enough to do with the children.

The supplied inspiration image is credited to christinebritton.com. This version uses ordinary white marshmallows decorated with edible markers, with the ingredients packaged separately inside the outer bag to help keep everything fresh and tidy.

Best of all, your ghosts don’t need matching expressions. One can look startled, another can look mildly concerned, and the third can look as though somebody has already eaten its chocolate.

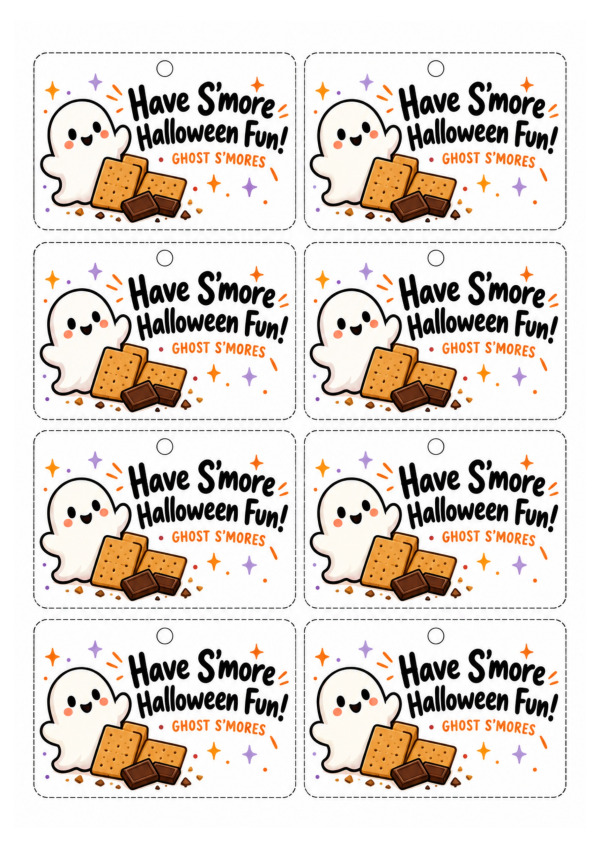
Free Printable Gift Tag – ghost-smores-favour-labels-a4

What You’ll Need

For each favour bag, making approximately three small s’mores:

  • Six graham cracker squares, or six similarly sized plain sweet biscuits
  • Three pieces of milk chocolate, sized to fit the crackers
  • Three regular white marshmallows or Ghost Peeps
  • One black edible food-colouring marker suitable for marshmallows
  • Small food-safe bags or wrappers for separating the ingredients
  • One clear outer food-safe favour bag
  • A bag tie or suitable food-bag closure
  • Halloween ribbon
  • Cardstock for a gift tag or our free Printable file.
  • Pen, scissors and a hole punch

Skill level: Beginner
Assembly time: Approximately 10 minutes per bag, plus time for the edible ink to dry
Yield: One gift bag containing three small s’mores

For Australian readers, plain sweet biscuits are a practical alternative if graham crackers aren’t available. Choose biscuits that are sturdy enough to sandwich around the filling.

Adjust the chocolate and marshmallow sizes to suit your biscuits. Oversized marshmallows can overwhelm a small cracker.

How to Make Ghost S’mores Favour Bags

1. Prepare a Clean Work Area

Wash your hands and arrange the ingredients on a clean, dry surface.

Keep the ribbon, scissors and paper supplies in a separate area while handling the food. Prepare your tags first if you’re working in a small space.

Check that all bags are labelled as suitable for food contact. Decorative craft bags aren’t necessarily intended to hold unwrapped ingredients.

2. Draw the Marshmallow Ghost Faces

Choose the smoothest side of each marshmallow.

Using your black edible marker, draw two small oval eyes and a slightly larger oval mouth beneath them.

Use a light touch. Pressing too hard can drag the surface or leave more colour than you intended.

Test one marshmallow first, since edible markers vary in how well they work on the powdery surface. Use a product specifically recommended for marshmallows, and avoid ordinary pens or craft markers.

Set the decorated marshmallows aside until the ink is dry and no longer transfers when handled gently.

If your marshmallows are squat rather than tall, keep the face small. There’s no need to trim them into shapes.

3. Package the Crackers

Count six cracker squares or biscuits for each kit.

Stack them neatly and place them inside a small food-safe bag. Close it securely without crushing the crackers.

Keeping them separate from the marshmallows helps protect their crisp texture. It also makes the kit easier to unpack.

Choose an outer favour bag wide enough to fit the cracker stack comfortably. Squeezing it into a narrow bag is a reliable way to create a gift of biscuit crumbs.

4. Package the Chocolate

Place three appropriately sized chocolate pieces in a separate small food-safe bag or wrapper.

Arrange them in a flat layer if you’d like the chocolate to remain visible through the outer packaging.

Individually wrapped chocolate portions are another option. Keep them in their original wrappers and choose pieces that fit the crackers.

5. Package the Ghost Marshmallows

Place the three decorated marshmallows in a small clear food-safe bag.

Arrange their faces towards the front and close the bag above them. Handle them gently to avoid smudging the features.

The marshmallows can still look like a little ghost family through their separate wrapper.

6. Assemble the Favour Bag

Place the packaged crackers at the bottom of the outer bag.

Add the chocolate in front of or above them, then position the marshmallow ghosts at the top with their faces visible.

The exact arrangement will depend on your bag and ingredient sizes. Aim for a tidy kit that can be moved without everything tumbling out of position.

Gather the top and close it with a suitable bag tie. Tie your decorative ribbon over the closure.

7. Add the Gift Tag

Cut a tag from cardstock, punch a hole near the top and thread it onto the ribbon.

Try this message on the front:

“A little BOO
and s’more for you!”

Other simple options include:

  • “Have a spookily sweet Halloween!”
  • “You make Halloween s’more fun.”
  • “Three little ghosts and a gooey treat.”
  • “A sweet little haunting, just for you.”

Write the warming instructions on the back or attach a second small card.

If you enjoy paper crafting, our stamped Halloween treat bag toppers offer another way to dress up Halloween food gifts with patterned paper and stamped greetings.

Warming Instructions to Include With the Gift

You can copy this wording onto your instruction card:

Make Your Ghost S’mores

  1. Remove all bags, wrappers, ties, ribbon and tags.
  2. Place one cracker on a microwave-safe plate.
  3. Add one piece of chocolate and one marshmallow.
  4. Microwave briefly in 5-second bursts, checking after each burst, until the marshmallow begins to puff and soften.
  5. Carefully add a second cracker and press gently.
  6. Allow to cool before eating. The filling can be hot.

Adult supervision required. Never heat the gift bag or packaging.

Microwave power and ingredient sizes vary, so don’t promise one exact cooking time. The marshmallow only needs to soften, and it can expand quickly.

The ghosts will lose their neat faces as they melt. That’s part of turning them into s’mores.

Tips for Making a Batch

Prepare all the tags first. It saves switching between handling food and working with craft supplies.

Decorate a few extra marshmallows. Keep the best-looking ones for gifts and use the practice ghosts for your own s’mores.

Keep the filling modest. Three s’mores make a lovely small gift.

Use coordinating ribbon. Black ribbon with orange dots looks particularly cheerful against the white ghosts.

Transport the bags upright. A shallow box or tray helps protect the crackers.

For another Halloween treat idea, our skeleton bones favour bags feature chocolate-covered pretzels and themed packaging.

Storage and Food-Gifting Notes

Make these close to the day you plan to give them. Store the sealed kits in a cool, dry place away from sunlight and heat.

Use fresh ingredients and follow their original storage instructions and best-before dates. Once foods have been opened and repackaged, don’t assume the kit will keep as long as the unopened packets.

Include ingredient and allergen information with each gift. Depending on the products chosen, crackers may contain wheat, chocolate may contain milk or soy, and marshmallows may contain gelatine.

If making gifts for a school or organised group, check their food and allergy requirements first.

A Little Halloween Treat Worth Making

These ghost s’mores bags are wonderfully simple, but the marshmallow faces give them plenty of personality. A few everyday ingredients become a little activity and a treat all wrapped together.

Make them for a Halloween film night, leave one with a handwritten note for a friend, or let the grandchildren help decorate the ghosts before assembling the bags.

You don’t need elaborate packaging or perfect lettering. A clear bag, a bright bow and three surprised little marshmallows do most of the work.

And do keep enough ingredients for your own s’more. It would be a shame to spend the afternoon making ghosts without finding out how deliciously they melt.

Categories

Baked candy chocolate Christmas cookies Craft Inspirations cupcakes Drinks Easter fruit Fun With Food Halloween Holidays kids More Recipes non-sweets Parties & entertaining Recipes Thanksgiving Valentines Day

Easy and Colorful Cake Decorating Idea

Make Your Own Nut Milk

Frozen Banana Pops

Rainbow Cubes

No Boil Baked Tortellini

RSS feed: More Articles More Articles

  • 10 Ways to Upcycle Old Wool Scarves with Felting
  • BOO Halloween Mini Scrapbook Album
  • Ghost S’mores Favour Bags: Easy Halloween Treat Gifts
  • Clay Studio Series – YouTube Video Review Handmade Ceramic Pour Over – Coffee Meets Clay
  • 10 Halloween Wreaths You Can Make in an Hour
  • From Trash to Illusion: Thomas Deininger’s Recycled Art Challenges Perception and Promotes Sustainability
  • Fun Halloween Worksheets for Kids
  • How to Start Junk Journaling with Items You Already Have
  • Free Printable Witch Hat Bag Toppers for Doritos
  • Granny Square Along by Lori Holt: A Crochet Book for Lovers of Vintage Colour

Pick Your Blog

  • Sewing
  • Knitting
  • Quilting
  • Crochet
  • Home & Garden
  • Recycled Crafts
  • Scrapbooking
  • Card Making
  • Polymer Clay
  • Cross-Stitch
  • Edible Crafts
  • Felting
  • Glass Art
  • Indie Crafts
  • Kids Crafts
  • Jewelry Making
  • Lesson Plans
  • Needlework
  • Bath & Body
  • Party Ideas
  • Candle Making
  • DIY Weddings
  • Not Craft
  • Free Craft Projects

Explore Edible Crafts

breakfast cake candy chocolate Christmas cookie decorating cookies dessert Easter fruit Halloween Holidays kids lollipop sticks lunch packaging party summer Thanksgiving valentines

Copyright © 2026 · CraftGossip | Start Here | Contact Us | Link to Us | Your Editors | Privacy and affiliate policy