There is nothing more heartbreaking than spending an afternoon baking for someone you love, wrapping everything up carefully… and then finding out the parcel arrived as a sad box of crumbs. Ask me how I know.
If you’ve ever wanted to post Christmas cookies, slices, cakes, or homemade treats to family and friends, you absolutely can — you just need to bake and pack with shipping in mind. Some baked goods travel beautifully. Others? Not so much. The trick is knowing which is which, and how to pack them so they arrive looking (and tasting) like you actually care.
This is my tried-and-true guide to shipping baked goods successfully, without tears, apologies, or emergency re-bakes.
Choose Baked Goods That Travel Well
Not all baking is created equal when it comes to the postal system. Anything soft, moist, or sturdy tends to survive the journey far better than delicate, crumbly treats.
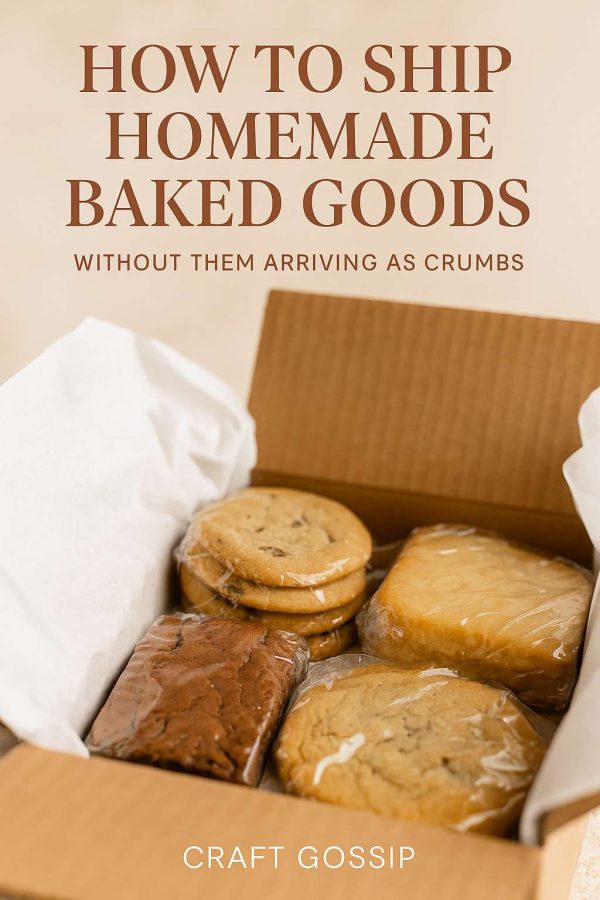
Cookies that ship well include gingerbread, biscotti, shortbread, snickerdoodles, chocolate chip cookies, oatmeal cookies, and slice-style bars like brownies or blondies. Dense loaf cakes, pound cakes, and fruit cakes also do very well.
What I avoid shipping are meringues, cream-filled treats, frosted cupcakes, soft sponge cakes, pastries, and anything with a gooey filling. They might taste amazing fresh, but postal sorting machines do not share our appreciation for delicate baking.
If you’re unsure, ask yourself one simple question: would this survive being gently shaken for several days? If the answer is no, it’s probably not a good candidate.
Bake Everything Completely (Slightly Underbaked Is Not Your Friend)
This is not the time for soft, gooey, just-barely-set centres. Anything you ship needs to be baked all the way through so moisture doesn’t cause spoilage or sogginess during transit.
I also let everything cool completely — and I mean completely. Warm baked goods create condensation inside packaging, which leads to sticky cookies and mouldy surprises. Once cooled, I usually leave items out for a few hours longer just to be safe.
Wrap Each Item Individually
This is the step people skip, and it’s the reason boxes arrive looking like chaos.
Every cookie, slice, or cake portion should be wrapped on its own. Cling wrap works well, as does baking paper followed by foil. The goal is to prevent items rubbing against each other and transferring moisture or crumbs.
For bars and slices, I cut them into portions first, then wrap each piece tightly. For cookies, I stack similar sizes together with baking paper between layers and wrap the entire stack snugly.
Build a Cushion Inside the Box
Think of your parcel like a tiny pillow fort for baked goods.
Start with a sturdy box — double-walled if possible. Line the bottom with crumpled baking paper, tissue paper, or bubble wrap. Place your wrapped items inside, packing them snugly so they don’t shift.
Fill any gaps with more padding. If the contents can move when you shake the box gently, add more cushioning. Movement is the enemy here.
Once packed, I always do the “gentle shake test.” If anything rattles, I open it back up and add more padding.
Separate Different Types of Baked Goods
If you’re sending a variety box, keep different items separate. Soft brownies should not be packed next to crisp biscotti, and strongly flavoured treats (like peppermint or spice-heavy cookies) should be wrapped extra well so flavours don’t mingle.
When in doubt, group like with like and pad between sections.
Skip Frosting, Glazes, and Decorations
I know — frosting is half the fun. But unless you’re hand-delivering, it’s best left off.
Instead, include a small container of icing sugar, glaze mix, or decorations with a note saying “decorate when it arrives.” It feels thoughtful, travels better, and avoids the dreaded melted frosting situation.
Choose the Right Shipping Timing
Timing matters just as much as packing.
I always ship early in the week — Monday or Tuesday if possible — so parcels don’t sit in depots over the weekend. Express shipping is worth it for food items, especially in warmer months.
Avoid posting right before public holidays, and always check estimated delivery times before baking.
Add a Little Note (Because That’s the Best Part)
One of my favourite things about sending baked goods is including a handwritten note. It doesn’t have to be long — just a little “Made with love in my kitchen” message goes a long way.
If you’re worried about freshness, you can also include a note saying when the items were baked and how best to store them once they arrive.
A Final Reality Check
Even with perfect packing, shipping baked goods is never going to be 100 percent predictable. But with the right treats, good wrapping, and smart timing, you can get very close.
And honestly? Even slightly crumbled homemade cookies still beat no cookies at all.