• Home
  • Suggest A DIY
  • DIY Newsletter

Edible Crafts

Creative food craft ideas

  • About CraftGossip
  • Our Network
    • Bath & Body Crafts
    • Candle Making Ideas
    • Crochet Ideas
    • Cross Stitch
    • Edible Crafts
    • Felting Patterns
    • Glass Art
    • Home & Garden Ideas
    • Indie Crafts
    • Jewelry Making
    • Kids Crafts
    • Knitting Patterns
    • Lesson Plans
    • Needlework
    • Party Ideas
    • Polymer Clay
    • Quilting Ideas
    • Recycled Crafts
    • Scrapbooking
    • Sewing Patterns
    • Card Making
    • DIY Weddings
    • Not Craft Ideas
  • Giveaways
  • Roundups
  • Store
  • Search

How to Make Thick Yoghurt Smoothie Bowls in the Ninja Slushie Maker

June 22, 2026 by Shellie Wilson Leave a Comment

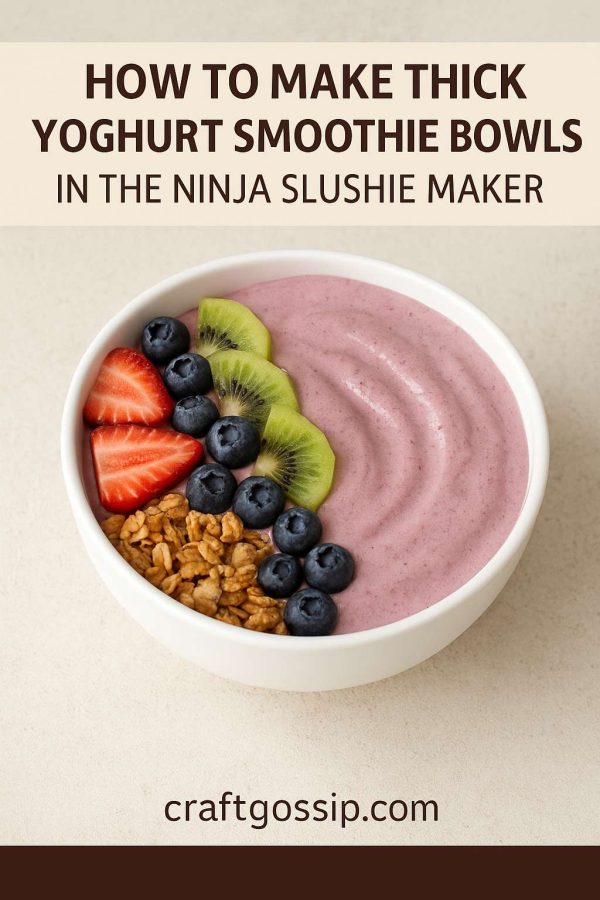
A quick, creamy breakfast with fresh fruit added on top

Smoothie bowls are one of those beautiful breakfasts that feel healthy and a little indulgent at the same time. Thick, cold, creamy, and pretty enough that you almost don’t want to eat them… almost.

The Ninja Slushie Maker takes all the effort out of it.
Instead of dealing with frozen fruit bricks or blenders that complain loudly, you simply mix your yoghurt base, chill it, and let the Ninja turn it into the perfect thick smoothie-bowl texture — no ice required.

If you are like me and come addicted to these smoothie bowls then you will want to invest in these double walled bowls, this is my favorite brand and these have been great. 

Then you top it with your fresh fruit afterwards so the bowl stays thick, cold, and spoon-worthy.

It’s easy, quick, and a lovely way to start the day.

Why Yoghurt Works So Well in the Ninja Slushie Maker

Yoghurt freezes into a silky, firm slush — similar to soft-serve but healthier and lighter. Because the machine creates the icy texture itself (instead of relying on ice cubes), the mixture never becomes watery or gritty.

Just smooth, cold, creamy perfection you can decorate to your heart’s content.

The Basic Yoghurt Slush Base

Once you learn this base recipe, you can create endless flavour combinations.

Ingredients

  • 2 cups plain or Greek yoghurt, chilled 
  • ½–1 cup milk of your choice (just enough to loosen the mixture) 
  • 1–3 tablespoons honey or maple syrup (optional) 
  • 1 teaspoon vanilla extract (optional) 

Method

  1. Stir all ingredients together until smooth. 
  2. Chill the mixture in the fridge until very cold. 
  3. Pour the chilled mixture into the Ninja Slushie Maker. 
  4. Blend on the slush setting until thick, creamy, and icy. 
  5. Spoon into a bowl and add your fruit and toppings. 

This base has enough body to hold granola, berries, and nut butter without sinking.

Topping Ideas (Add These After Blending)

Fresh Fruit

  • Strawberries 
  • Blueberries 
  • Banana slices 
  • Mango 
  • Kiwi 
  • Peaches 

Crunchy Toppers

  • Granola 
  • Toasted coconut 
  • Chopped nuts 
  • Cacao nibs 

Extras

  • Honey drizzle 
  • Peanut butter 
  • Chia seeds 
  • Freeze-dried fruit crumbs 

Easy Flavour Variations

Berries & Cream Smoothie Bowl

Use vanilla yoghurt as your base. Top with raspberries, strawberries, and a sprinkle of granola.

Tropical Coconut Bowl

Add a splash of coconut milk to the base. Top with mango, pineapple, kiwi, and toasted coconut flakes.

Chocolate Yoghurt Bowl

Mix 1 tablespoon cocoa powder or chocolate protein powder into the base. Top with banana slices and a peanut-butter drizzle.

Meal-Prep Tip

Prepare the yoghurt base the night before and store it in small jars.
In the morning, just pour one jar directly into the Ninja Slushie Maker and you’ve got a thick, cold, ready-to-top breakfast in minutes.


Related Posts:

  • Ninja Slushie Eggnog Milkshake - The Christmas Drink…
  • Christmas Morning Ninja Slushie Smoothie Bowls
«

Have you read?

12 Matcha-Flavoured Recipes To Try At Home

There is something so lovely about matcha. It feels a little bit fancy, a little bit calming, and just green enough to make you feel like you are doing something good for yourself, even when you are folding it into cookies or cheesecake.

But here is the thing I learned the slightly lumpy way: matcha is not instant coffee. You cannot just dump it into a mug, stir twice with a spoon, and expect magic. Matcha powder is very fine, and it loves to clump if you do not treat it properly.

That is why a proper bamboo whisk makes such a difference.

Before you start making matcha lattes, matcha desserts, matcha frosting, or even matcha ice cream, it helps to whisk the powder first with a little warm water. This creates a smooth, bright green base that blends much more easily into milk, cream, batter, frosting, or dessert mixtures.

I like this Matcha Whisk Set with Tea Caddy because it includes the pieces that actually make matcha easier for beginners: a bamboo whisk, a bowl with room to whisk properly, a sifter for breaking up clumps, a scoop, a whisk holder, and a tea caddy. The sifter and whisk are the two heroes here. Sift first, whisk second, then add your matcha mixture to whatever recipe you are making.

Let’s be honest, nobody wants little bitter green specks floating in their latte.

Why Matcha Should Be Whisked First

Matcha is powdered green tea, which means you are consuming the tea leaf itself rather than steeping leaves and removing them. That gives matcha its beautiful colour and distinct earthy flavour, but it also means it needs a little help to mix smoothly.

A bamboo matcha whisk, also called a chasen, is designed with lots of fine prongs that move quickly through the powder and water. This helps break up clumps, creates a smoother texture, and gives matcha drinks that lovely frothy top.

For baking and desserts, whisking the matcha first can help the flavour spread more evenly through the recipe. It is especially useful for cheesecakes, puddings, frosting, ice cream, tiramisu, and anything creamy where little pockets of dry powder would be very noticeable.

A quick beginner method:

Sift 1 teaspoon of matcha into a matcha bowl.

Add a small splash of warm water, not boiling.

Whisk briskly in a W or zig-zag motion until smooth and frothy.

Add to milk, cream, batter, frosting, or dessert mixture.

That tiny extra step makes everything taste smoother and look prettier.

Matcha Latte

A classic Matcha Latte is probably the best place to start if you are new to matcha. It is simple, creamy, and easy to adjust depending on how strong you like your tea flavour.

This one is a good everyday recipe because it uses just matcha, hot water, milk, and a little sweetener if you want it. Whisking the matcha first is what gives the drink that smooth, café-style finish instead of a powdery bottom-of-the-cup situation.

Iced Matcha Latte

This Iced Matcha Latte is perfect for warmer days or for anyone who wants their matcha without the cosy winter mug moment.

Cold drinks are where clumps really show up, so this is one recipe where the whisk matters. Whisk the matcha with a little water first, then pour it over ice and milk. It looks beautiful in the glass, especially if you let the green matcha layer sit on top for a moment before stirring.

Iced Strawberry Matcha Latte

If you have seen those pretty layered green and pink drinks online, this Iced Strawberry Matcha Latte is that kind of recipe.

It combines sweet strawberries, milk, and frothy matcha for a drink that feels like a treat without being overly complicated. This is a lovely one for brunch, afternoon tea, or when you want something that looks Pinterest-worthy but still tastes fresh and homemade.

Tea Sommelier’s Matcha Latte

This Tea Sommelier’s Matcha Latte is a great recipe for anyone who wants to learn the details of making matcha properly.

It includes helpful steps like sifting the matcha and using the right water temperature. If you have bought a proper matcha whisk set and want to use it well, this recipe is a nice practical guide to getting that smooth, creamy finish.

Minty Iced Matcha Latte

This Minty Iced Matcha Latte has a fresh little twist with mint, cashews, vanilla, and natural sweetener.

It is creamy, refreshing, and a bit different from the usual matcha-and-milk combination. I can see this being lovely on a hot afternoon when you want something cool but not too heavy. The mint also softens the earthy flavour of the matcha, which is handy for beginners.

Matcha Cookies

These Matcha Cookies are buttery, pretty, and just the right amount of special.

Matcha and white chocolate are such a good pairing because the sweetness of the chocolate balances the green tea flavour. These would be lovely for gifting, cookie swaps, afternoon tea, or a “just because I needed something sweet” baking session.

Matcha Checkerboard Cookies

If you want a baking project that looks impressive without being too fussy, these Matcha Checkerboard Cookies are a beautiful choice.

The green and vanilla pattern makes them look like something from a bakery window. They would be gorgeous for Christmas cookie trays, tea parties, or handmade food gifts. This is the kind of recipe where evenly mixed matcha matters, because the colour is part of the charm.

Matcha Pudding

This Matcha Pudding is smooth, creamy, and elegant without being over the top.

It is a lovely dessert for anyone who likes make-ahead recipes. Because pudding is all about texture, this is another recipe where you really do not want clumps of dry matcha hiding in the mix. Whisking first helps keep the pudding silky.

Matcha Basque Cheesecake

This Matcha Basque Cheesecake is rich, creamy, and dramatic in the best possible way.

The browned top and green centre make it look absolutely stunning when sliced. It is a great recipe for matcha lovers who want something a bit more grown-up than cookies but still very achievable at home.

Matcha Tiramisu

This Matcha Tiramisu gives classic tiramisu a green tea twist.

Instead of coffee being the main flavour, matcha brings a slightly earthy, elegant note to the creamy layers. This would be a beautiful dessert for a dinner party because it looks fancy, but much of the work can be done ahead of time. My favourite kind of dessert, honestly.

Matcha Bliss Bites

These Matcha Bliss Bites are a handy little snack recipe made with simple plant-based ingredients.

They are good for lunchboxes, afternoon snacking, or keeping in the fridge for those moments when you are opening the pantry door and hoping inspiration jumps out. The matcha gives them colour and flavour without needing a complicated baking session.

Matcha Ice Cream

This homemade Matcha Ice Cream is a gorgeous recipe if you love green tea desserts.

It uses matcha with milk, cream, honey, sugar, vanilla, and salt for a creamy frozen treat. Whisking the matcha before adding it to the dairy helps keep the colour smooth and even, which is exactly what you want in a scoopable dessert.

A Few Tips For Better Matcha Recipes

Use a sifter. Matcha clumps very easily, even good-quality matcha. Sifting makes a big difference.

Do not use boiling water. Very hot water can make matcha taste more bitter. Warm water is better.

Whisk before adding milk. Milk alone does not always break up the powder properly.

Use a bamboo whisk for drinks. A spoon will stir, but it will not create the same smooth froth.

Store matcha properly. Keep it sealed, cool, dry, and away from strong smells.

Use culinary grade for baking. Save the more expensive ceremonial matcha for drinks if you want the cleanest flavour.

The Takeaway

Matcha recipes are not difficult, but they do reward you for slowing down for that one tiny whisking step.

Whether you are making a hot latte, iced strawberry matcha, cookies, pudding, cheesecake, or ice cream, starting with a properly whisked matcha base gives you better flavour, smoother texture, and that gorgeous green colour everyone loves.

And if you are new to matcha, a set like this Matcha Whisk Set with Tea Caddy is a simple way to get the basic tools in one place.

Once you have the whisk, the bowl, and the sifter, you are ready for the fun part.The Recipes.

Leave a Reply

Your email address will not be published. Required fields are marked *

Categories

Baked candy chocolate Christmas cookies Craft Inspirations cupcakes Drinks Easter fruit Fun With Food Halloween Holidays kids More Recipes non-sweets Parties & entertaining Recipes Thanksgiving Valentines Day

Shamrock-Shaped Cupcakes

Healthy Apple Pie Scones

Peppermint Candy Stocking Ornaments

Homemade Ice Cream Sandwiches

Clever Pie Vents

RSS More Articles

  • Book Review: The Book Book of Beginner Amigurumi
  • Bird Embroidery Blank Laser Cut Pattern
  • 4 FREE Vintage Masculine Summer Pattern Papers
  • My Fabric Buying Rules (That I Break All the Time)
  • Free Trauma Teddy Knitting Pattern – A Simple Comfort Bear To Knit And Donate
  • Etsy Feature – Pottery Border Rollers Set (6 or 12 Designs)
  • 25+ Easy Crochet Flower Patterns For Beginners
  • How to Bind a Junk Journal (5 Easy Methods for Beginners)
  • Sewing Pattern Saturday Review: DIY Reusable Period Pad Sewing Pattern
  • Using Pizza and Pretend Play to Learn about Fractions

Pick Your Blog

  • Sewing
  • Knitting
  • Quilting
  • Crochet
  • Home & Garden
  • Recycled Crafts
  • Scrapbooking
  • Card Making
  • Polymer Clay
  • Cross-Stitch
  • Edible Crafts
  • Felting
  • Glass Art
  • Indie Crafts
  • Kids Crafts
  • Jewelry Making
  • Lesson Plans
  • Needlework
  • Bath & Body
  • Party Ideas
  • Candle Making
  • DIY Weddings
  • Not Craft
  • Free Craft Projects

Explore Edible Crafts

breakfast cake candy chocolate Christmas cookie decorating cookies dessert Easter fruit Halloween Holidays kids lollipop sticks lunch packaging party summer Thanksgiving valentines

Copyright © 2026 · CraftGossip | Start Here | Contact Us | Link to Us | Your Editors | Privacy and affiliate policy