• Home
  • Suggest A DIY
  • DIY Newsletter

Edible Crafts

Creative food craft ideas

  • About CraftGossip
  • Our Network
    • Bath & Body Crafts
    • Candle Making Ideas
    • Crochet Ideas
    • Cross Stitch
    • Edible Crafts
    • Felting Patterns
    • Glass Art
    • Home & Garden Ideas
    • Indie Crafts
    • Jewelry Making
    • Kids Crafts
    • Knitting Patterns
    • Lesson Plans
    • Needlework
    • Party Ideas
    • Polymer Clay
    • Quilting Ideas
    • Recycled Crafts
    • Scrapbooking
    • Sewing Patterns
    • Card Making
    • DIY Weddings
    • Not Craft Ideas
  • Giveaways
  • Roundups
  • Store
  • Search

Easy Halloween Donut Cups

August 25, 2020 by arabella

It doesn’t get any cuter or easier than these Halloween donut cups! Perfect for Halloween parties, classroom parties, or gifts. Make all 3 varieties and hand them out to students, classmates or your neighbours. See the full tutorial and Halloween idea here. 

If you’re looking for a Halloween party idea that makes everyone smile before they’ve even taken a bite, these Halloween Donut Cups from Glue Sticks Blog are an absolute winner. I love recipes that double as décor, and this one nails it—sweet little donut “pumpkin tops” sitting on paper cups filled with candy or treats. It’s simple, fun, and festive without needing a full day in the kitchen.

What I appreciate most is how budget-friendly and doable it is. The recipe doesn’t rely on fancy ingredients—just donuts, orange frosting, and a few sprinkles to dress them up. You can even pick up store-bought donuts if you’re short on time (and who isn’t in October?). I made a batch for my teens and their friends, and the presentation alone had them hovering around the table before I could even set them out. The donuts are moist, the frosting adds just the right amount of seasonal flair, and once stacked on top of the cups, they look like little edible centerpieces.

The beauty of this recipe is its flexibility. Fill the cups with candy, caramel popcorn, or even savory snacks if you’re trying to balance out all the sugar. These also travel well, making them perfect for school events, trunk-or-treat gatherings, or an easy hostess gift.

Overall, I’d say this recipe isn’t just about taste—it’s about creating a festive Halloween atmosphere with minimal effort. Quick, creative, and guaranteed to impress both kids and adults. Definitely one to add to your Halloween treat rotation.

Hosting a Halloween Party? Check out these Halloween Party Decorations or maybe you want to download and print your own Halloween designs? Check out these Halloween printables, digital stamps, invitations and files from Design bundles.
«
»

Have you read?

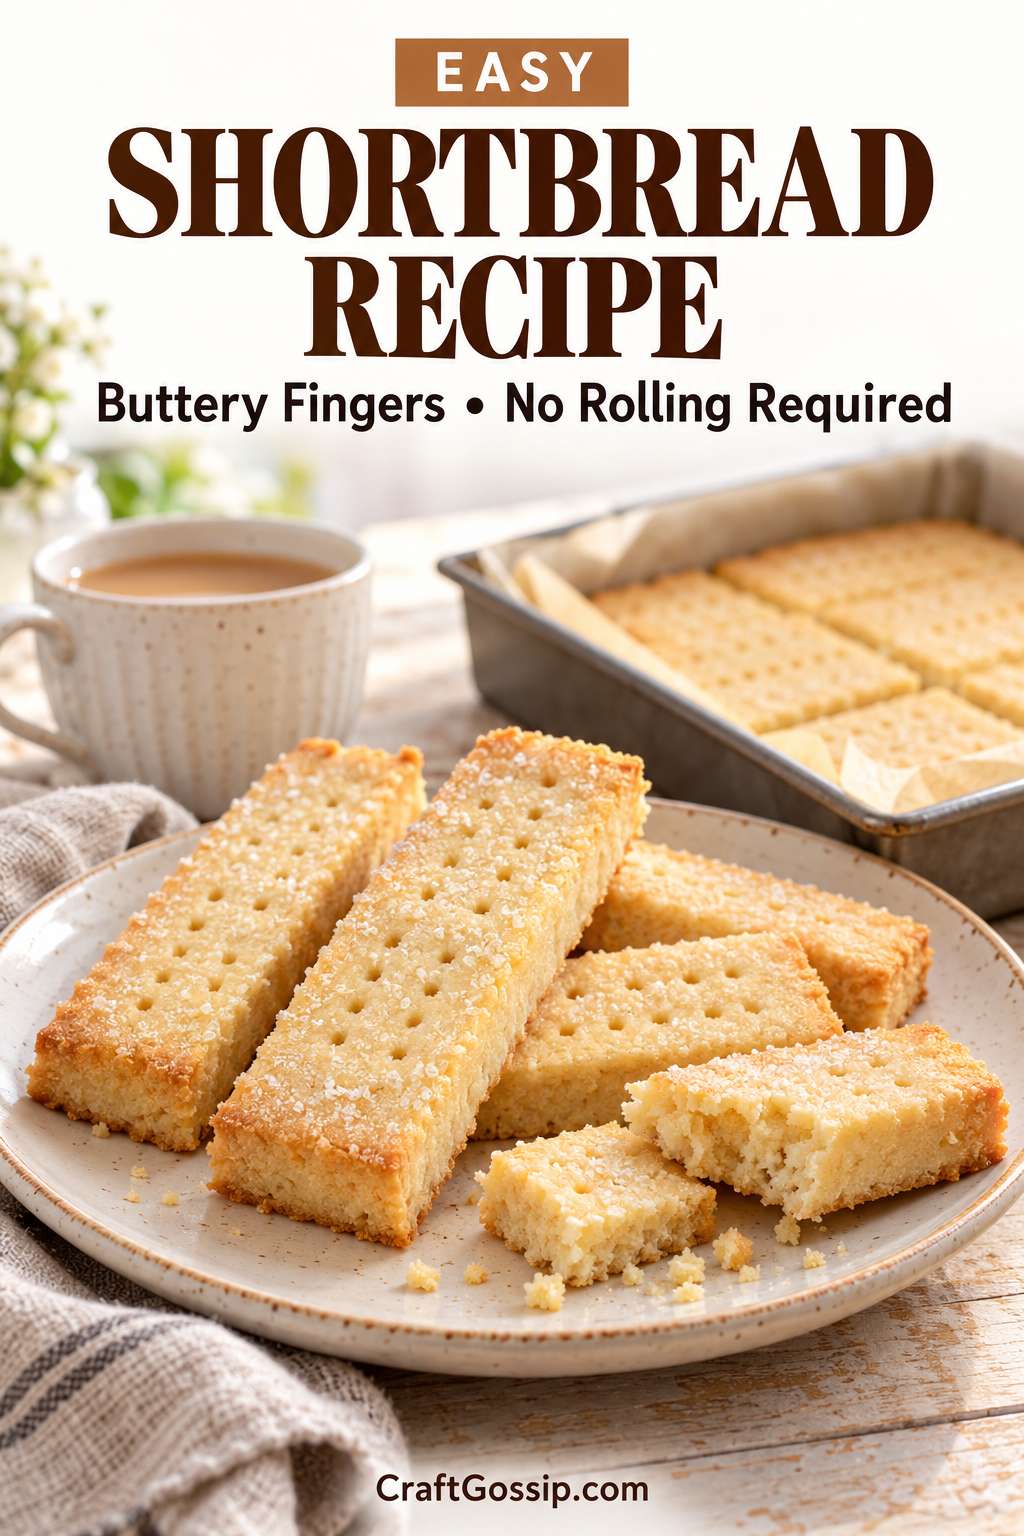
Easy Shortbread Recipe: Buttery Fingers With No Rolling Required

A good shortbread recipe should be wonderfully simple. Butter, sugar, flour and something warm to drink while you wait for the biscuits to cool. Preferably with nobody hovering beside the oven asking whether they’re ready yet.

But simple recipes still have their little traps. Butter that’s too warm, an enthusiastic handful of extra flour or cutting the shortbread at the wrong moment can turn a lovely afternoon bake into a tin of crumbs.

This easy shortbread recipe keeps the shaping straightforward. You press the dough into a tin, bake it as one slab and cut it into fingers while it’s still warm. There’s no rolling pin, no biscuit cutters and no pile of scraps to gather up for another round.

It uses the traditional shortbread ratio of three parts flour, two parts butter and one part sugar by weight. For the most consistent result, use kitchen scales rather than converting the ingredients into cups.

Easy Shortbread Recipe

Makes: 16 shortbread fingers
Preparation: Approximately 15 minutes
Chilling: 20 minutes
Baking: Approximately 35 to 45 minutes
Tin: 20 cm square metal baking tin

Ingredients

  • 200 g unsalted butter, softened but still cool
  • 100 g caster sugar
  • 300 g plain flour
  • ¼ teaspoon fine salt
  • 1 teaspoon vanilla extract, optional
  • 1 to 2 teaspoons extra caster sugar for sprinkling, optional

What You’ll Need

  • Kitchen scales
  • Mixing bowl
  • Electric mixer or sturdy wooden spoon
  • 20 cm square metal baking tin
  • Baking paper
  • Fork
  • Sharp knife
  • Cooling rack

A digital kitchen scale is particularly useful here. Shortbread has so few ingredients that measuring each one accurately makes a noticeable difference.

How to Make Shortbread Fingers

1. Prepare the Tin

Lightly grease the tin and line it with baking paper, leaving an overhang on two opposite sides.

The overhang gives you something to hold when lifting the shortbread out. Keep the paper reasonably smooth so it doesn’t create deep folds in the edges.

2. Mix the Butter and Sugar

Beat the butter and caster sugar until smooth and combined, scraping down the bowl as needed.

You don’t need a very pale, fluffy mixture. Stop once the sugar is evenly incorporated and the butter looks creamy.

Mix in the vanilla, if using.

Butter check: It should take a gentle fingerprint but still hold its shape. If it looks oily or is collapsing into a puddle, cool it before continuing.

3. Add the Flour and Salt

Stir the flour and salt together, then add them to the butter mixture.

Mix on low speed or use a wooden spoon until the mixture forms moist crumbs and small clumps.

Squeeze a little between your fingers. It should hold together. The dough doesn’t need to look like a smooth ball before you put it in the tin.

4. Press Into the Tin

Tip the mixture into the prepared tin and press it into an even layer, including the corners.

Use the back of a spoon or the flat base of a measuring cup to smooth it. A piece of baking paper between the dough and your pressing tool can help prevent sticking.

Aim for an even thickness so the middle and edges bake at a similar rate.

5. Mark the Fingers and Chill

Lightly score the dough into 16 fingers. Divide the square into eight strips, then mark a line across the middle to halve them.

Prick the surface gently with a fork and sprinkle with the extra sugar, if using.

Refrigerate for 20 minutes. Meanwhile, preheat the oven to 160°C conventional or 140°C fan-forced.

6. Bake Until Lightly Golden

Bake on the middle shelf for approximately 35 to 45 minutes, checking from 35 minutes.

Look for a set, dry-looking surface and lightly golden edges. The center should no longer look wet or greasy.

Ovens vary, so use these cues alongside the timer. If the surface is coloring quickly while the center still looks underdone, loosely cover with foil and continue checking.

7. Cut While Warm

Let the shortbread rest in its tin for about 10 minutes.

Carefully lift it onto a board using the baking paper. Support the base so the warm slab doesn’t bend.

Cut along the marked lines with a sharp knife. Allow the fingers to cool completely before moving them into a container.

Warm shortbread is delicate. Give it time to firm up rather than testing every piece while it’s still on the board.

The Small Details That Make Shortbread Easier

Weigh the Flour

Too much flour can make shortbread dry and difficult to bring together.

Weighing avoids the variation that comes from scooping flour into a cup. For this recipe, use the gram measurements as written.

Use Block Butter

Butter provides much of the flavor and texture.

Spreadable butter blends, reduced-fat spreads and margarine can behave differently. For your first batch, use ordinary block butter.

Keep Mixing Brief Once the Flour Goes In

Mix until the dough holds together when pressed. Avoid prolonged kneading or beating.

You’re making a tender biscuit, so there’s no need to treat the dough like bread.

Keep the Tin Size Consistent

A larger tin spreads the dough more thinly and changes the baking time. A smaller tin makes a thicker slab that takes longer to bake through.

Use the specified tin before experimenting with other shapes.

Shortbread Troubleshooting

Why Is My Dough Too Crumbly?

Shortbread dough can look crumbly before it’s pressed together. Try the squeeze test first.

If a handful holds its shape, it’s ready for the tin.

If it falls apart completely, check whether the butter is still too cold and whether the flour was weighed correctly. Let cold dough soften slightly, then mix briefly again. Avoid immediately pouring in milk or water.

Why Is My Shortbread Hard?

Possible causes include excess flour, too much handling or baking longer than needed.

Next time, weigh the ingredients, keep mixing brief and start checking at the earlier end of the baking range.

Why Did It Break When I Cut It?

It may have been too hot and fragile, or completely cold and brittle.

For this slab method, let it rest briefly after baking, then cut while it’s still warm. Use a sharp knife and support the slab on a flat board.

Why Is the Middle Soft?

Check the tin size, oven temperature and thickness of the dough.

Some tenderness while warm is normal, but the surface should be set before the shortbread leaves the oven. A thicker slab may need more time.

Easy Shortbread Variations

Start with the plain version, then try one small change at a time.

Lemon shortbread: Add the finely grated zest of one lemon to the butter and sugar. For a different citrus bake, our lemon-lime shortbread thumbprint cookies feature offers another recipe to explore.

Chocolate-dipped fingers: Dip one end of each completely cooled biscuit into melted chocolate. Place on baking paper and allow the chocolate to set before packing.

Christmas shortbread: Finish cooled fingers with a little melted chocolate and a few festive sprinkles. Keep the decoration modest so the buttery biscuit still shines.

If you want shaped biscuits rather than a slab, these hedgehog shortbread cookies are a lovely separate project. Follow their linked shaping recipe rather than assuming the baking time above will suit them.

How to Serve Homemade Shortbread

A cup of tea is the obvious companion, but shortbread also makes a useful little dessert.

Serve a finger alongside fresh strawberries and a spoonful of yogurt or cream. Our shortbread with strawberries and yogurt feature offers inspiration for that combination.

You can also crumble a broken biscuit over ice cream. Any pieces that don’t survive slicing have simply volunteered for another job.

Packing Shortbread for Gifts

Let the biscuits cool completely before wrapping them.

Use food-safe bags or containers, with baking paper between layers. A ribbon and handwritten tag are plenty of decoration.

Include an ingredient note when gifting, particularly for wheat and milk, plus any nuts or other ingredients used in your decorations.

Keep the finished biscuits in an airtight container in a cool, dry place. For the best gift presentation, bake close to the day you plan to give them.

Can I Use Salted Butter?

Yes. Use the same weight of salted block butter and omit the added salt.

The flavor will vary slightly depending on the brand.

Can I Use Self-Raising Flour?

Use plain flour for this recipe. Self-raising flour contains raising agents and will change the result.

Does This Shortbread Need Eggs?

No. The dough comes together with butter, sugar and flour. There are no eggs in this recipe.

A Simple Bake Worth Keeping

What I like about shortbread is that it doesn’t need much dressing up. A few fork marks, a little sugar on top and a batch of buttery fingers are enough.

Keep the measurements accurate, give the dough gentle handling and watch the baking cues. Once you’re comfortable with the plain version, you can add a little citrus or chocolate without turning it into an entirely different project.

And do put a few pieces aside before packing the gifts. The baker deserves something to go with her tea.

Categories

Baked candy chocolate Christmas cookies Craft Inspirations cupcakes Drinks Easter fruit Fun With Food Halloween Holidays kids More Recipes non-sweets Parties & entertaining Recipes Thanksgiving Valentines Day

Groundhog Day Cupcake Push Pops

Colorful Mardi Gras Cupcakes

Sweet Treats for Doggies

4th of July Shots

Paper Flower Cake Decorations

RSS feed: More Articles More Articles

  • Book Review: Patty Lyons’ Knitting ER
  • 10 Scrapbook Layout Ideas with Mixed Patterns for Fall and Halloween
  • Easy Shortbread Recipe: Buttery Fingers With No Rolling Required
  • Make Rustic Christmas Ribbon from Old Bed Sheets and Tiny Stamps
  • Free Crochet Hot Chocolate Mug Ornament Pattern For Christmas
  • Hanukkah Cross Stitch Projects
  • Christmas on a Budget -Scrap Fabric Christmas Gift Bags You Can Use Every Year
  • 10 DIY Recycled Christmas Jewelry Ideas
  • The Miffy Crochet Book Review: 16 Sweet Projects for Bunny Lovers
  • Christmas on a Budget – How to Style Your Christmas Table Using Things You Already Own

Pick Your Blog

  • Sewing
  • Knitting
  • Quilting
  • Crochet
  • Home & Garden
  • Recycled Crafts
  • Scrapbooking
  • Card Making
  • Polymer Clay
  • Cross-Stitch
  • Edible Crafts
  • Felting
  • Glass Art
  • Indie Crafts
  • Kids Crafts
  • Jewelry Making
  • Lesson Plans
  • Needlework
  • Bath & Body
  • Party Ideas
  • Candle Making
  • DIY Weddings
  • Not Craft
  • Free Craft Projects

Explore Edible Crafts

breakfast cake candy chocolate Christmas cookie decorating cookies dessert Easter fruit Halloween Holidays kids lollipop sticks lunch packaging party summer Thanksgiving valentines

Copyright © 2026 · CraftGossip | Start Here | Contact Us | Link to Us | Your Editors | Privacy and affiliate policy