• Home
  • Suggest A DIY
  • DIY Newsletter

Edible Crafts

Creative food craft ideas

  • About CraftGossip
  • Our Network
    • Bath & Body Crafts
    • Candle Making Ideas
    • Crochet Ideas
    • Cross Stitch
    • Edible Crafts
    • Felting Patterns
    • Glass Art
    • Home & Garden Ideas
    • Indie Crafts
    • Jewelry Making
    • Kids Crafts
    • Knitting Patterns
    • Lesson Plans
    • Needlework
    • Party Ideas
    • Polymer Clay
    • Quilting Ideas
    • Recycled Crafts
    • Scrapbooking
    • Sewing Patterns
    • Card Making
    • DIY Weddings
    • Not Craft Ideas
  • Giveaways
  • Roundups
  • Store
  • Search

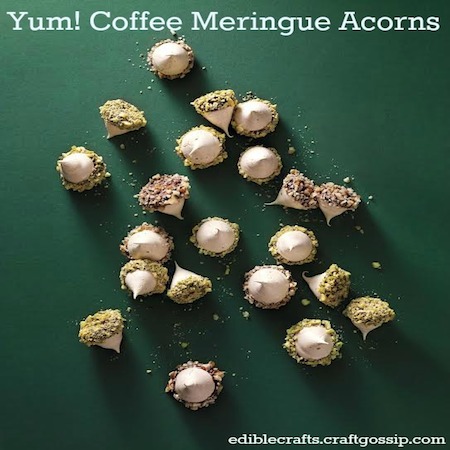
Creating Coffee Meringue Acorns

December 7, 2013 by Carolyn Bickford

meringue-acorns

  • Prep Time 1 hour
  • Total Time 3 hours 35 minutes
Yield Makes about 100 meringues

Ingredients

    • 3 large egg whites
    • 3/4 cup sugar
    • 1/8 teaspoon coarse salt
    • 1/8 teaspoon cream of tartar
    • 1 1/2 teaspoons Trablit coffee extract (available at culinarydistrict.com) or 1 tablespoon pure vanilla extract
    • 6 ounces bittersweet chocolate, chopped
    • 1 3/4 cups pistachios or 1 1/2 cups pecans, toasted and finely chopped

Directions

  1. Preheat oven to 200 degrees. Combine egg whites and sugar in a bowl set over a saucepan of simmering water, and whisk until sugar is dissolved and mixture is warm, about 3 minutes. Whisk in salt and cream of tartar; remove from heat.
  2. Beat mixture with an electric mixer on medium-high speed until stiff, glossy peaks form and meringue is mostly cooled, about 7 minutes. Beat in extract.
  3. Fit a pastry bag with a 3/8-inch round tip (Ateco #804) and fill bag with meringue. Pipe meringue “kisses,” each 1 inch in diameter, releasing pressure and pulling pastry bag straight up to create each, 1 inch apart on parchment-lined baking sheets. Bake until crisp on outside and able to release easily from parchment, about 1 hour, 15 minutes. Transfer to a wire rack and let cool completely.
  4. Melt chocolate in a bowl set over a saucepan of simmering water, stirring until smooth; remove from heat. Working 1 at a time, dip base of each meringue in chocolate, then coat base completely with nuts. Transfer to parchment-lined baking sheets and let stand until set, about 1 hour. Meringues can be made 5 days ahead and stored in a cool, dry place at room temperature.

Link to recipe
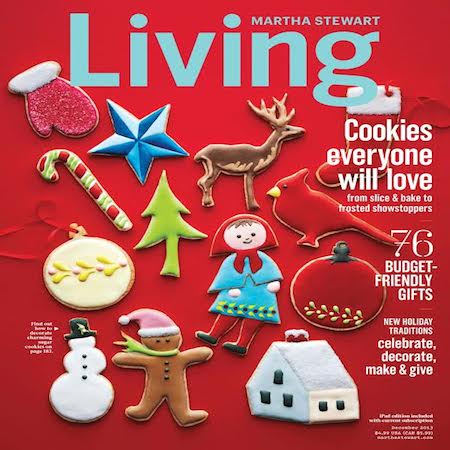
msl-dec-cover
For more recipe ideas check the Martha Stewart Living December issue
Reprinted with permission from Martha Stewart Living December Edition. Photos by Anita Calero. Courtesy of Martha Stewart Living. Copyright © 2013.
«
»

Have you read?

These Bakery-Style Biscoff Cupcakes Disappear in Minutes

Cupcakes never go out of style. They’re the little black dress of the baking world—simple, versatile, and always a hit at parties. But give them a twist of creamy Biscoff frosting, and suddenly you’ve got a dessert that feels modern, trendy, and completely irresistible.

These Biscoff Cupcakes start with a soft, fluffy vanilla sponge that’s perfectly balanced—not too sweet, not too dense. Then comes the star: a swirl of rich Biscoff buttercream frosting, topped with a mini Biscoff biscuit for crunch. They look bakery-worthy but are surprisingly easy to make at home.

Whether you’re baking for birthdays, school events, bake sales, or simply treating yourself with an afternoon cuppa, these cupcakes are guaranteed to disappear fast.

Why You’ll Love This Recipe

  • Bakery-style results at home – fluffy sponge + silky frosting. 
  • Cookie butter goodness – spiced caramel flavor in every bite. 
  • Picture perfect – ideal for Pinterest boards, dessert tables, and Instagram shots. 
  • Crowd pleaser – loved by both adults and kids. 

Ingredients

For the Cupcakes:

  • 200g (1 cup) sugar 
  • 200g (1 ¾ cups) all-purpose flour 
  • 120g (½ cup) unsalted butter, softened 
  • 2 large eggs 
  • 120ml (½ cup) milk 
  • 1 ½ tsp baking powder 
  • 1 tsp vanilla extract 
  • Pinch of salt 

For the Biscoff Buttercream Frosting:

  • 150g (? cup) unsalted butter, softened 
  • 200g (1 ½ cups) powdered sugar 
  • 150g (about ½ cup) Biscoff spread (smooth) 
  • 1–2 tbsp milk (to loosen, if needed) 

For Topping:

  • Mini Biscoff biscuits (one per cupcake) 
  • Crushed biscuits for sprinkling (optional) 

Method

Step 1 – Bake the Cupcakes

  1. Preheat oven to 180°C / 350°F. Line a 12-hole cupcake tray with cases. 
  2. Beat butter and sugar together until light and fluffy. 
  3. Add eggs one at a time, then stir in vanilla. 
  4. Mix flour, baking powder, and salt in a separate bowl. 
  5. Alternate adding dry ingredients and milk into the butter mixture, mixing gently until combined. 
  6. Divide batter evenly into cupcake cases. 
  7. Bake for 18–20 minutes until golden and springy. 
  8. Cool completely before frosting. 

Step 2 – Make the Biscoff Buttercream

  1. Beat softened butter until pale and creamy. 
  2. Add powdered sugar gradually, mixing until smooth. 
  3. Beat in Biscoff spread until fully combined. 
  4. If too thick, add 1–2 tbsp milk for a silky, pipeable consistency. 

Step 3 – Decorate

  1. Pipe swirls of Biscoff buttercream onto cooled cupcakes. 
  2. Top each with a mini Biscoff biscuit. 
  3. Sprinkle crushed biscuits for extra crunch. 

Tips for Perfect Biscoff Cupcakes

  • Use room temperature ingredients for a smooth batter. 
  • Don’t overbake – cupcakes should be soft and springy. 
  • Chill the frosting slightly before piping for firmer swirls. 
  • Make ahead – cupcakes can be baked the day before and frosted when ready to serve. 

Where to Get Biscoff

Stock up on Biscoff on Amazon, or if you love homemade projects, try making your own Cookie Butter Spread.

These Biscoff Cupcakes are soft, fluffy, and topped with the creamiest cookie butter frosting you’ll ever taste. Bakery-style, Pinterest-pretty, and dangerously delicious—they’re guaranteed to be the star of any dessert table.


Categories

Baked candy chocolate Christmas cookies Craft Inspirations cupcakes Drinks Easter fruit Fun With Food Halloween Holidays kids More Recipes non-sweets Parties & entertaining Recipes Thanksgiving Valentines Day

Halloween Cakes

Chicken Stuffed Waffles. But they are on a Stick.

Perfect Weekend Brunch: Macaroni and Cheese Waffles

Space Shuttle Candy

Edible Paint – Rainbow Bread

RSS More Articles

  • Backpack Cross Stitch Patterns
  • Pencil Knitting Patterns
  • 15 Cardboard Crafts For Adults: Clever Ways To Use Boxes, Tubes And Packaging
  • Red Melt The Ice Slouch Beanie Crochet Pattern Review
  • These Bakery-Style Biscoff Cupcakes Disappear in Minutes
  • 15 Lush Dupe Recipes You Can Make At Home
  • Sewing for Seniors: A Roundup of Practical Patterns for Aged Care and Dementia
  • Honey Baby Bear Applique Machine Embroidery Design – Etsy Review
  • 80’s Inspired Boombox Shaped Mini Album
  • Free Baby Star Crochet Pattern: A Cosy Hooded Cocoon for Newborns

Pick Your Blog

  • Sewing
  • Knitting
  • Quilting
  • Crochet
  • Home & Garden
  • Recycled Crafts
  • Scrapbooking
  • Card Making
  • Polymer Clay
  • Cross-Stitch
  • Edible Crafts
  • Felting
  • Glass Art
  • Indie Crafts
  • Kids Crafts
  • Jewelry Making
  • Lesson Plans
  • Needlework
  • Bath & Body
  • Party Ideas
  • Candle Making
  • DIY Weddings
  • Not Craft
  • Free Craft Projects

Explore Edible Crafts

breakfast cake candy chocolate Christmas cookie decorating cookies dessert Easter fruit Halloween Holidays kids lollipop sticks lunch packaging party summer Thanksgiving valentines

Copyright © 2026 · CraftGossip | Start Here | Contact Us | Link to Us | Your Editors | Privacy and affiliate policy