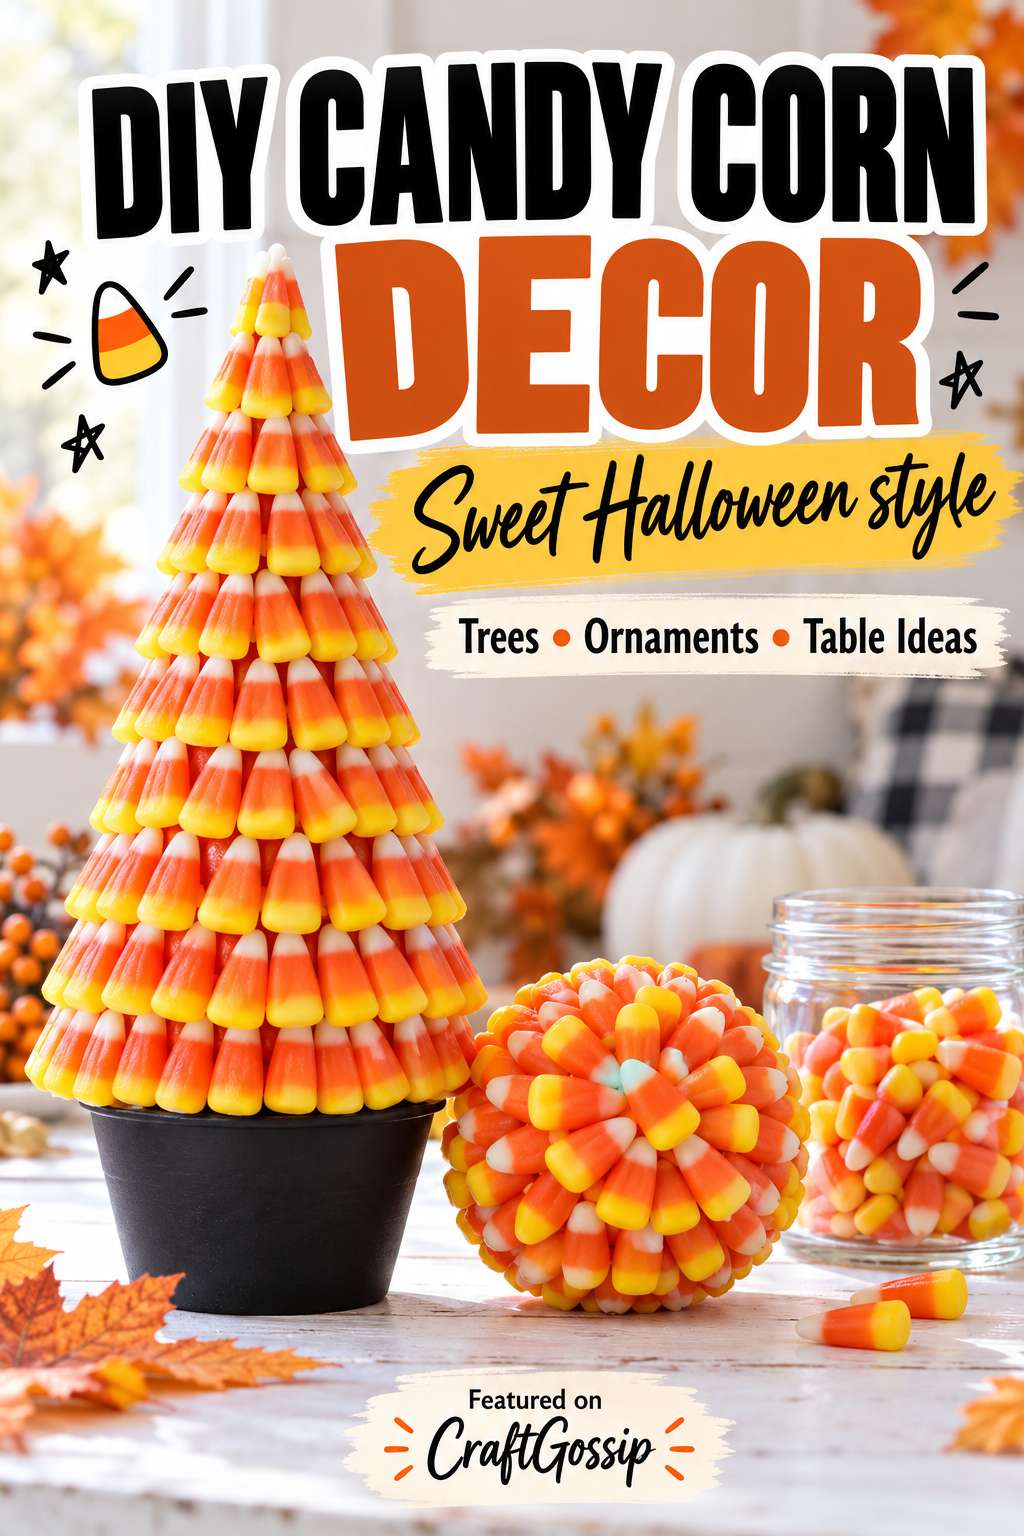
Candy corn has one of those colour combinations that says Halloween before you’ve added a single pumpkin. The yellow, orange and white stripes are cheerful, a little nostalgic and surprisingly effective when repeated across a small decoration.
I love the idea of using an everyday seasonal sweet as a crafting material. A bag of candy corn can become the starting point for a tabletop tree, a textured decorative ball or a simple glass-jar arrangement. You can make one small piece for a shelf or group a few together for a Halloween party display.
This project suits anyone who enjoys repetitive, relaxing crafts. Covering a cone takes patience, but the method is straightforward: arrange, attach and repeat. If that sounds like more crafting than you have time for, the jar-display ideas below give you the same seasonal colours with much less preparation.
The original CraftGossip post highlighted candy corn trees, balls and table decorations. These updated ideas offer a practical way to explore that theme at home.
Important: Candy attached with craft glue is for decoration only. Keep it separate from sweets intended for eating.
Materials for a Candy Corn Tree
- A small craft cone
- Candy corn
- Low-temperature glue gun and glue sticks labelled as suitable for the cone material
- A heat-resistant work mat
- A shallow bowl for the candy
- Optional small planter or sturdy display base
- Optional ribbon
Choose a small cone for your first attempt. Larger forms need considerably more candy and take longer to cover.
How to Make a Candy Corn Tree
1. Test the Adhesive
Attach one piece of candy to an inconspicuous part of the cone. Allow it to cool and check that it holds without damaging the surface.
Candy coatings and craft materials vary, so this small test is worth doing before covering the whole form.
2. Plan Your First Row
Lay a few pieces against the bottom of the cone to check their spacing.
For a striped, scalloped effect, position the broad yellow ends toward the bottom and the white tips upward. Keep the first row level so the tree sits neatly on its base.
3. Attach the Candy
Apply a small amount of adhesive and press each piece gently into position. Let the glue cool before adjusting neighbouring pieces.
Work around the cone a few pieces at a time rather than applying glue to a large area at once.
4. Build the Next Rows
Continue upward, slightly overlapping each row with the one below.
The cone narrows as you work, so you’ll need fewer pieces in each successive row. Adjust the spacing gradually rather than forcing an identical pattern all the way to the top.
5. Finish the Tip
Use smaller intact pieces near the top. Arrange them to cover the remaining surface without creating a heavy cluster.
6. Display the Tree
Leave the finished tree until the adhesive has fully cooled.
Set it directly on a tray or fit it securely into a small planter. Check that the base supports the weight and won’t tip easily.
Make Matching Candy Corn Decorative Balls
Use a small craft sphere and the same adhesive-testing process.
Attach candy in manageable sections, allowing the glue to cool before rotating the form. You can arrange pieces in rows or vary their direction for a more textured finish.
Display the finished balls in a shallow decorative bowl or on a tray. Candy adds weight, so resting them in a display is simpler than trying to hang them from a delicate ribbon.
Simple Candy Corn Jar Displays
For a quick alternative, fill clean glass jars with loose candy corn and arrange them in a small group.
Use different jar heights for interest, then tie ribbon or twine around the necks. A small paper tag can finish the display without adding much work.
If the sweets are intended for eating, use clean food-safe containers and utensils, keep the jars covered when practical and avoid inserting craft materials into the candy.
Create a Candy Corn Table Arrangement
Instead of scattering sweets across the entire table, gather your decorations on a tray.
Try combining:
- One candy corn tree
- A small decorative ball
- A covered jar of sweets
- A miniature pumpkin
- A folded cloth in cream, orange or black
Leave a little space between the pieces so the colours and textures remain easy to see. A tray also makes the arrangement easier to move when you need room for serving food.
Tips for a Better Finish
Sort before gluing. Set aside broken pieces and choose similarly sized candy for the more visible rows.
Start small. A compact cone lets you learn the technique without committing to a large project.
Keep glue discreet. Small amounts are easier to conceal between the pieces.
Display indoors. Heat and moisture can affect both the candy and adhesive.
Keep decorations separate from snacks. Label glued pieces as decorative and place them where children and pets cannot mistake them for treats.
Treat this as seasonal décor. Real candy can attract pests, so don’t assume the finished pieces will be suitable for storing and reusing next year.
A Cheerful Little Halloween Project
You don’t need a whole table full of decorations to make this idea work. One small tree beside a pumpkin or a pair of candy-filled jars can bring those familiar Halloween colours into a room.
Choose the version that fits your time and supplies. The glued projects offer a satisfying afternoon of crafting, while the jar arrangements are easy to put together shortly before guests arrive. Either way, candy corn gives you a bright seasonal starting point with plenty of room to make the display your own.